
A Comprehensive Guide with Detailed Steps and Screenshots
Hello everyone! Today, we're diving deep into implementing many-to-many (M:M) relationships in Oracle Analytics Cloud (OAC). This expanded tutorial will guide you step-by-step through the process of effectively managing M:M relationships using a bridge (junction) table approach, creating data flows, and building visualizations.
Table of Contents
1.
Introduction to M:M Relationships
2.
Preparing Basic Datasets
3.
Creating Basic Datasets in OAC
4.
Generating a Bridge Dataset using Data Flow
5.
Creating a Sequence
6.
Building Visualizations
7.
Conclusion
1. Introduction to M:M Relationships
Many-to-many (M:M) relationships are common in analytical solutions. While relational databases typically support only one-to-many relationships, we can use a bridge (junction) table to model M:M relationships effectively.
In this tutorial, we'll focus on:
1.
Creating datasets without utilizing Common Metadata (RPD)
2.
Populating a bridge table/dataset
3.
Building visualizations using the created datasets
We'll use Oracle Analytics Cloud's (OAC) Data Flow feature to prepare our bridge dataset, demonstrating how analysts can implement M:M relationships without relying on IT department support.
2. Preparing Basic Datasets
We'll use two basic datasets:
1.
Salesperson dataset
•
Each salesperson (SP No/SP Name) can have multiple deals (Deal No).
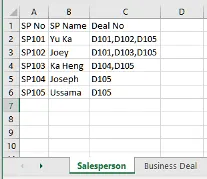
Figure 1: Sample salesperson dataset showing SP No, SP Name, and Deal No
2.
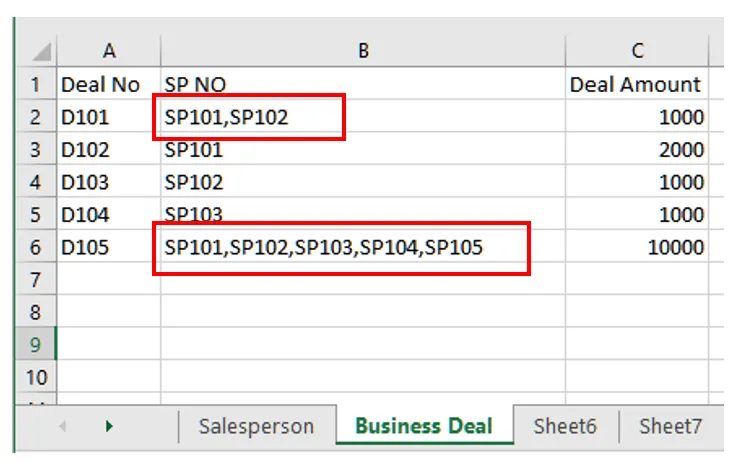
Business deal dataset
•
Each deal (Deal No) can be assigned to multiple salespeople (SP No)
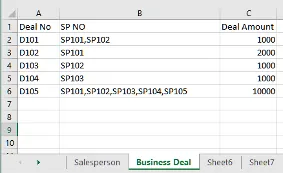
Figure 2: Sample business deal dataset showing Deal No, Deal Amount, and multiple SP No
3. Creating Basic Datasets in OAC
Let's create our basic datasets in OAC:
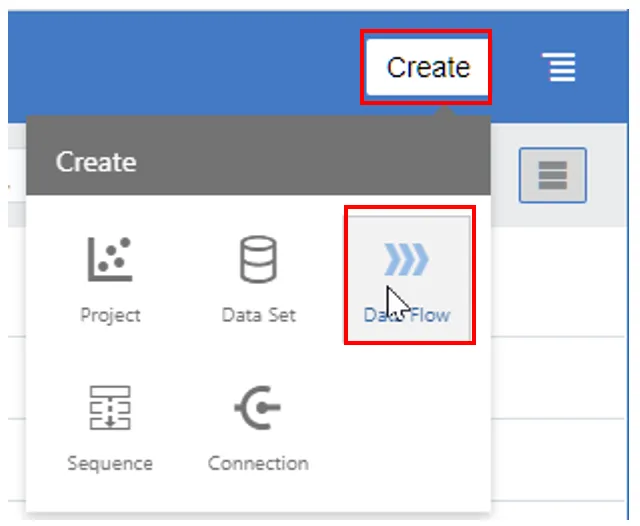
1) Ingest the salesperson dataset:
a. Click "Create" and select "Dataset
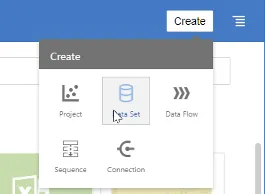
Figure 3: Creating a new dataset in OAC
b. Select your data source (e.g., “M to M TEST.xlsx”) and upload the data
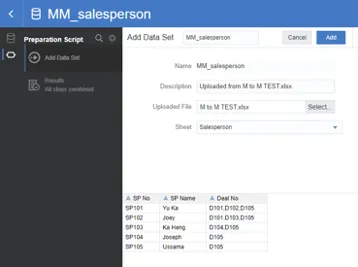
Figure 4: Uploading salesperson data into OAC
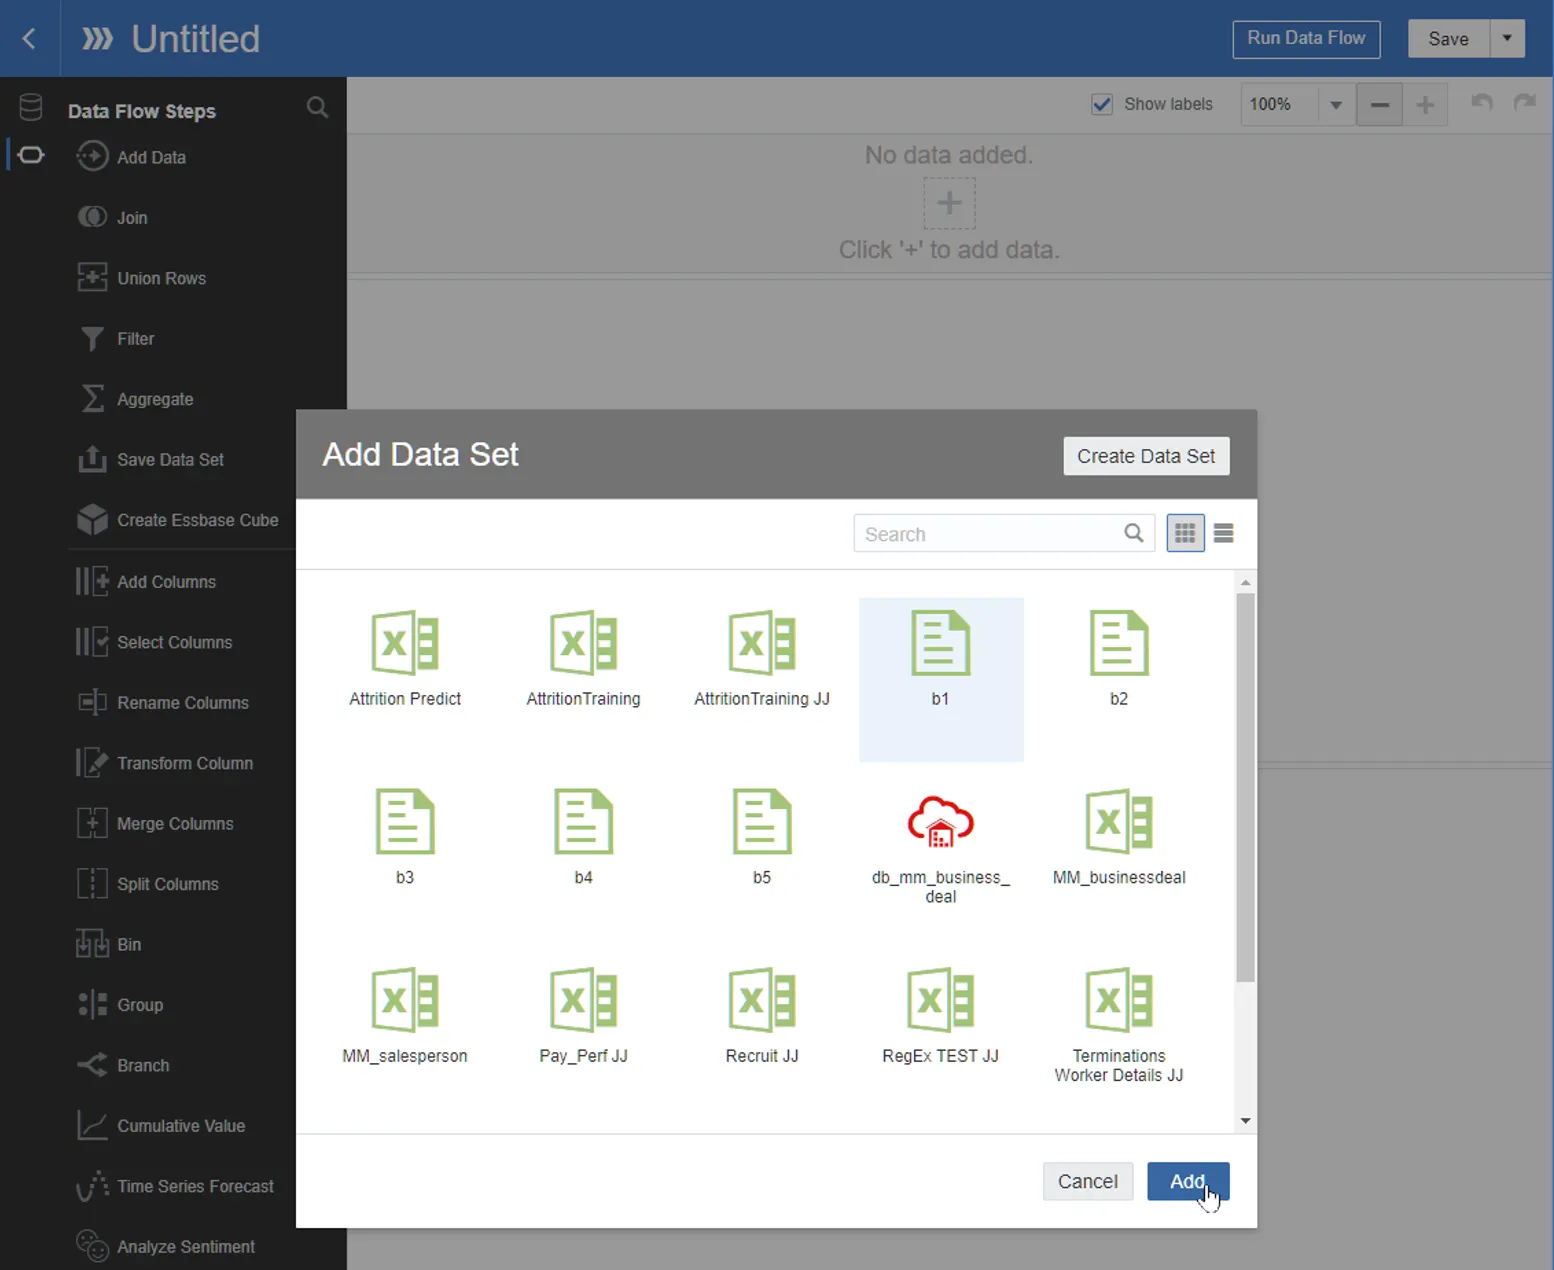
2) Ingest the business deal dataset using the same method.
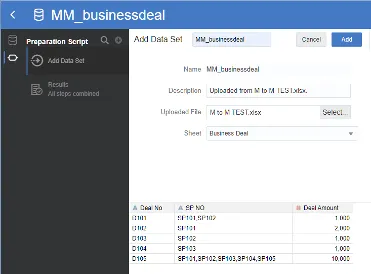
Figure 5: Business deal dataset uploaded in OAC
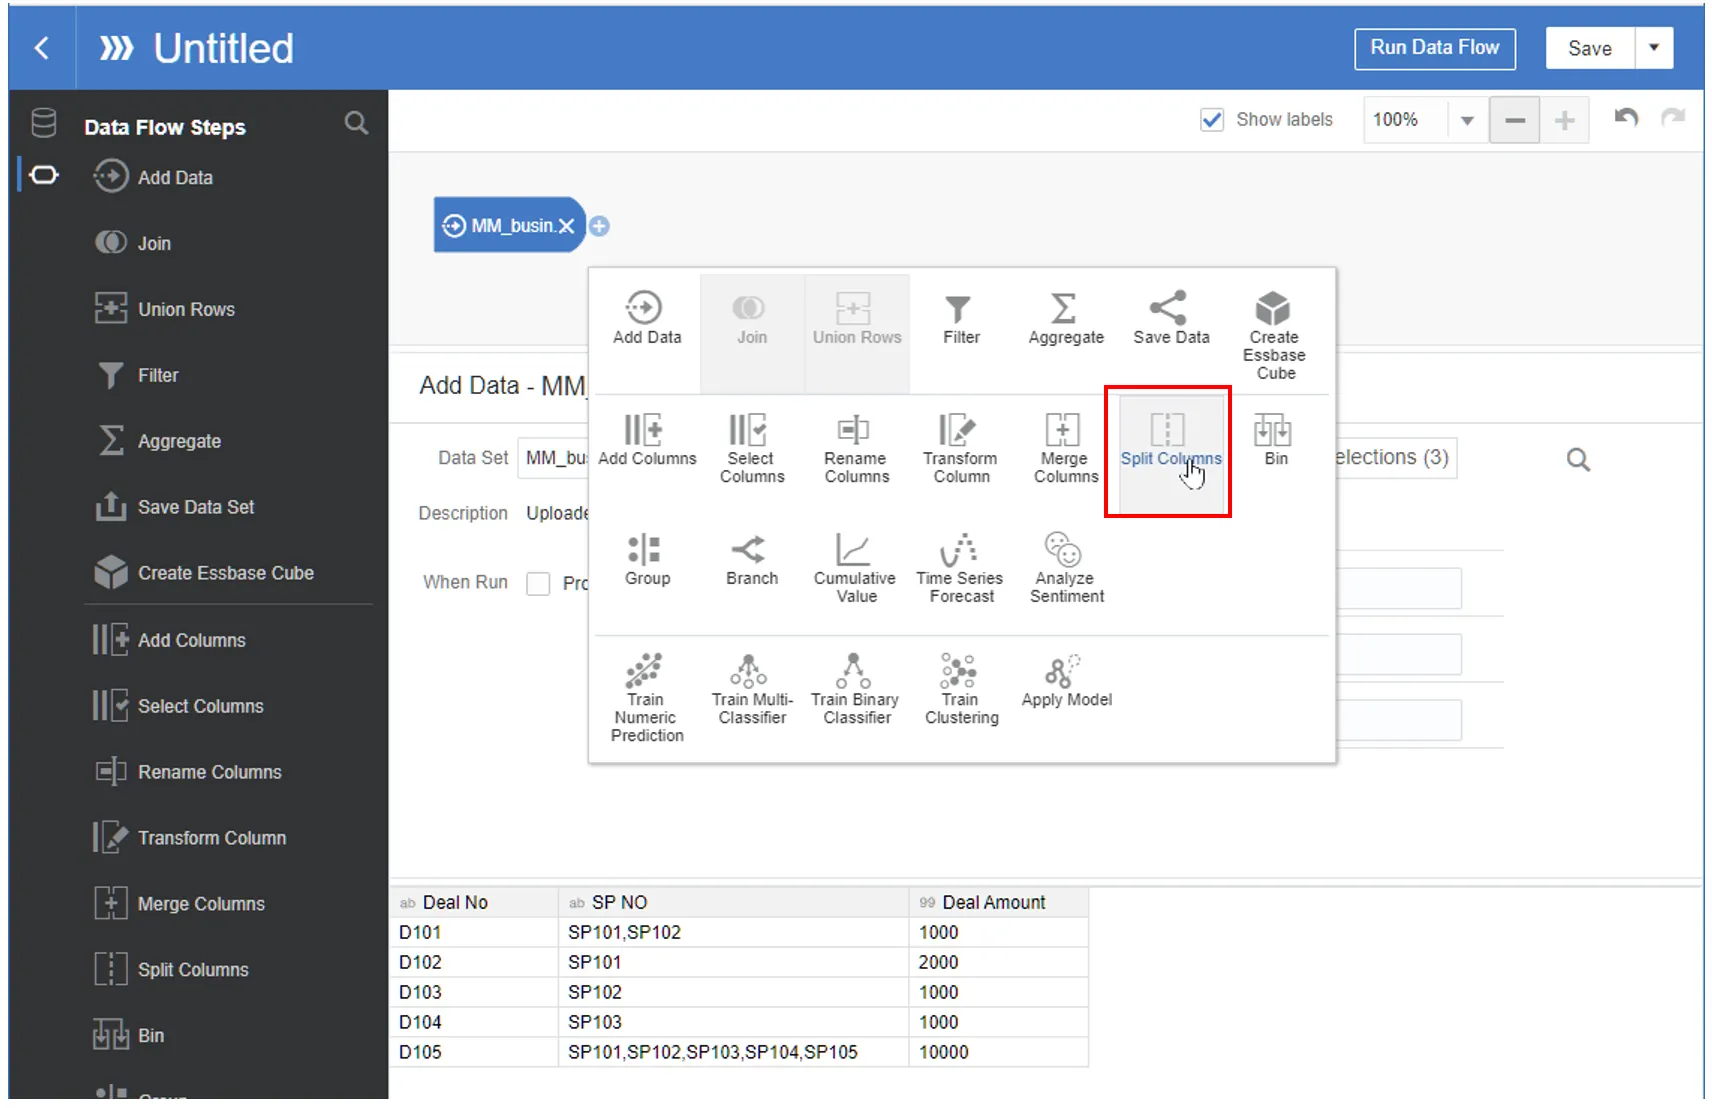
4. Generating a Bridge Dataset using Data Flow
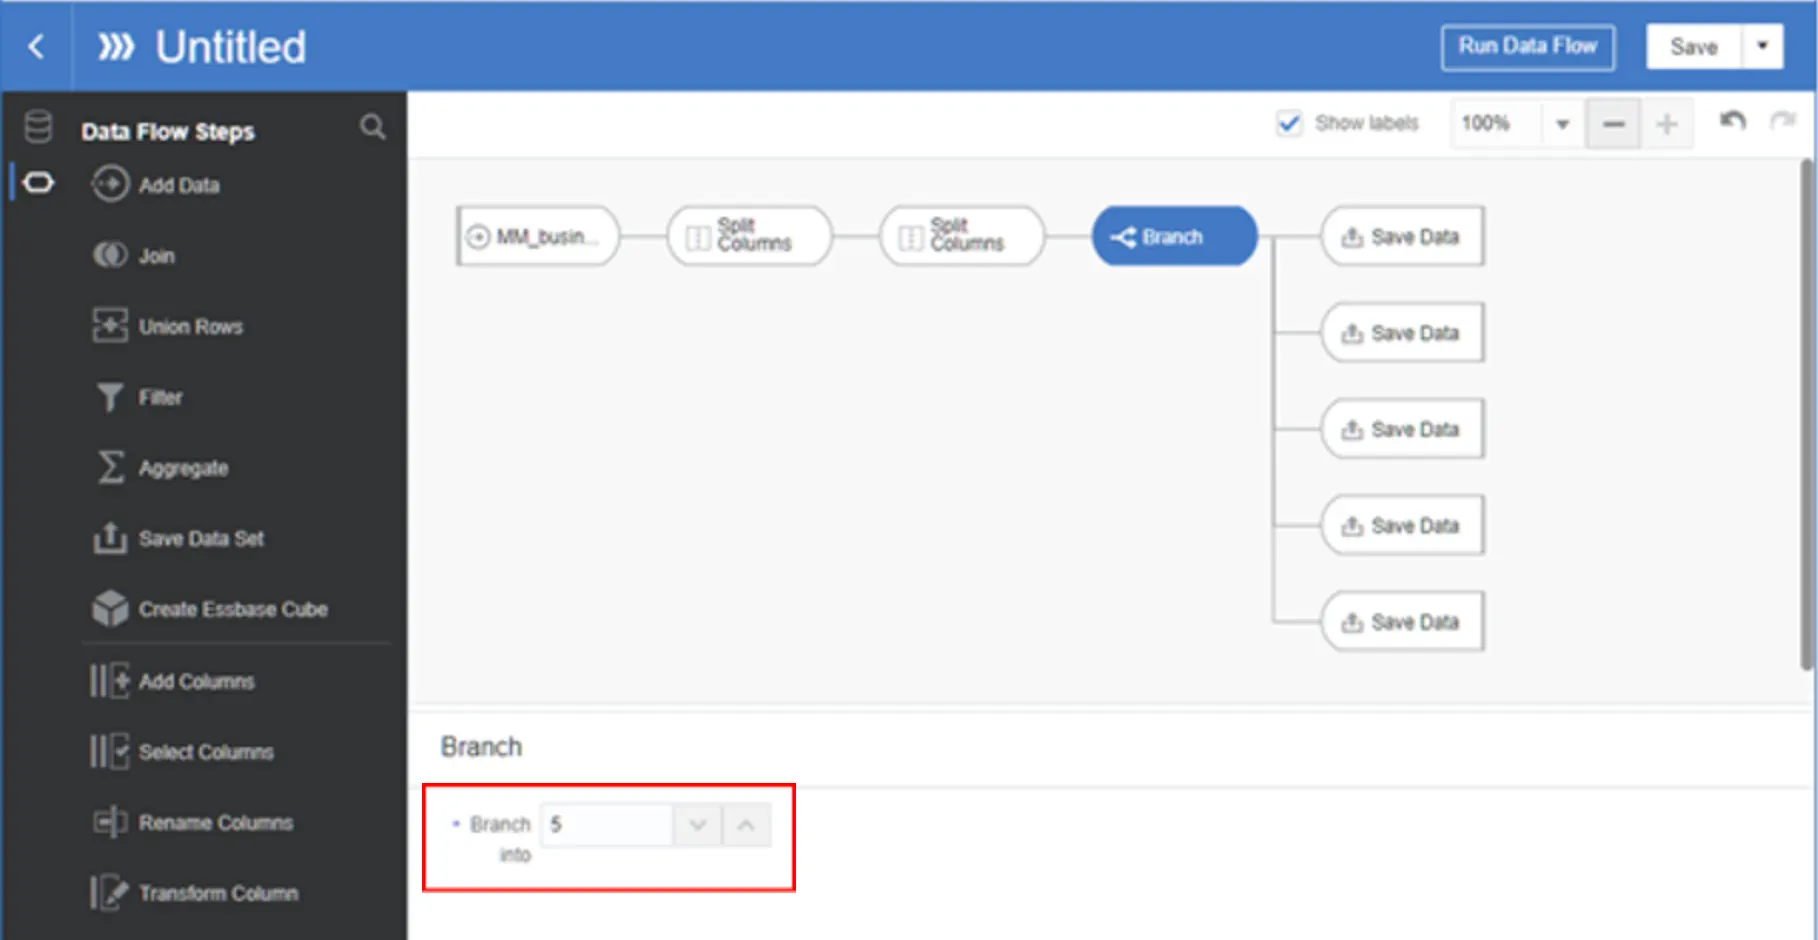
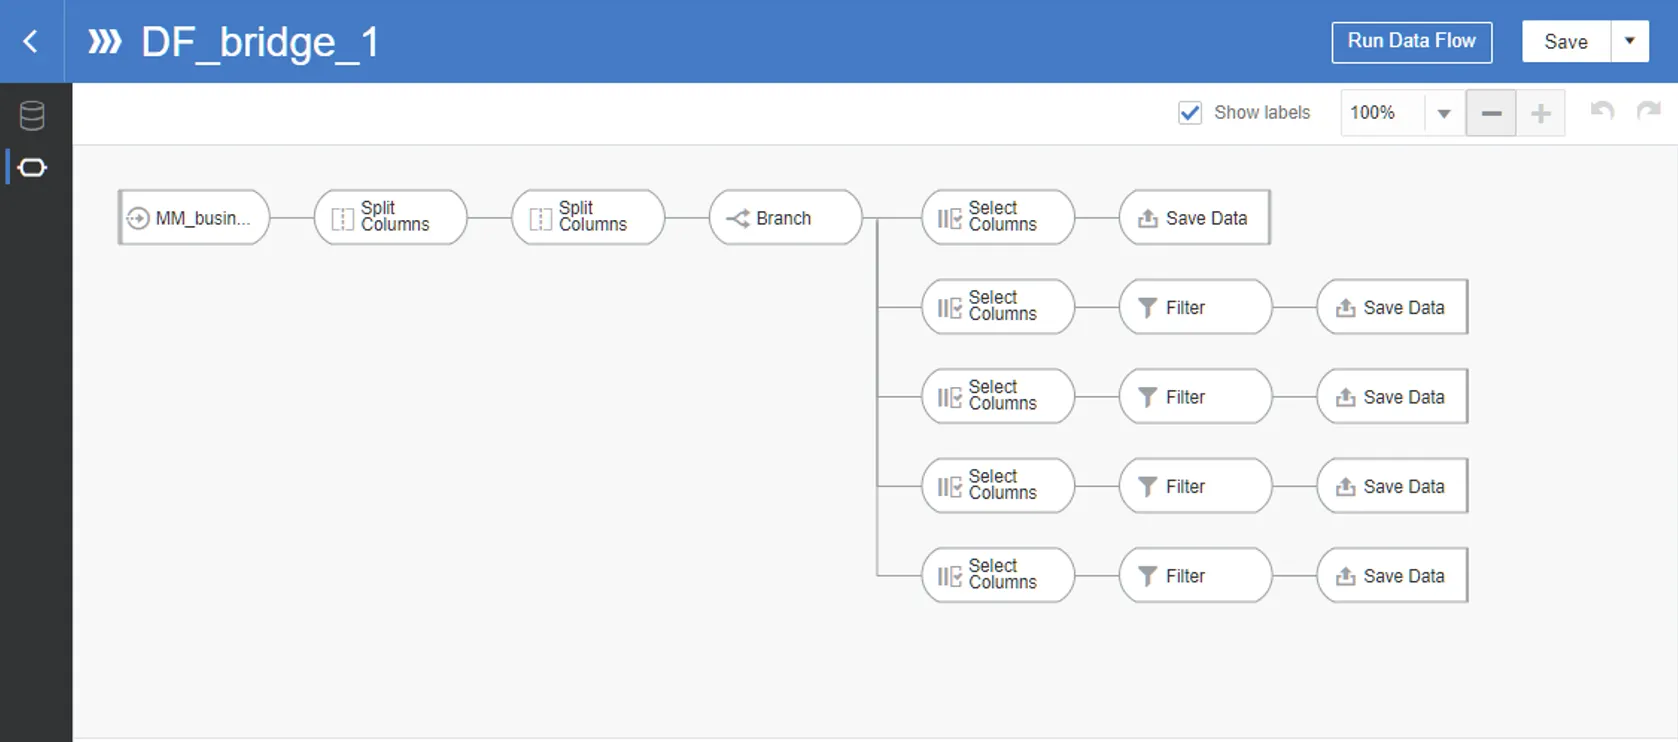
Now, we'll use OAC's Data Flow feature to create our bridge dataset. This process involves splitting the business deal dataset to create individual records for each salesperson-deal combination.
1.
Create a new Data Flow:
2.
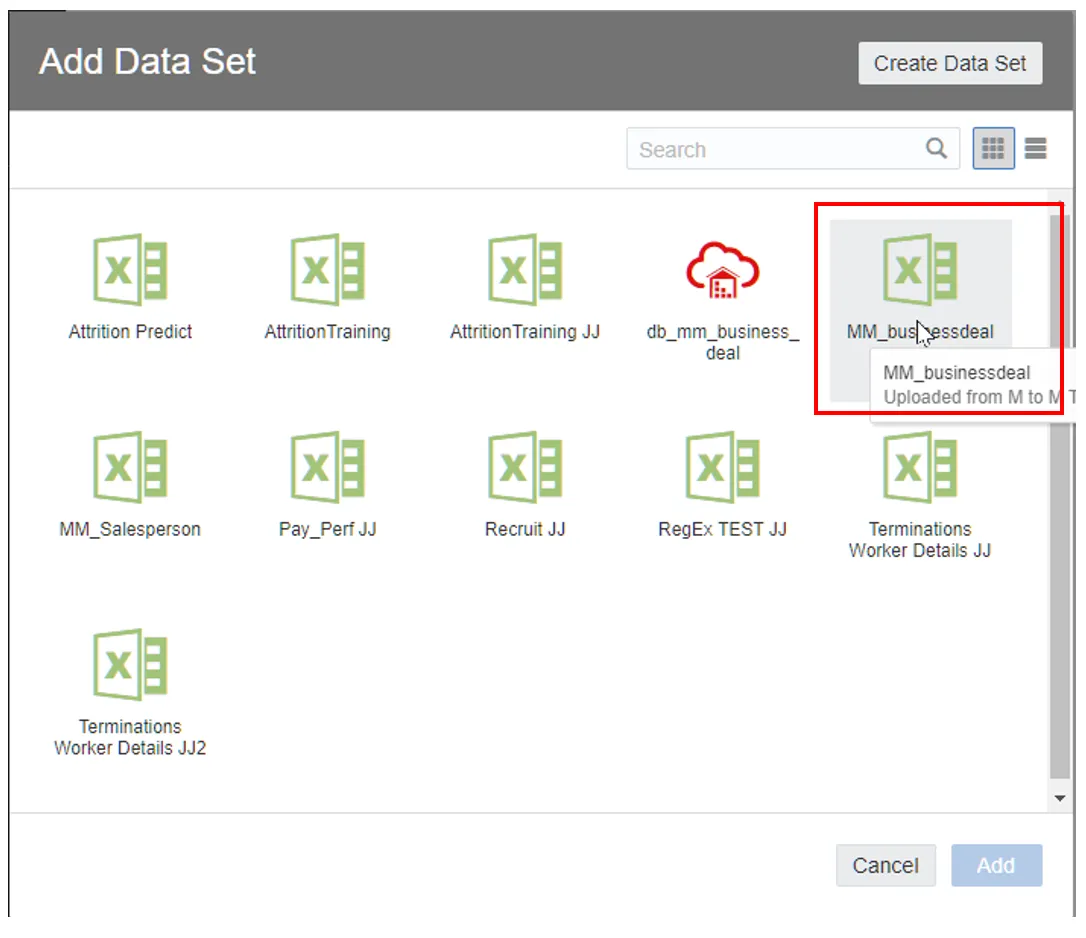
Add the business deal dataset:
3.
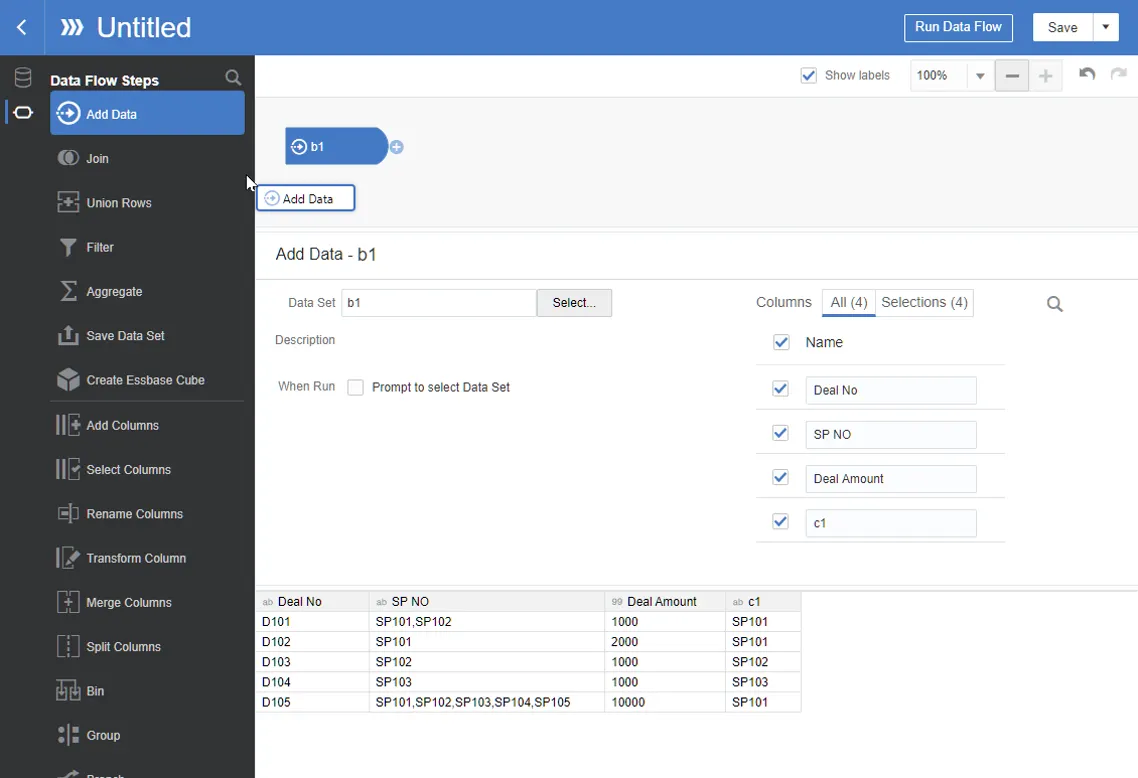
Add a Split Columns step to separate the SP NO column:

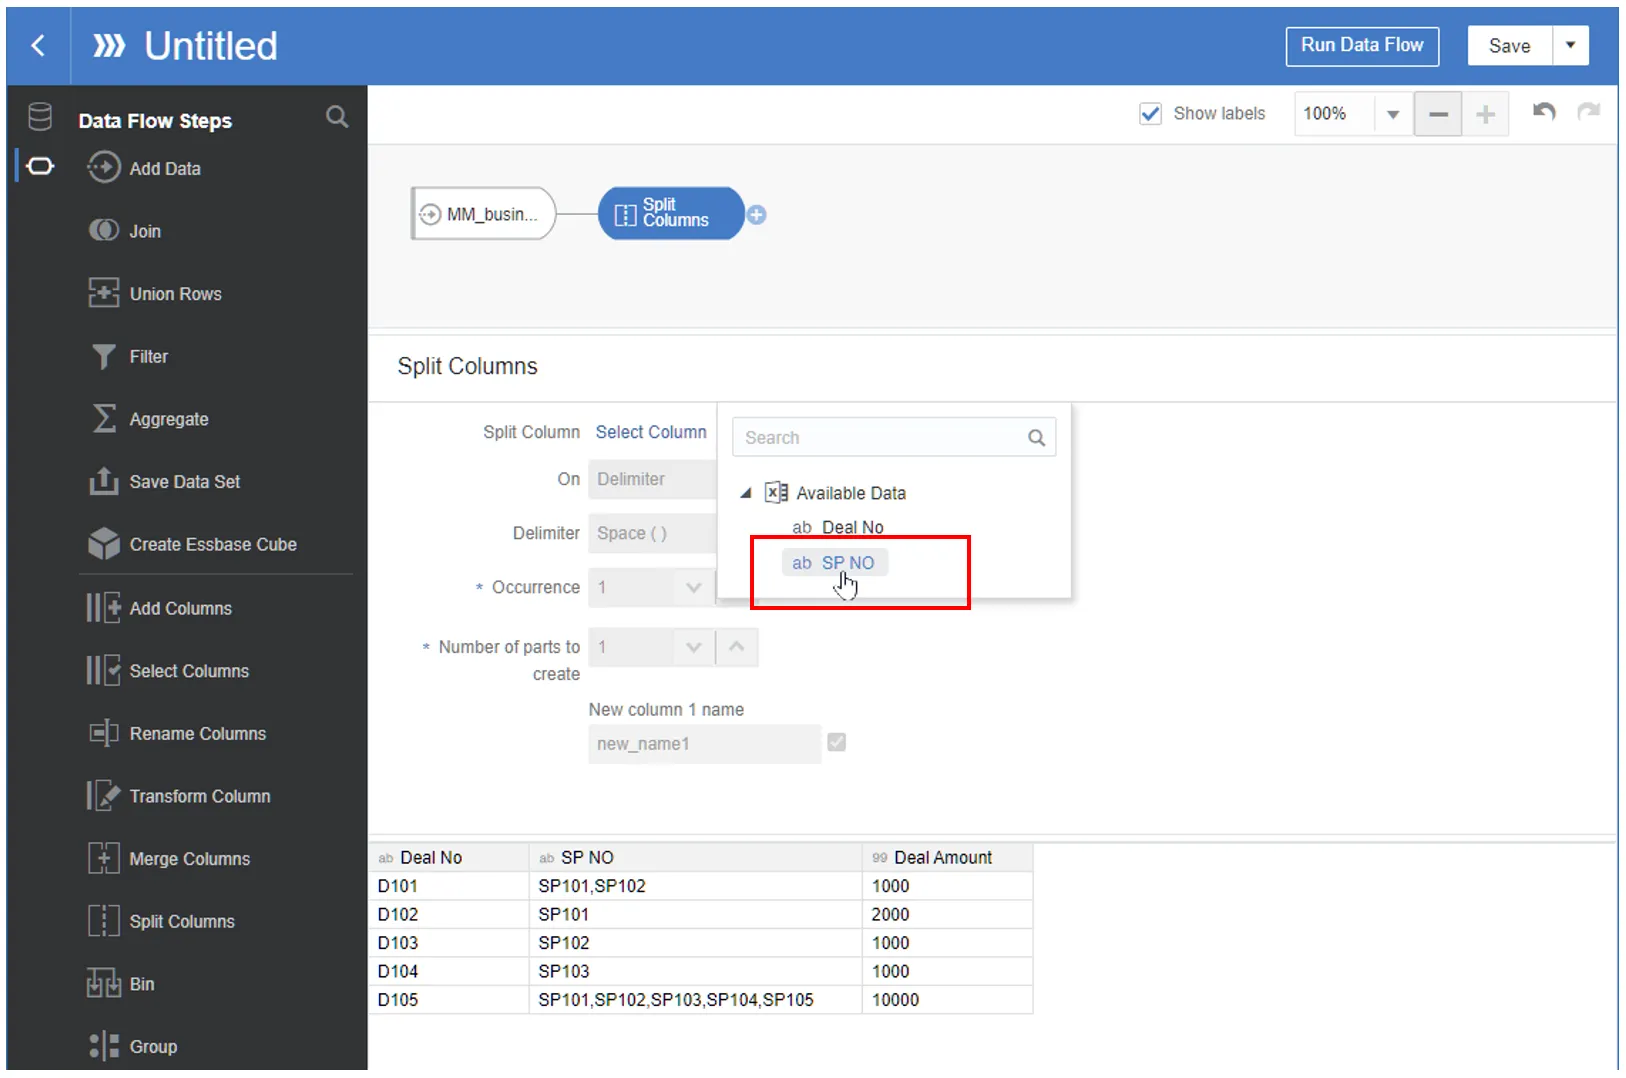
4.
Set the delimiter as a comma and specify the number of parts to create as 4 and define new column names for easier handling at later steps.
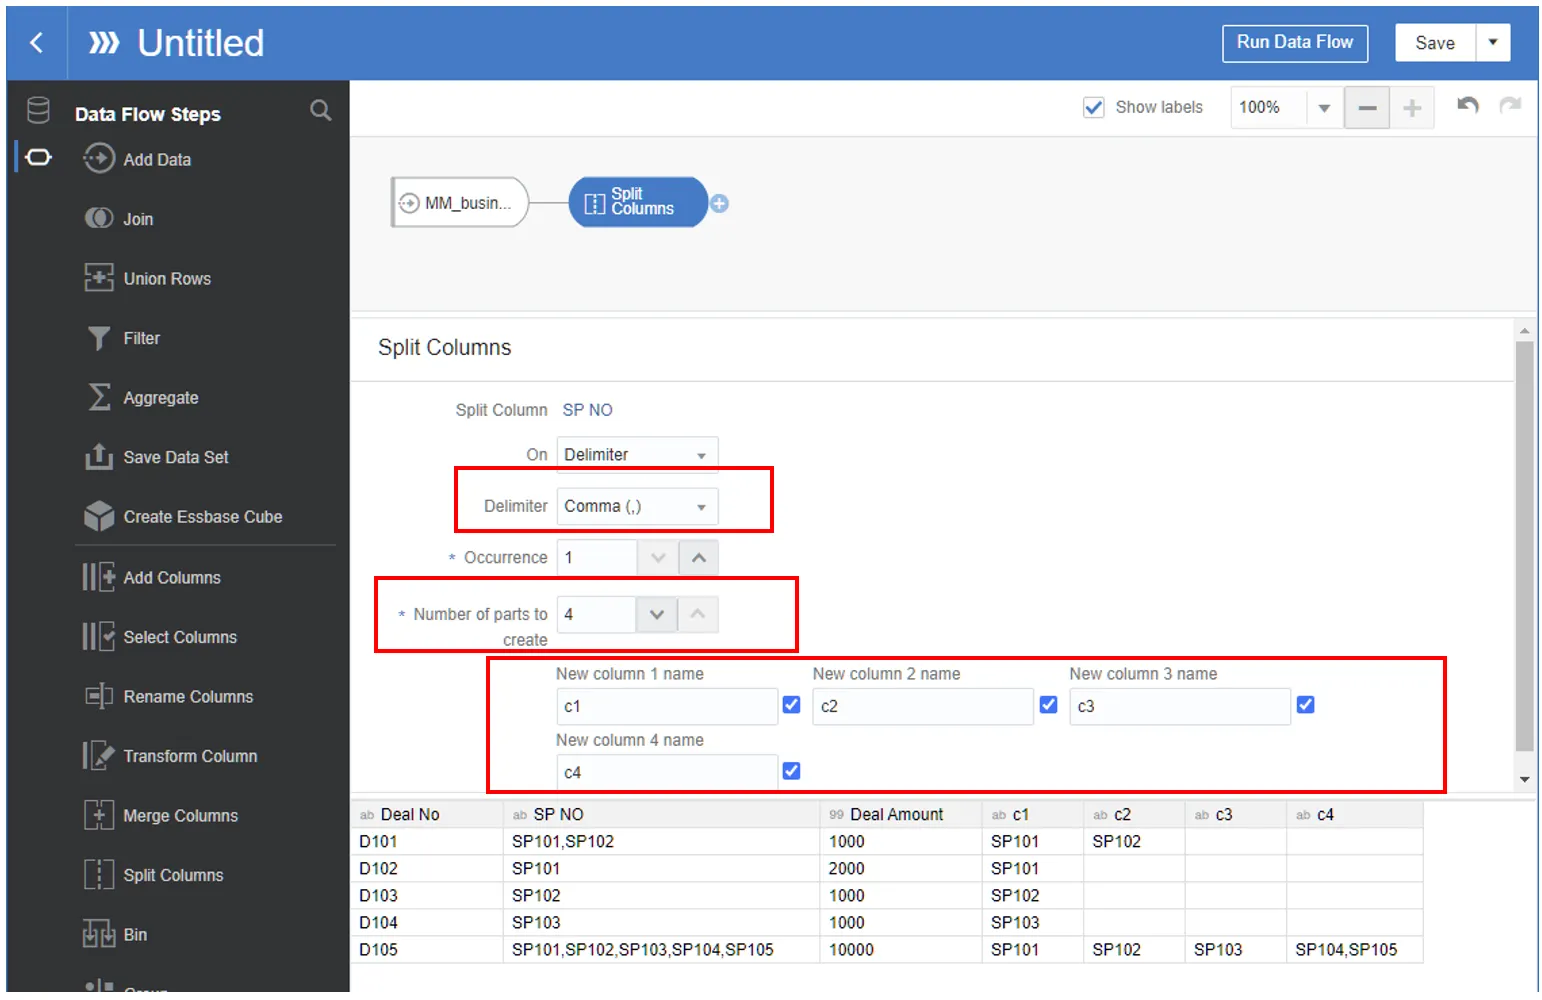

NOTE: As maximum supported number of parts can be defined at a time is only four, you need to repeat it again in adding another step to split the column values if there are more than four values in this column.
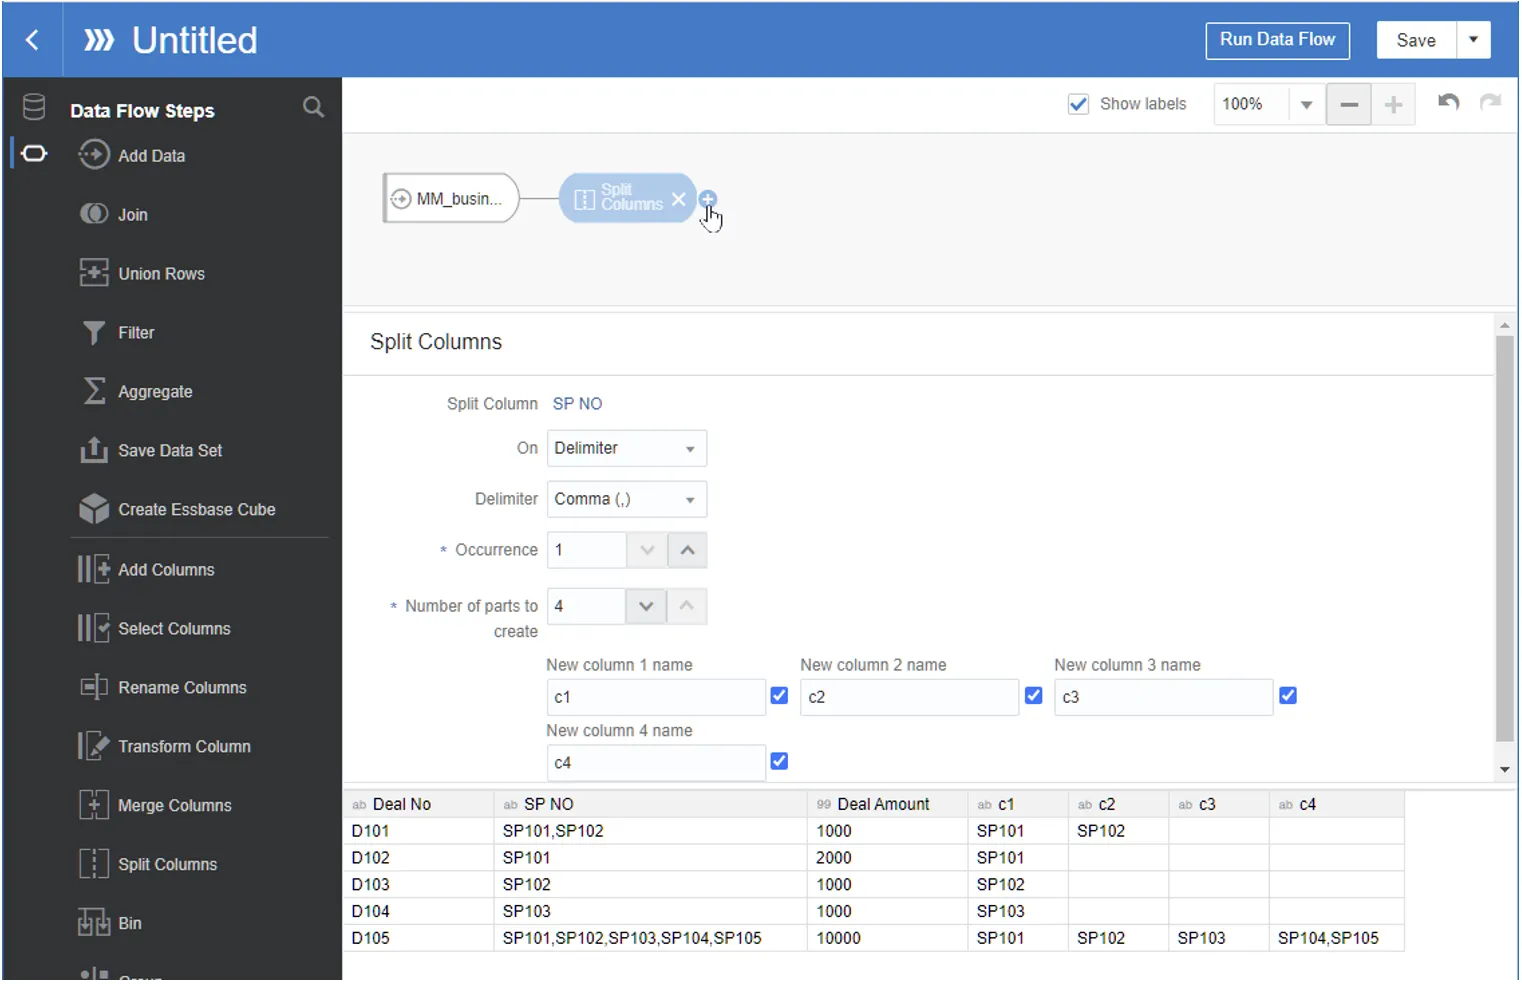
5.
Repeat the split process if there are more than four values in the column.
6.
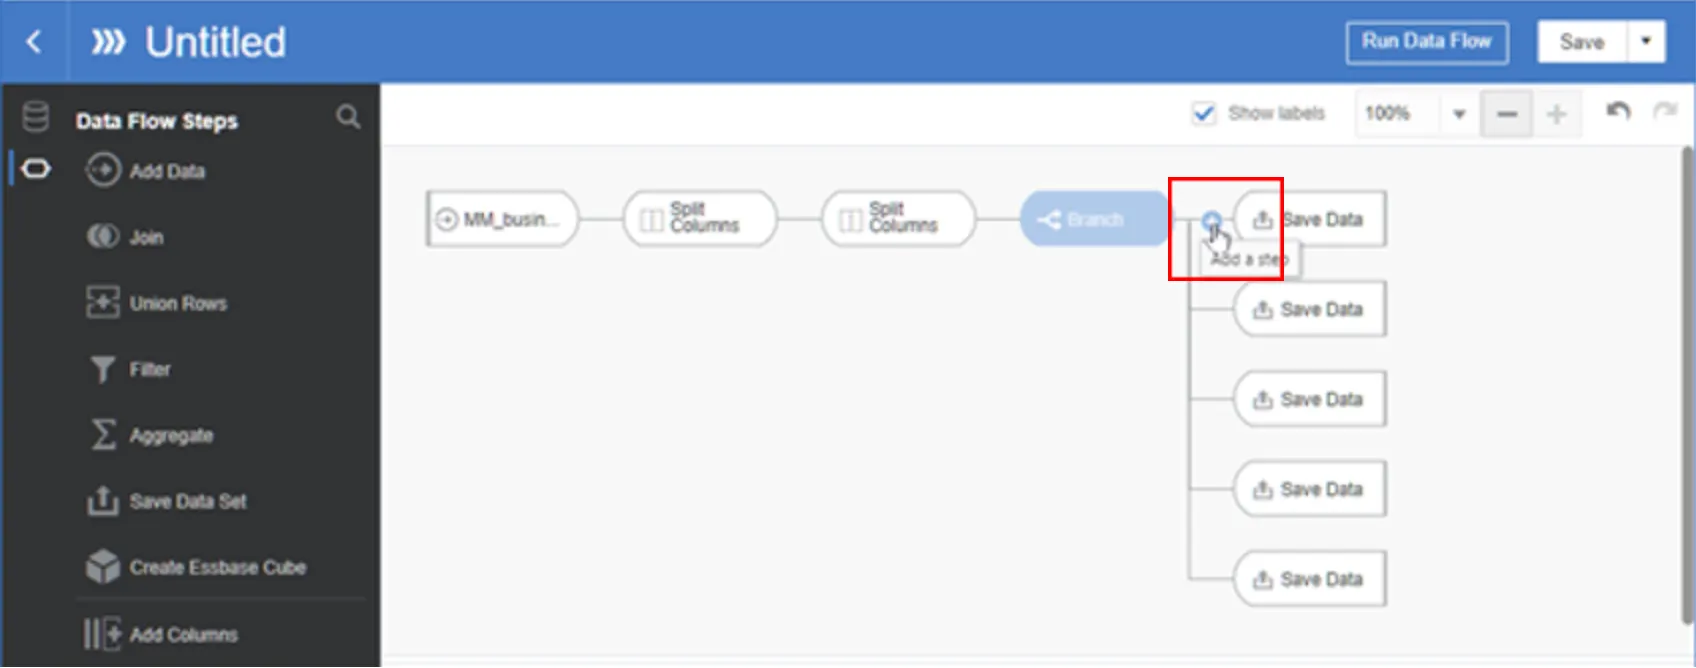
Add a step to create additional columns
7.
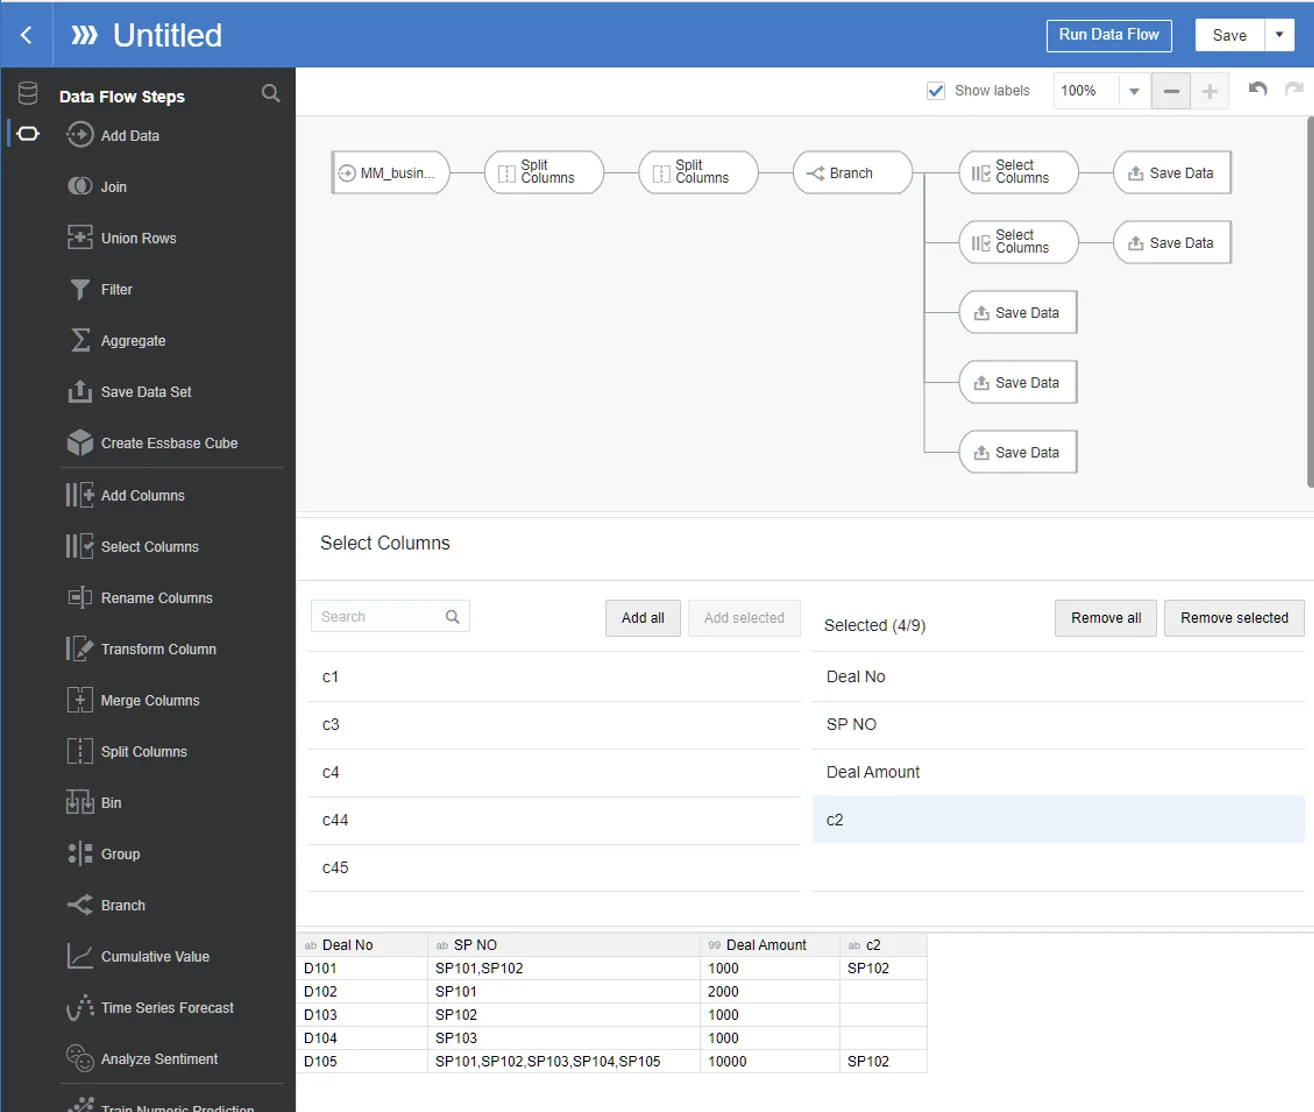
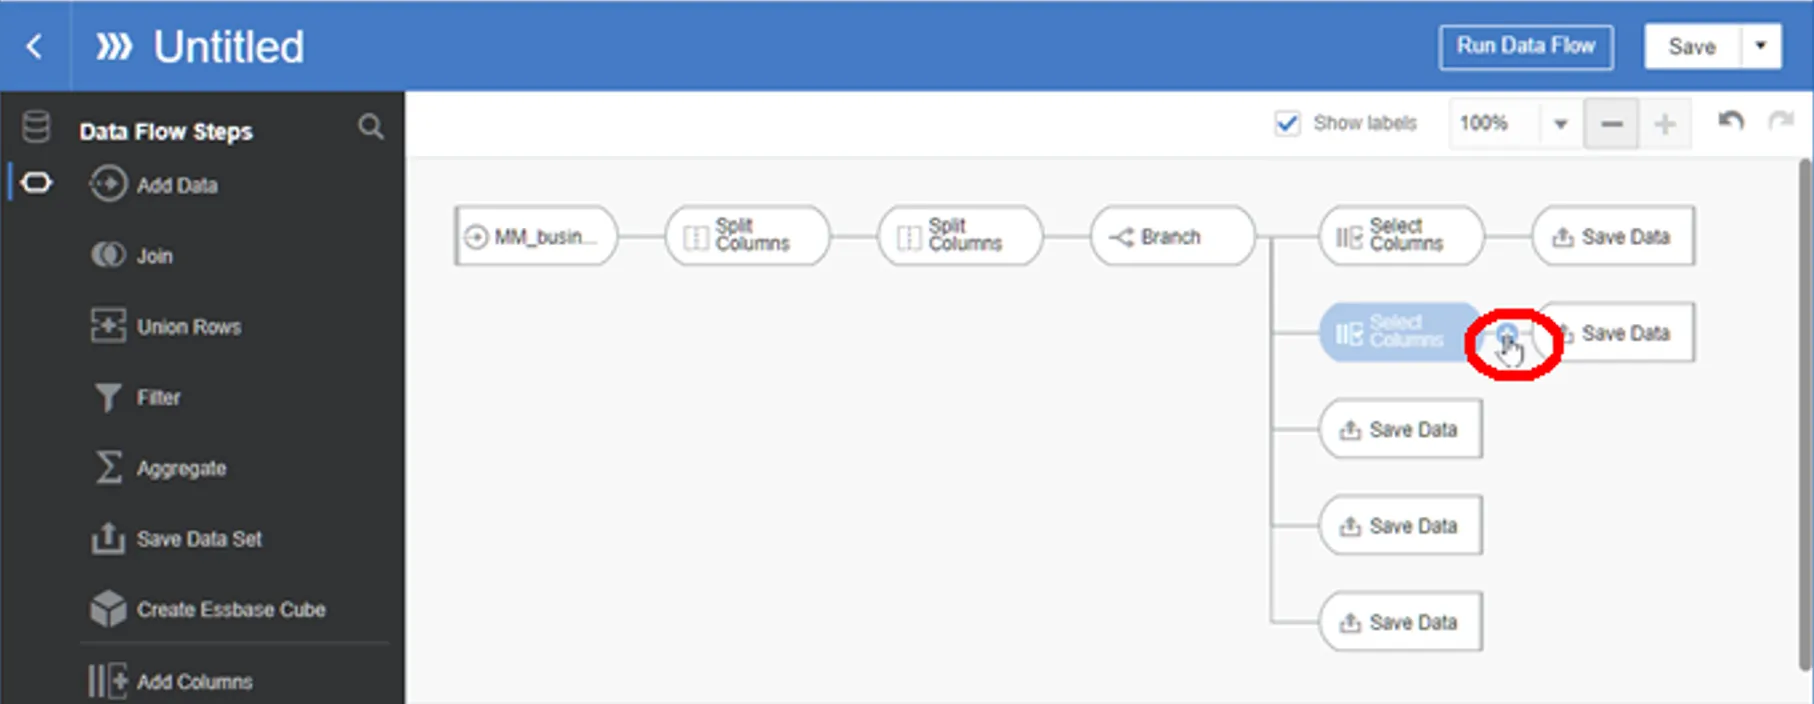
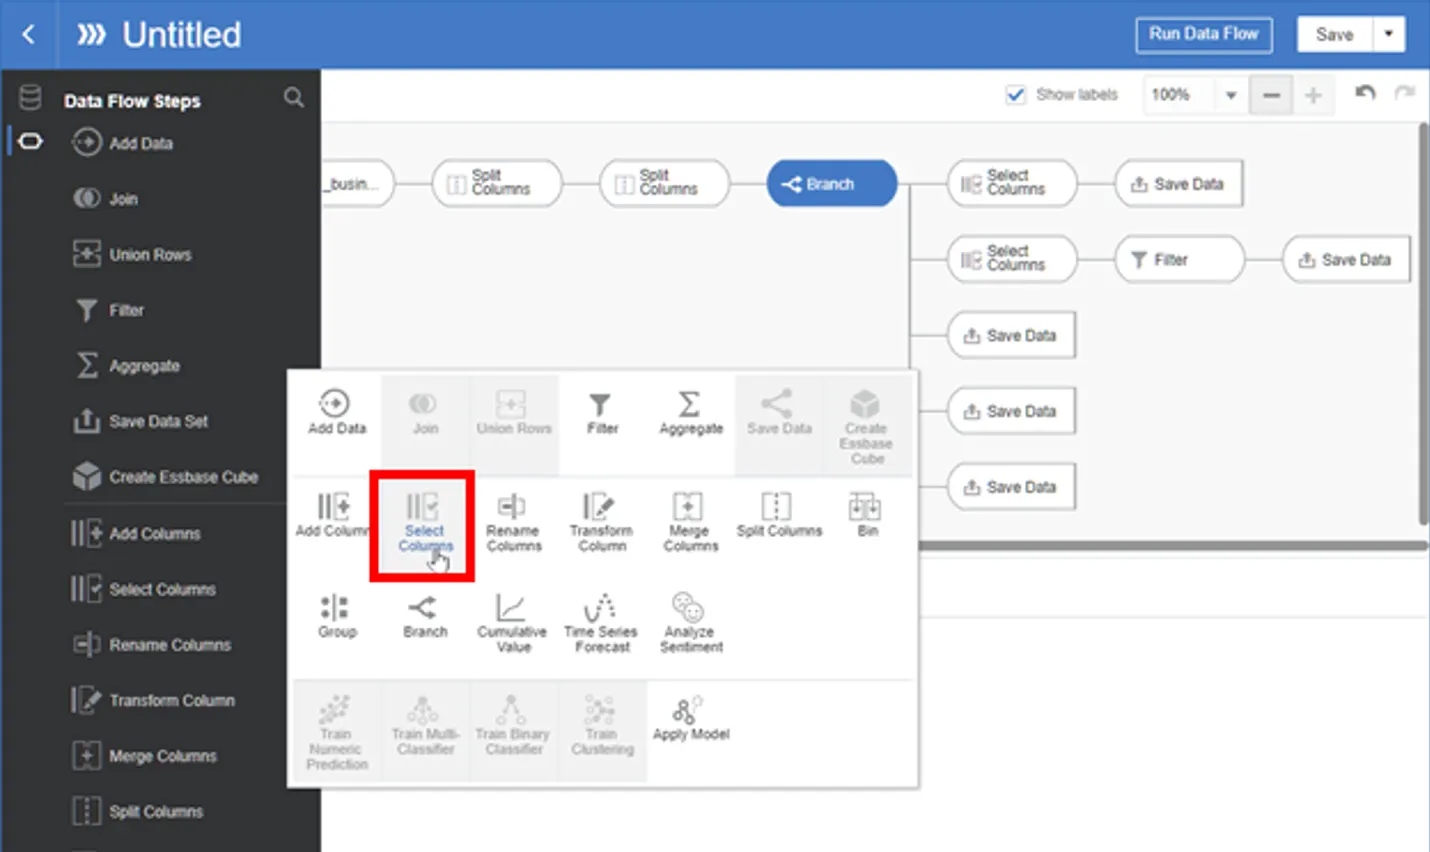
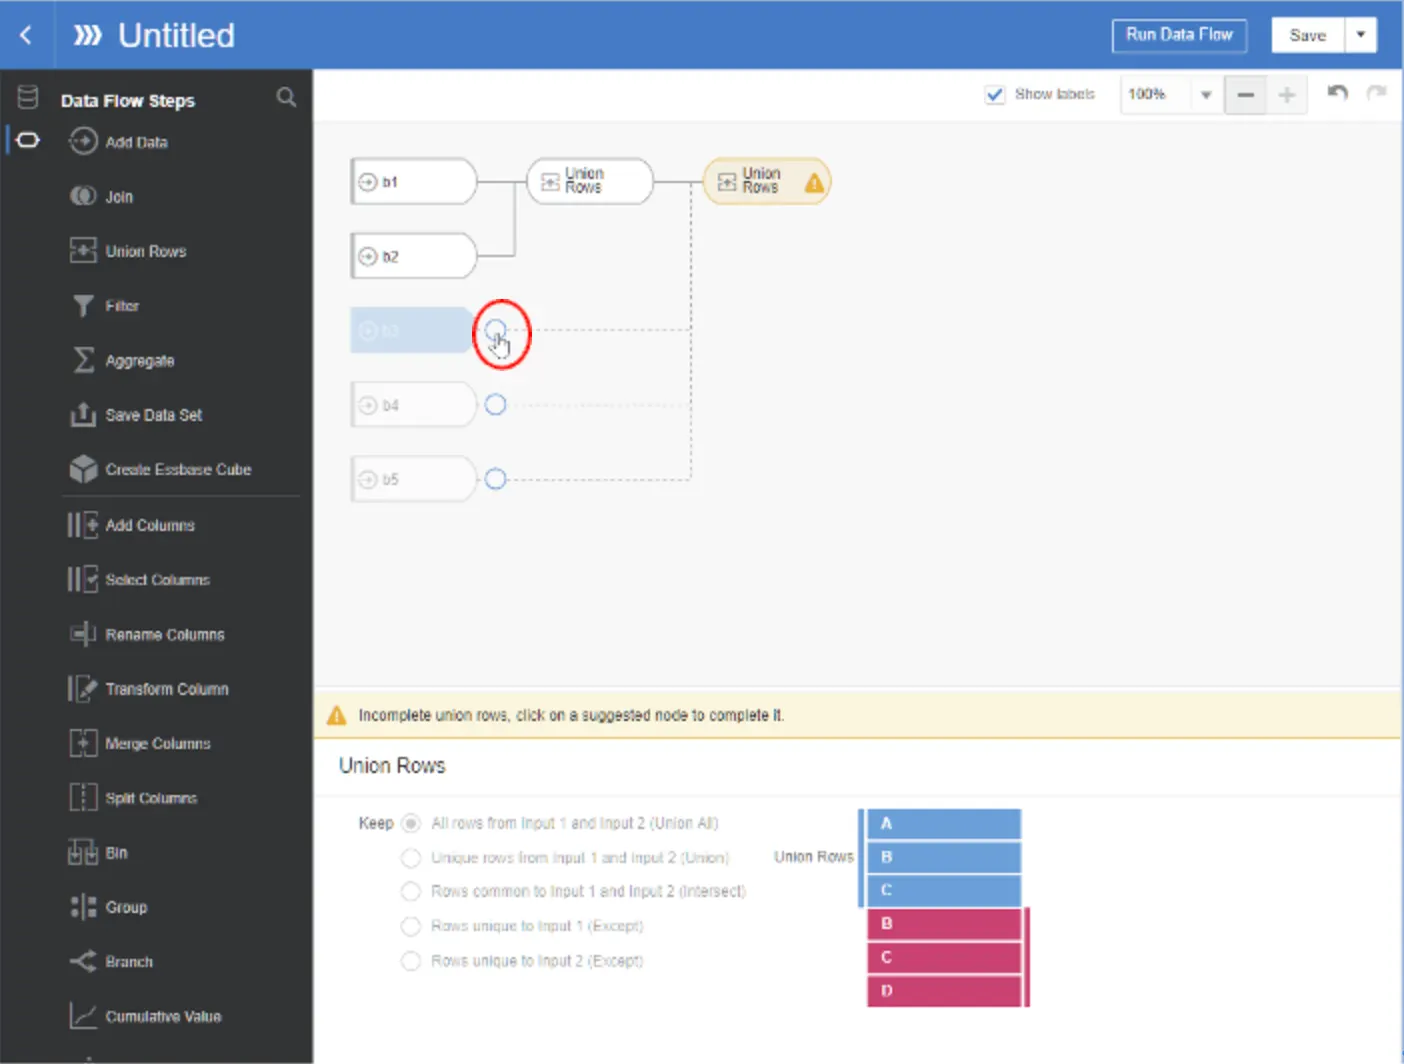
For each branch, add Select Columns and Filter steps to isolate each salesperson:
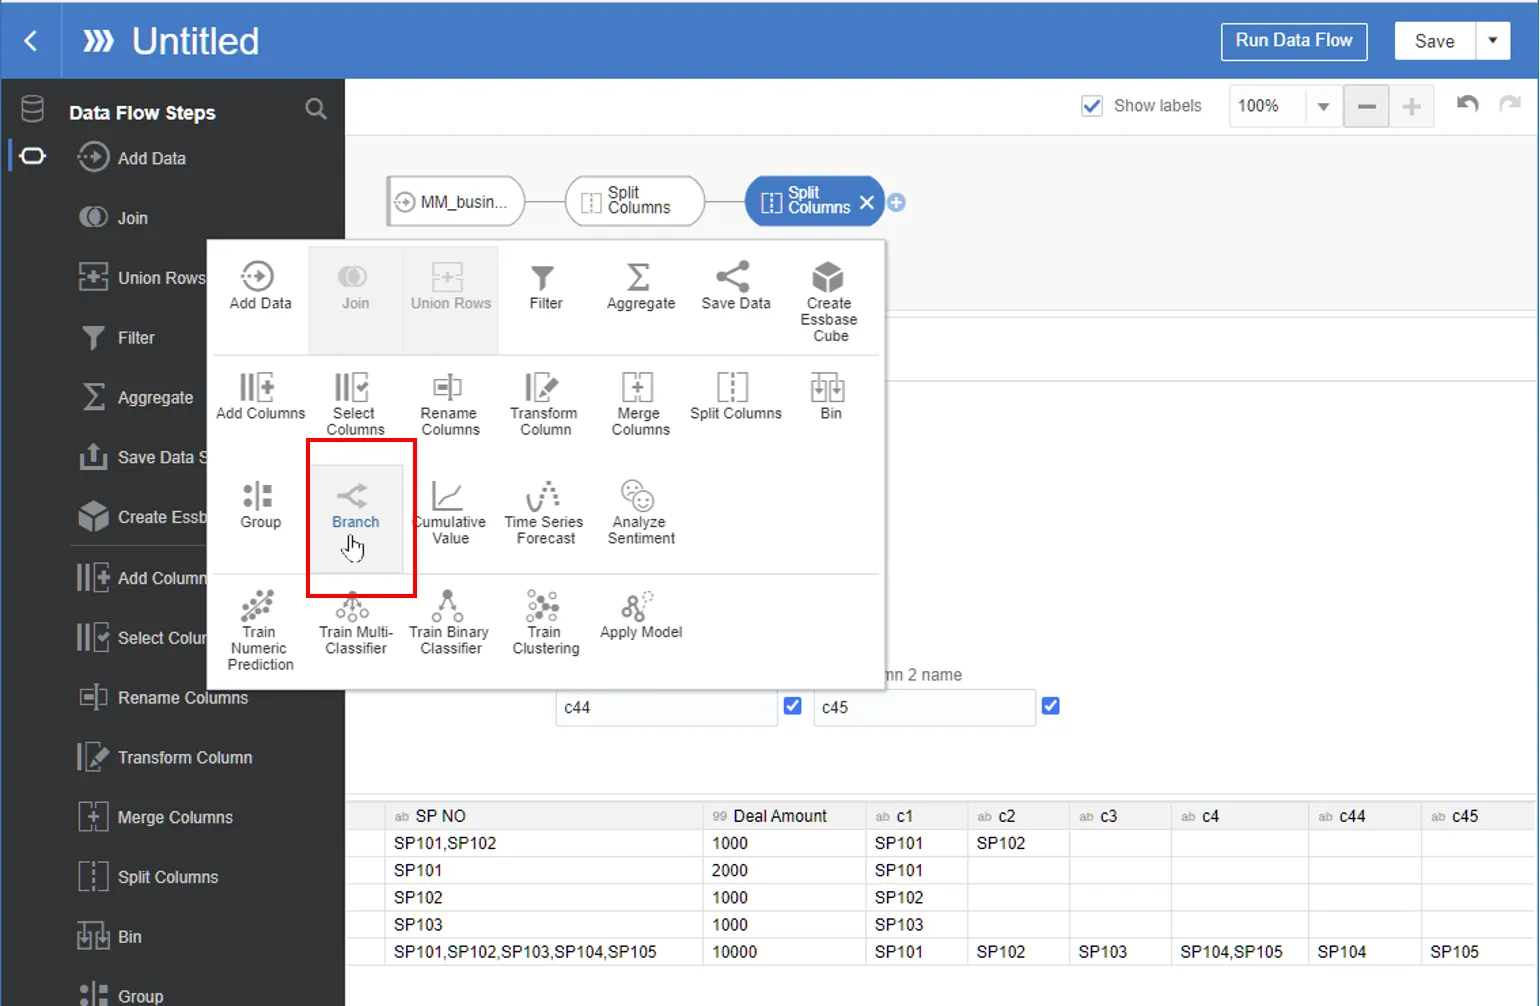
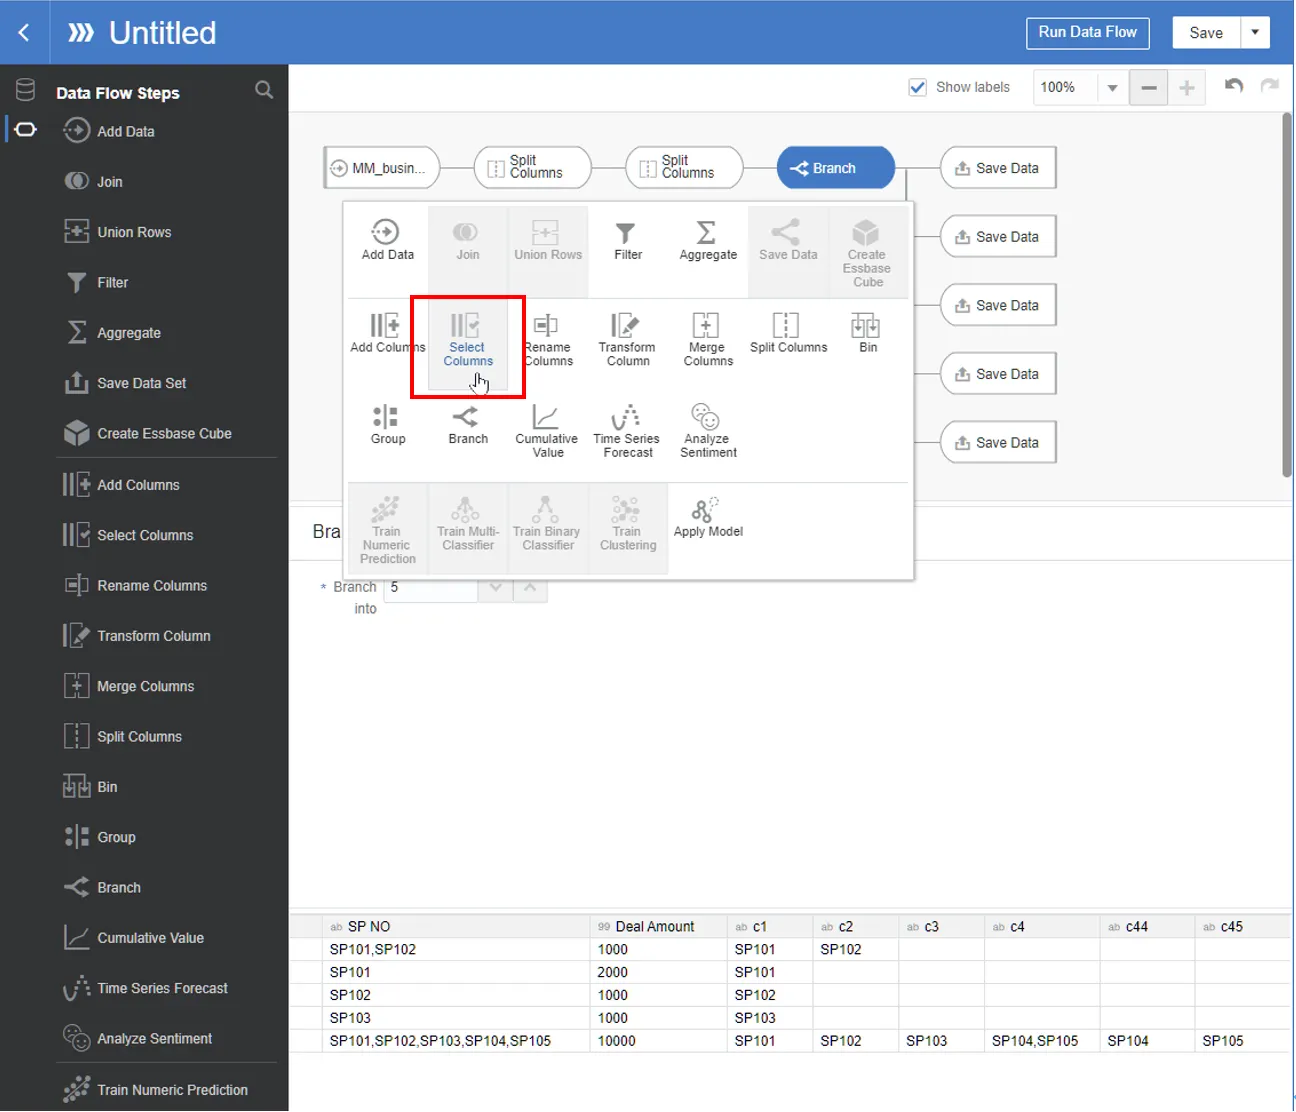
Remove the rest of the splitted columns except “c1” to select only “c1” column for the 1st part of the branch.
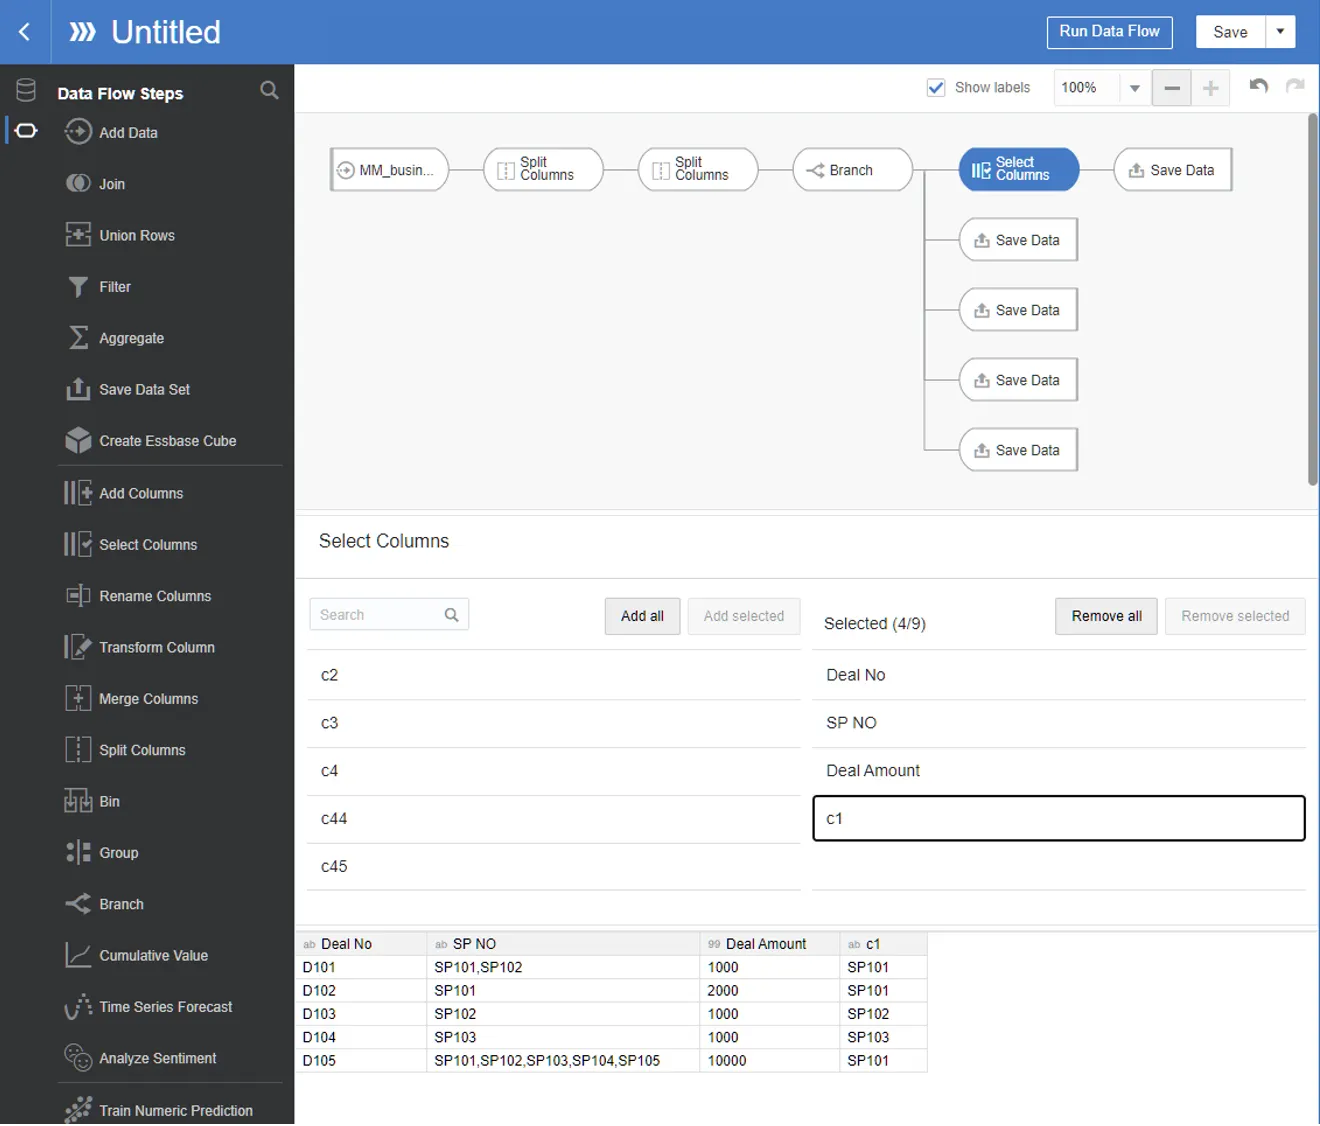
Add step in the 2nd branch
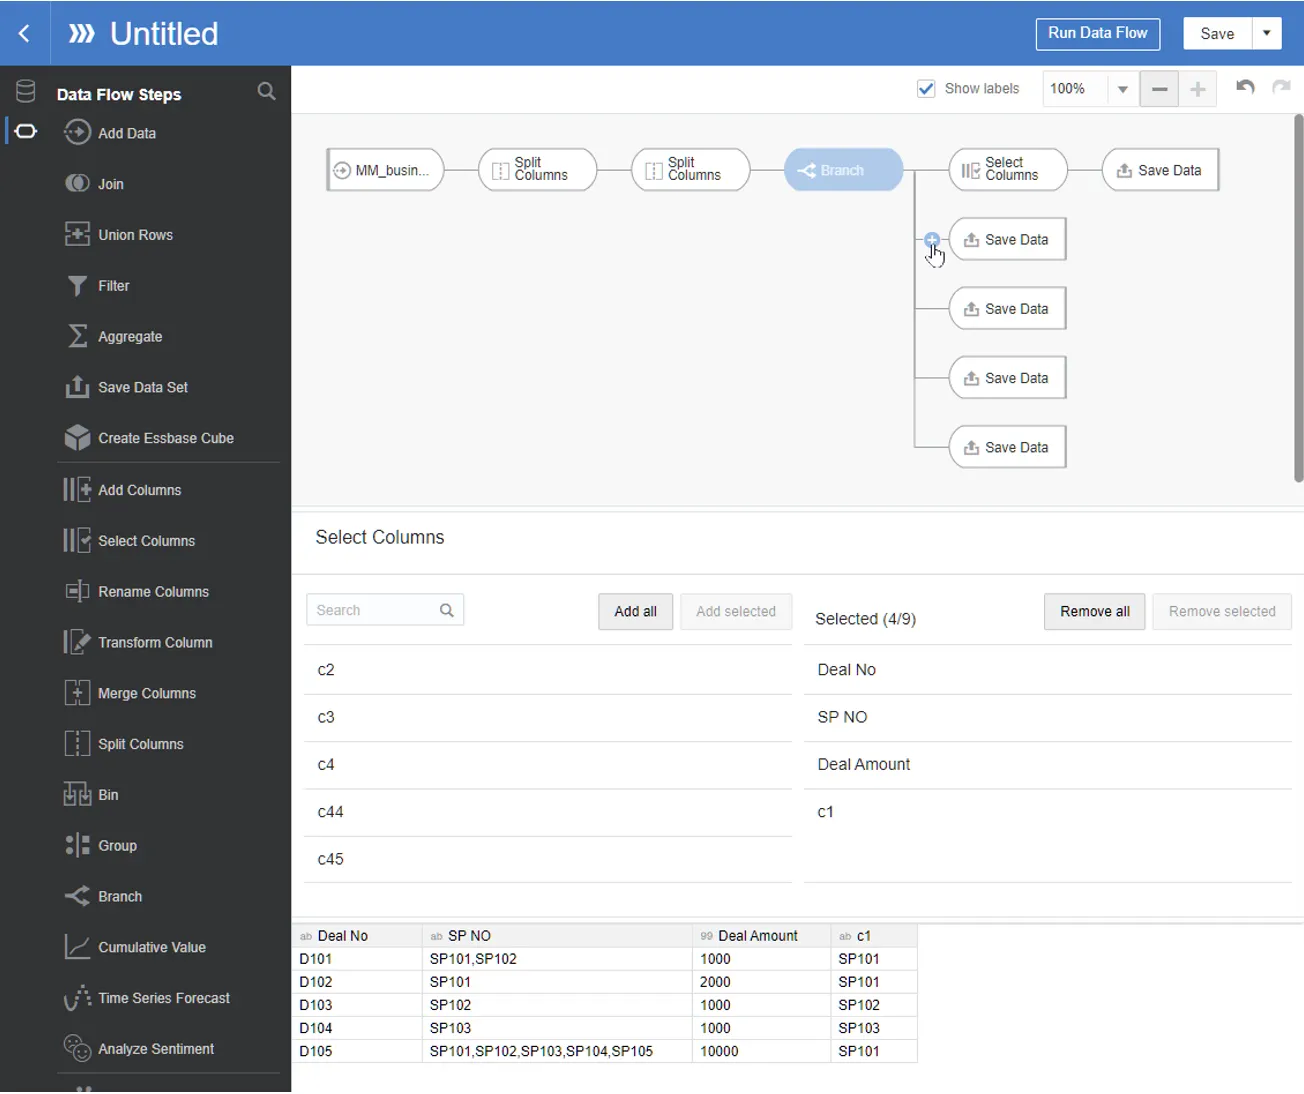
Select select columns

Select “c2” column and the rest columns should be removed
Add step in 2nd branch
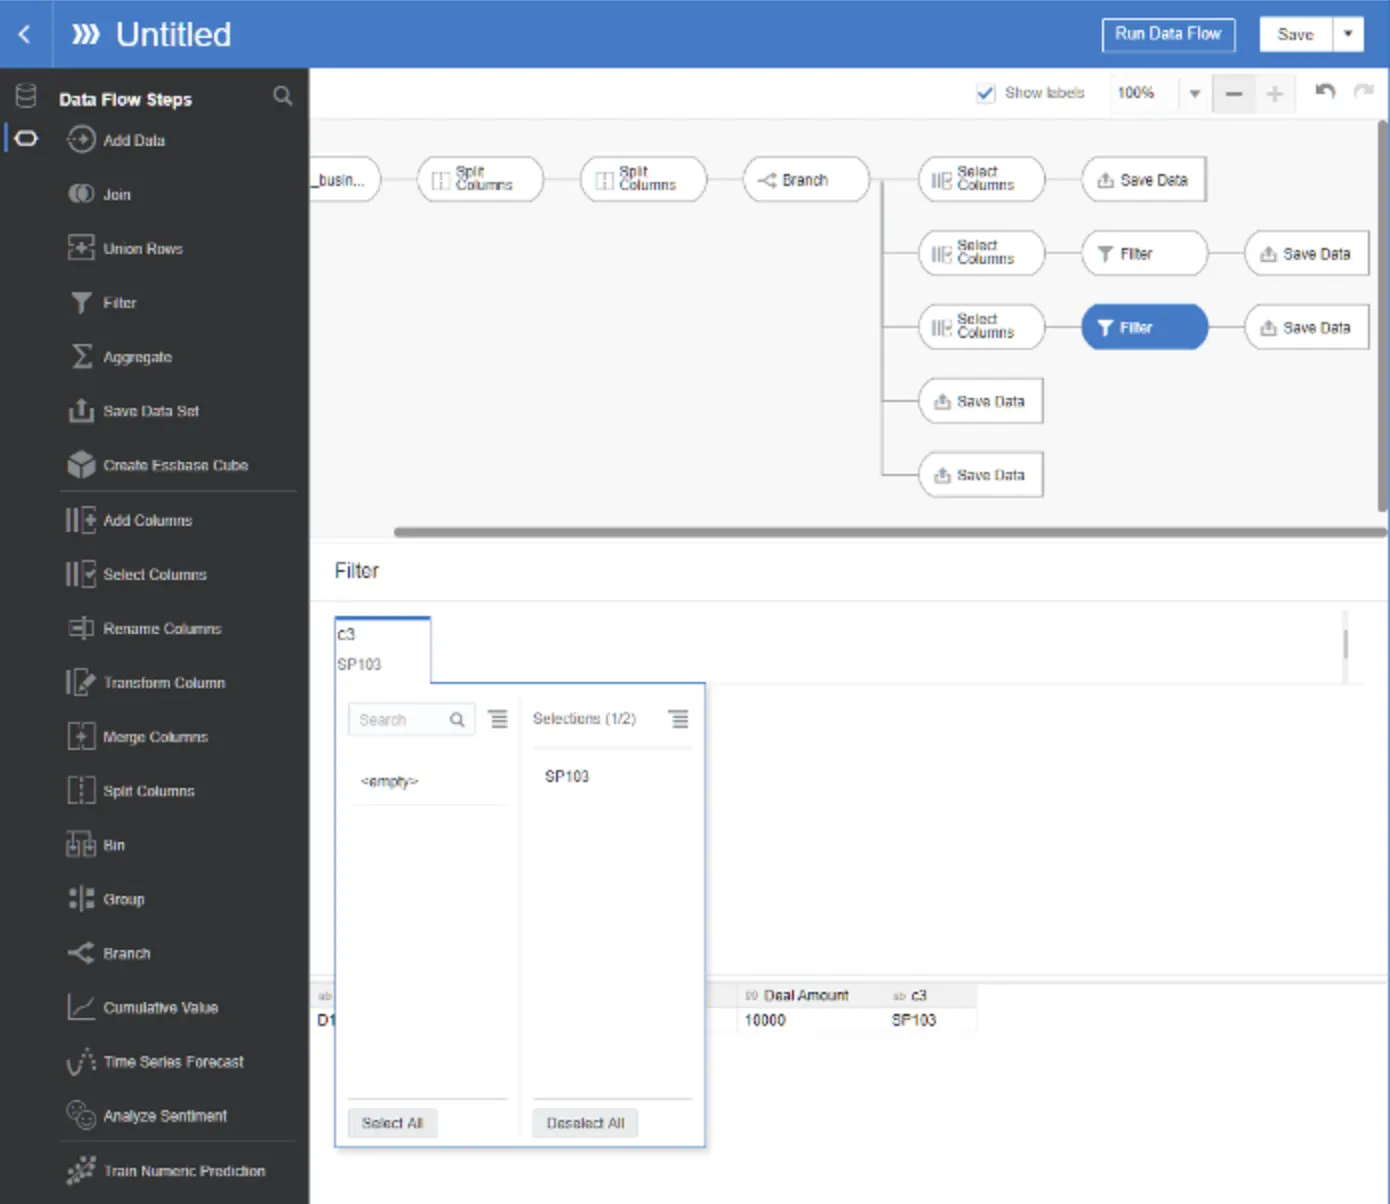
Select Filter
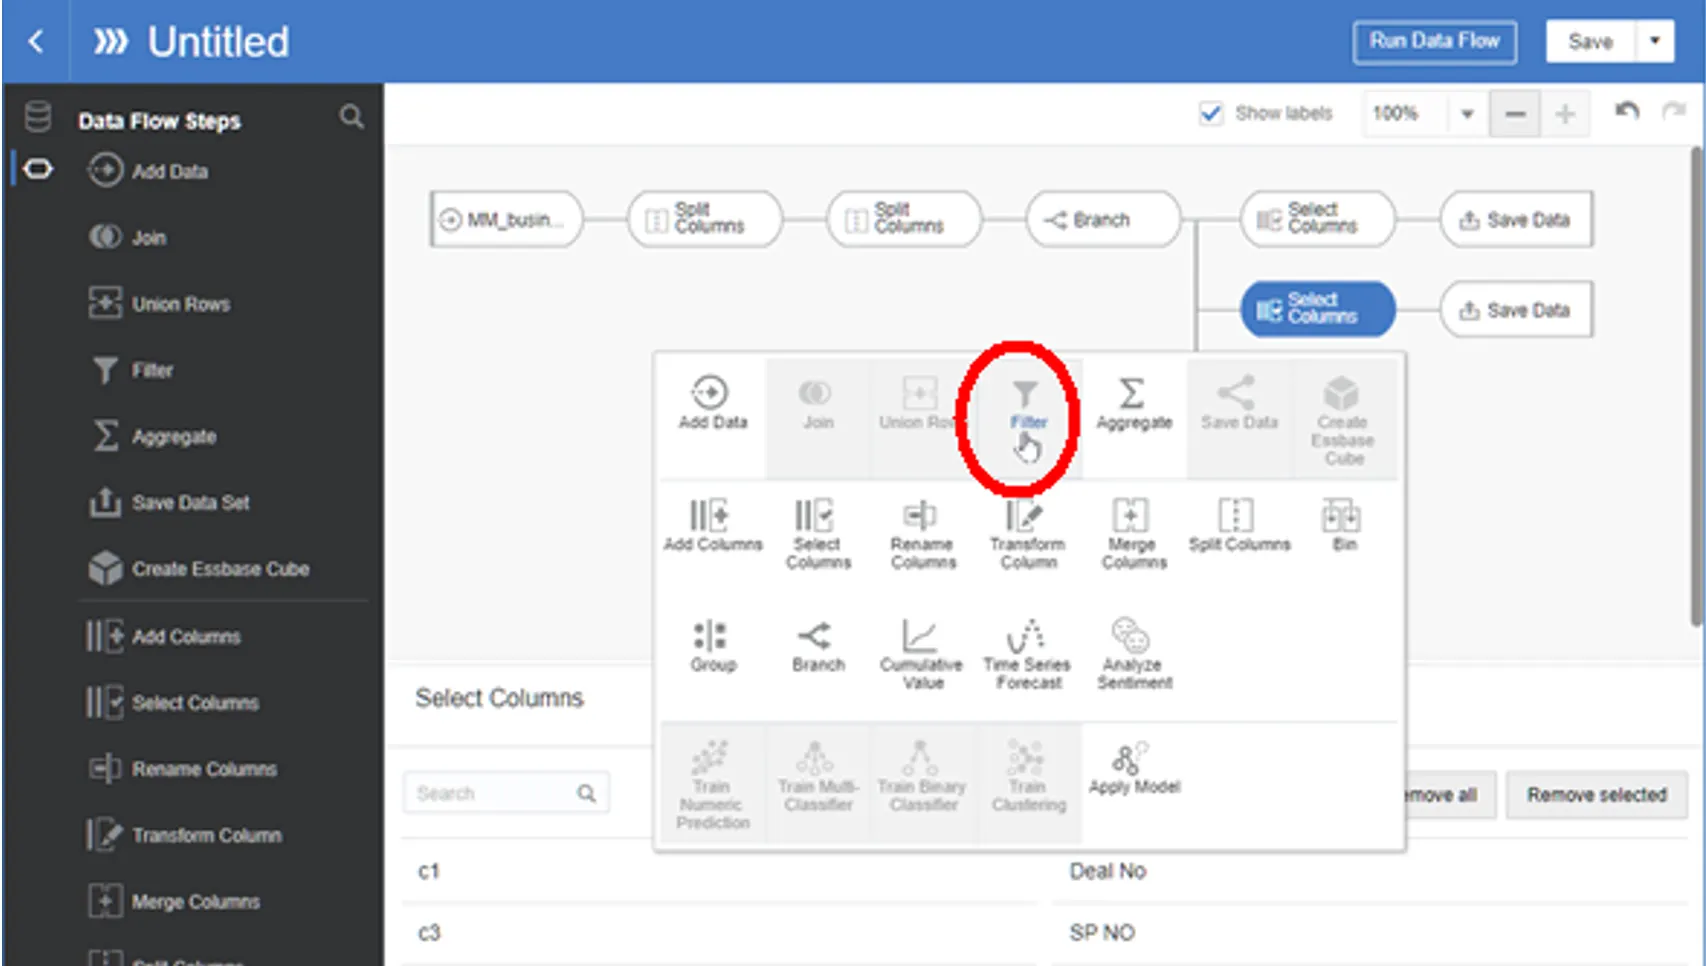
Add a filter
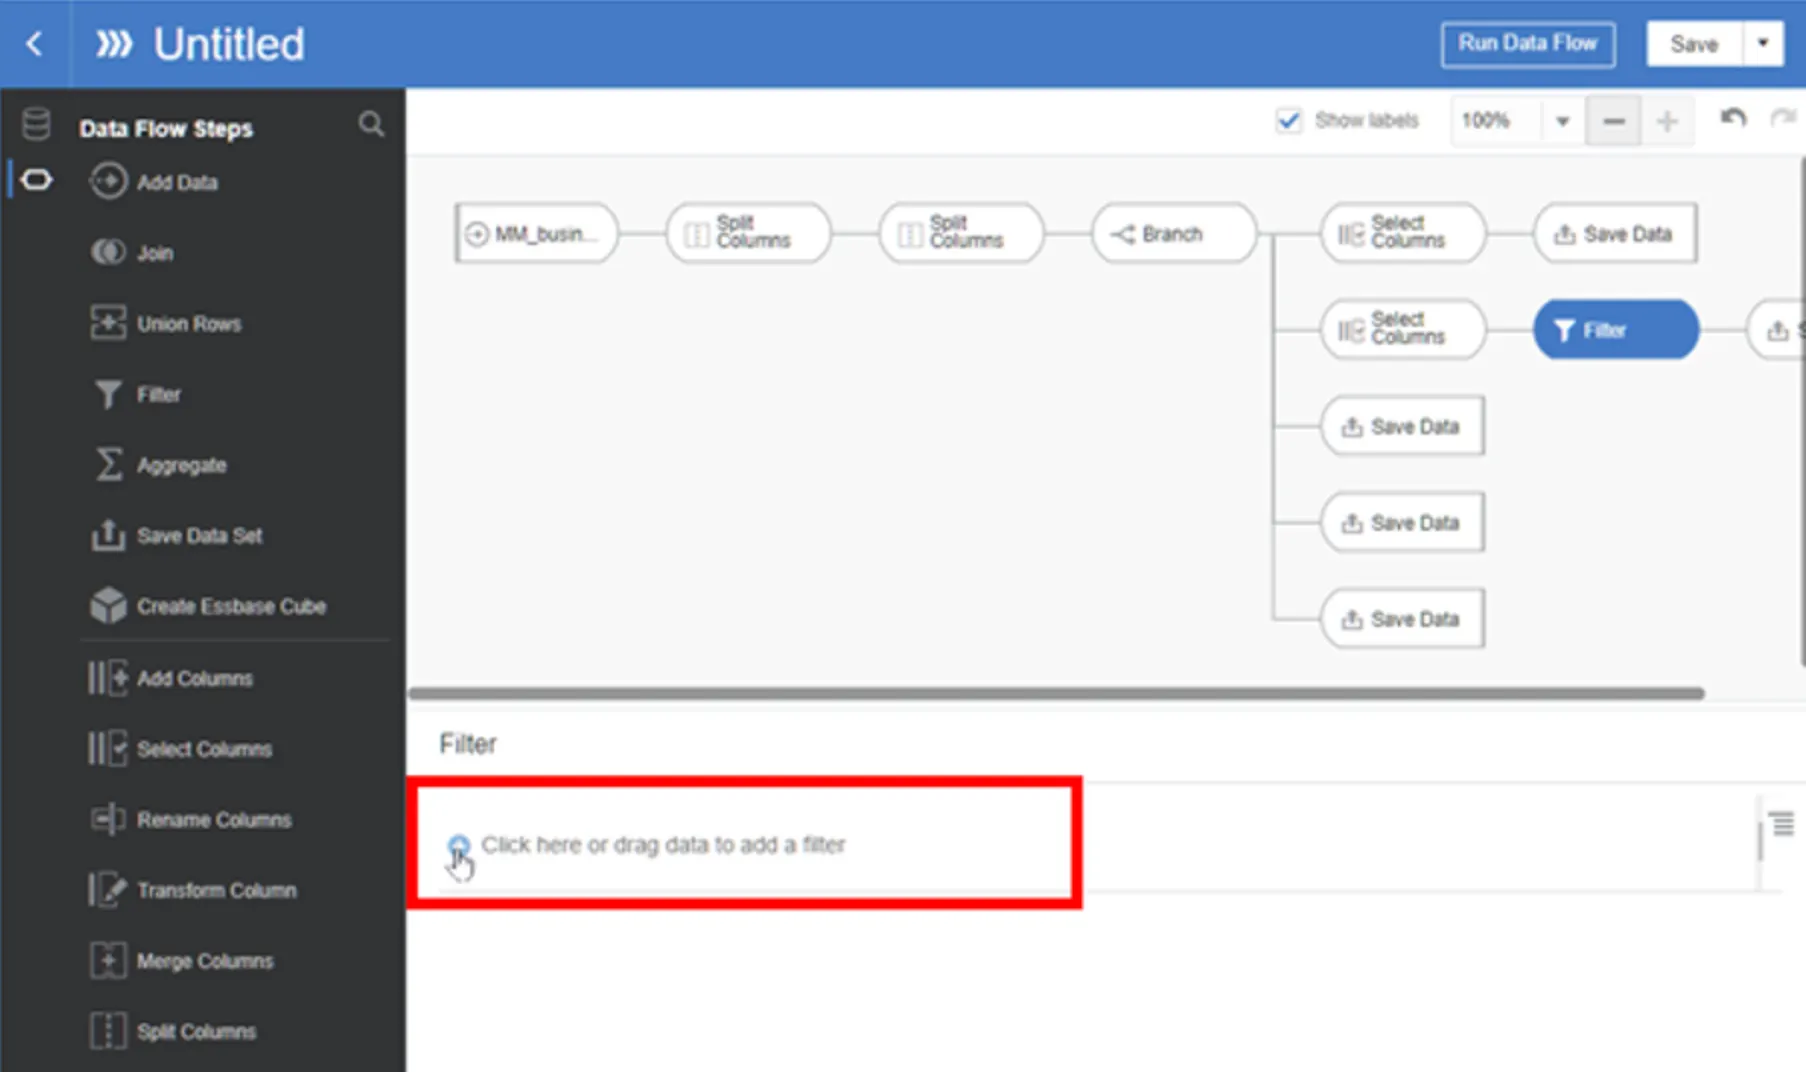
Select “c2”
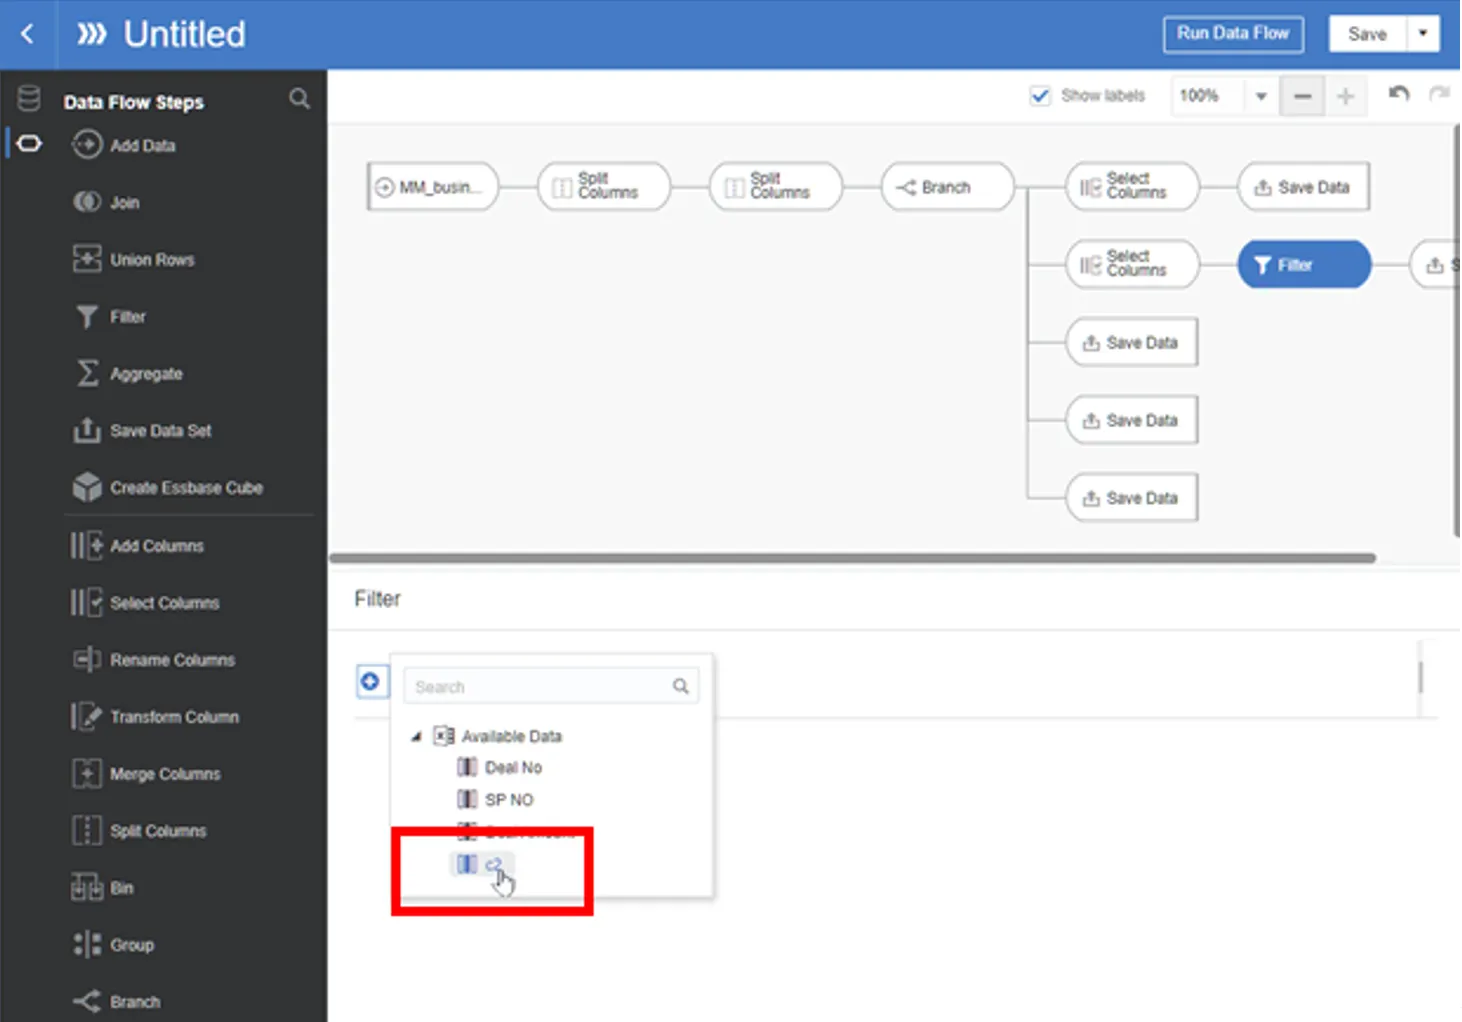
Deselect <empty> value

Add step to 3rd branch
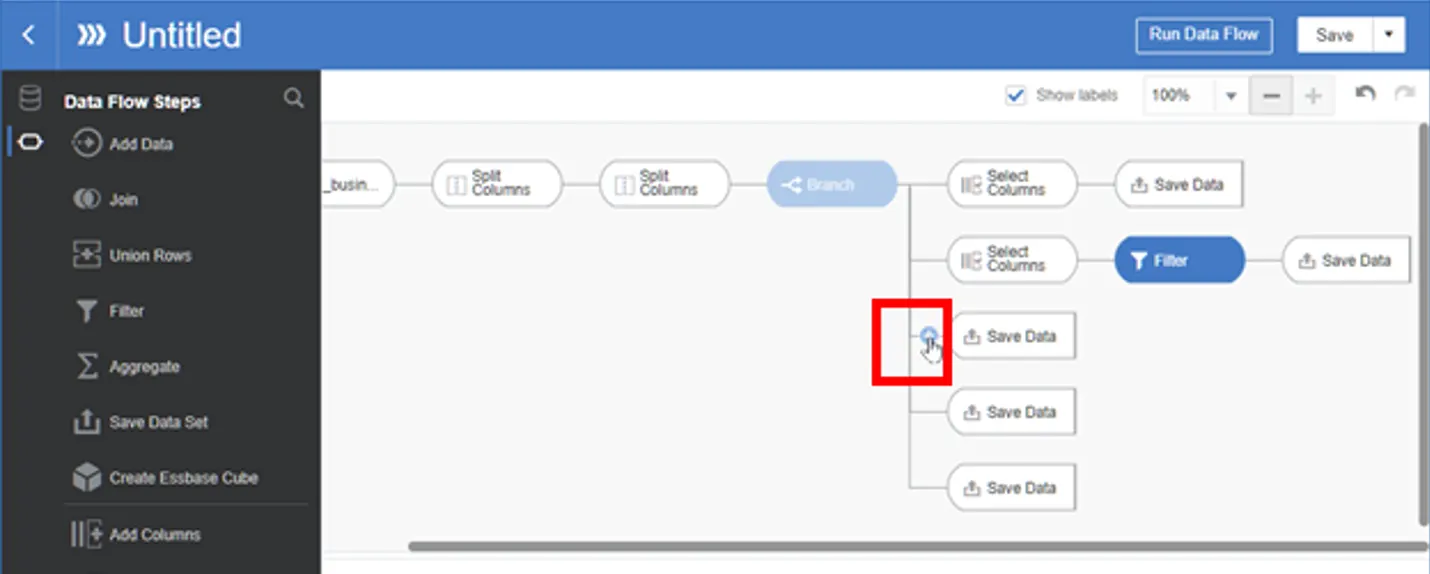
Select Select Columns
Select only c3 column

Add step and select Filter in the 3rd branch

Select only non empty value in c3 column
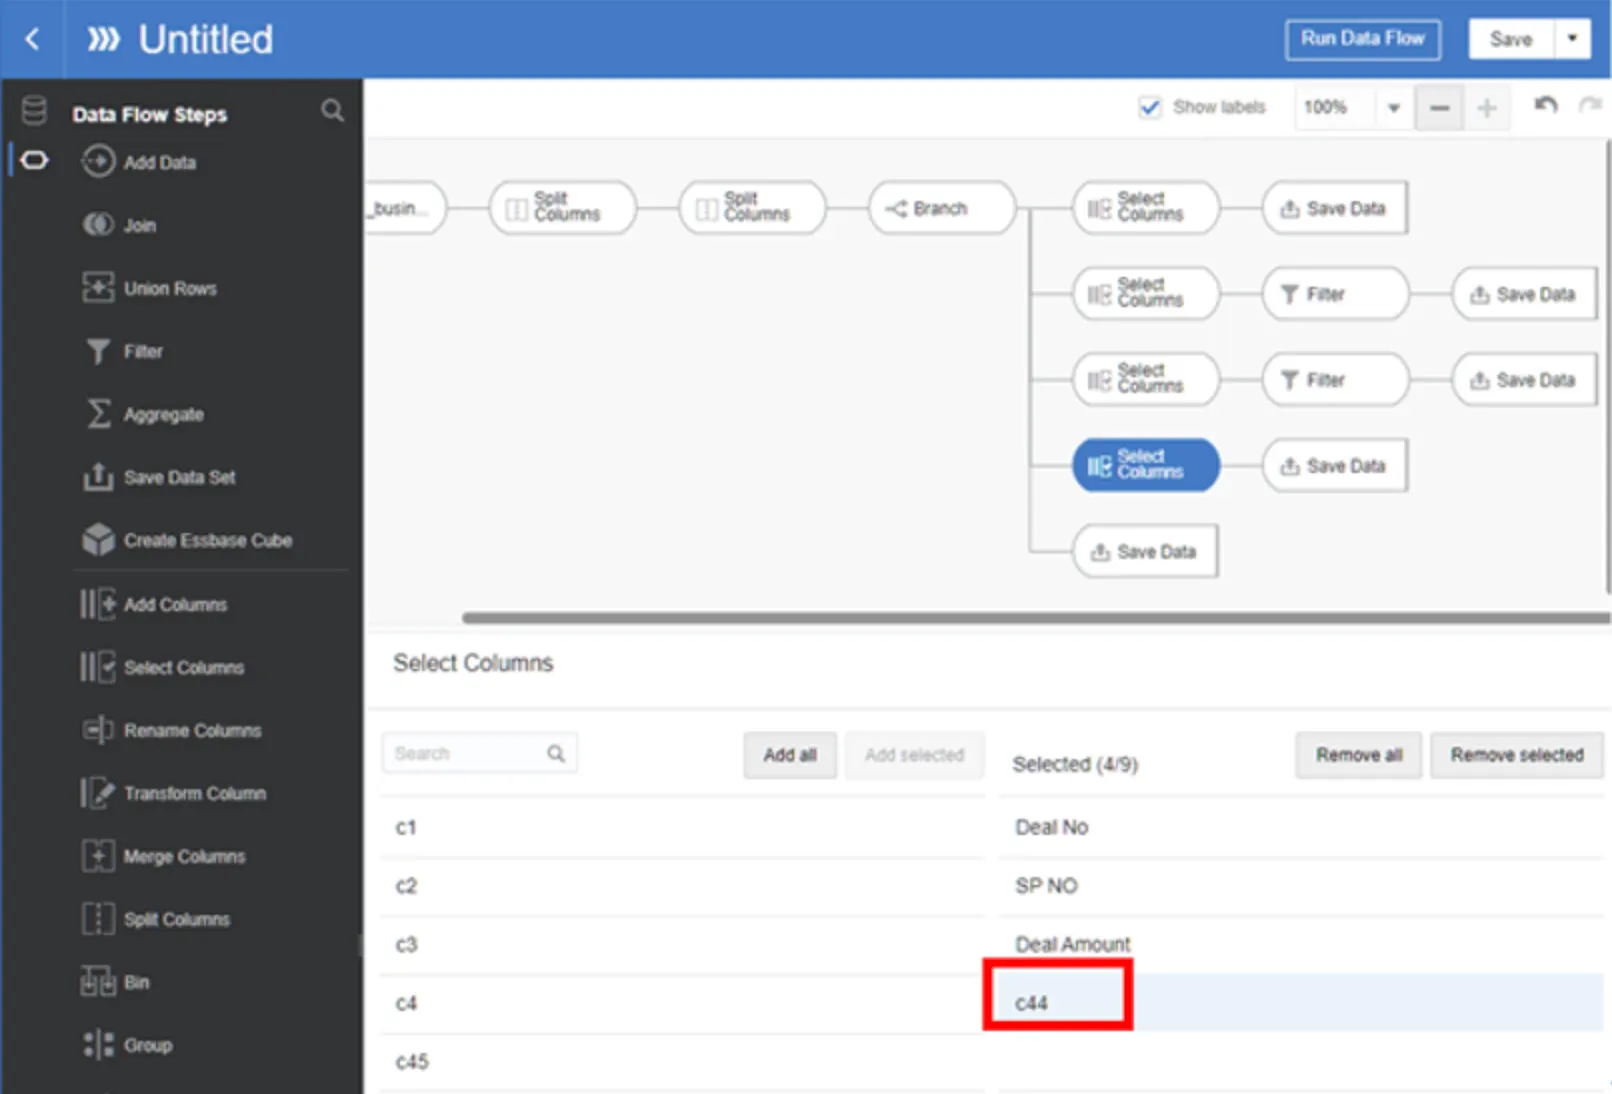
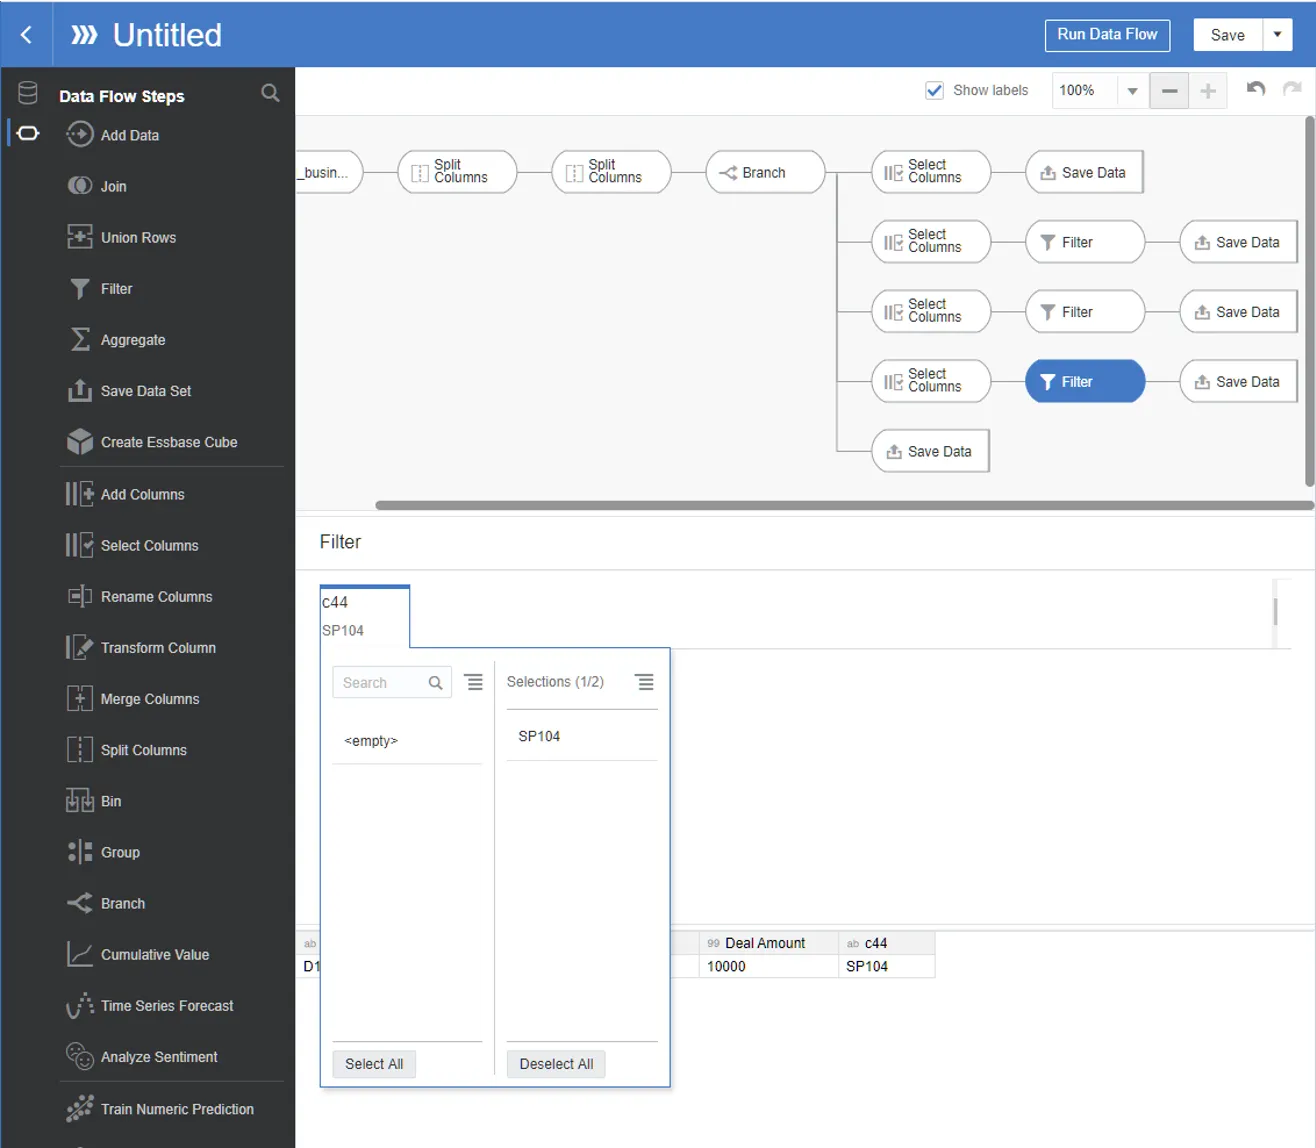
Add step to 4th branch —> select “Select Columns” —> Select c44 column only
Add step in 4th branch —> select Filter —> Select only Non-empty value
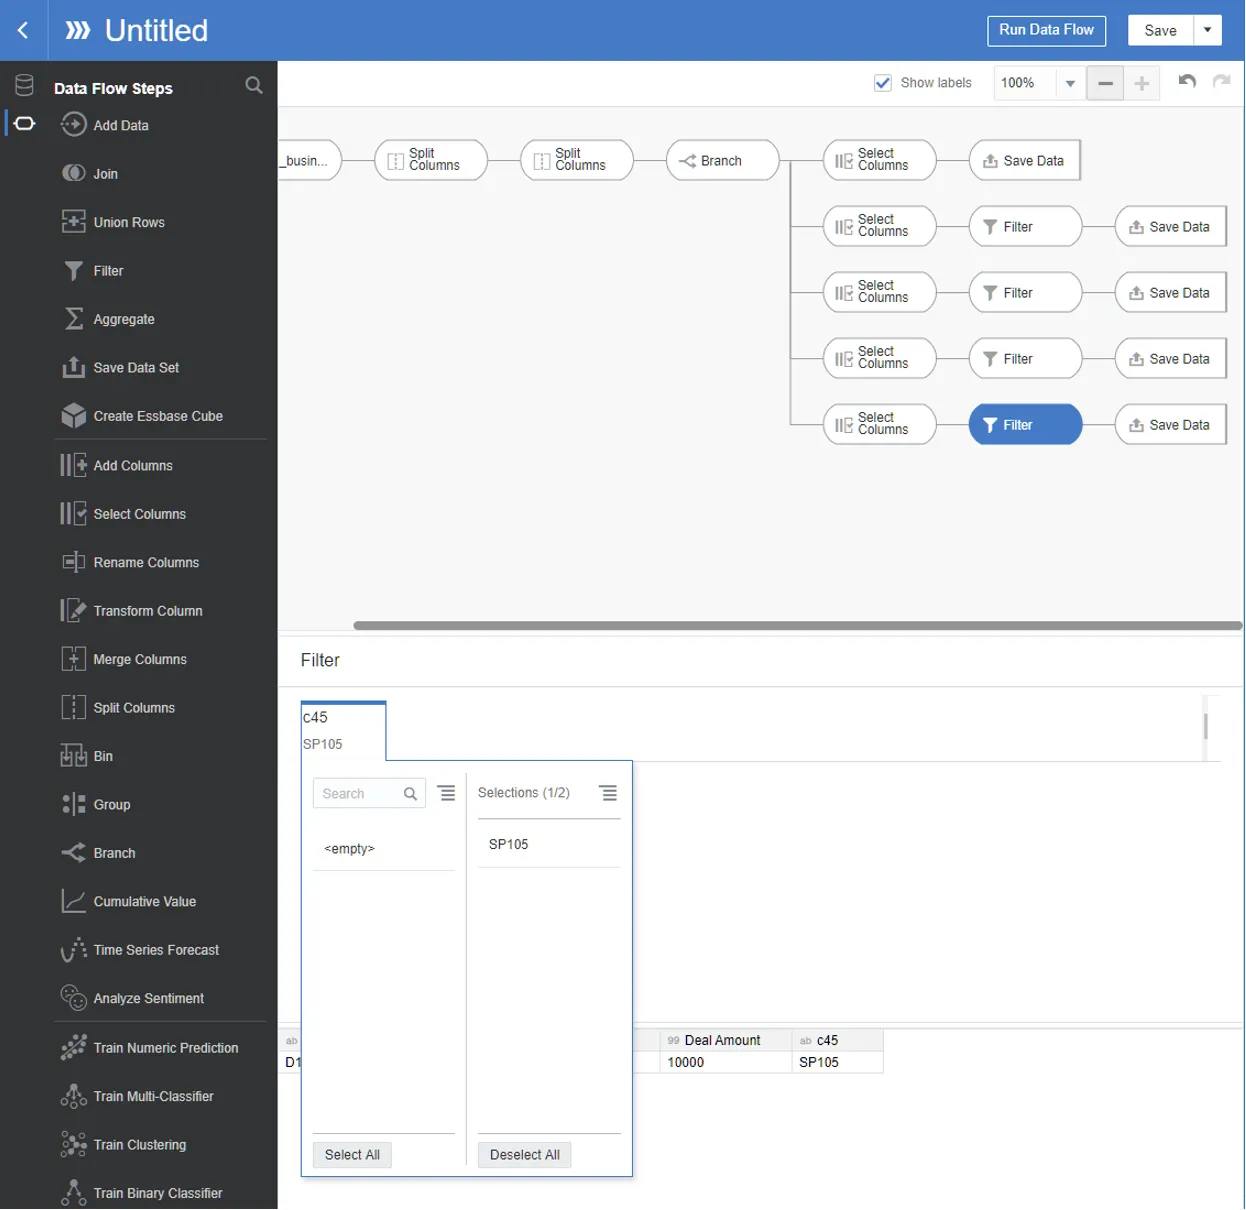
Add step to 5th branch —> select “Select Columns” —> Select c45

Select non empty value
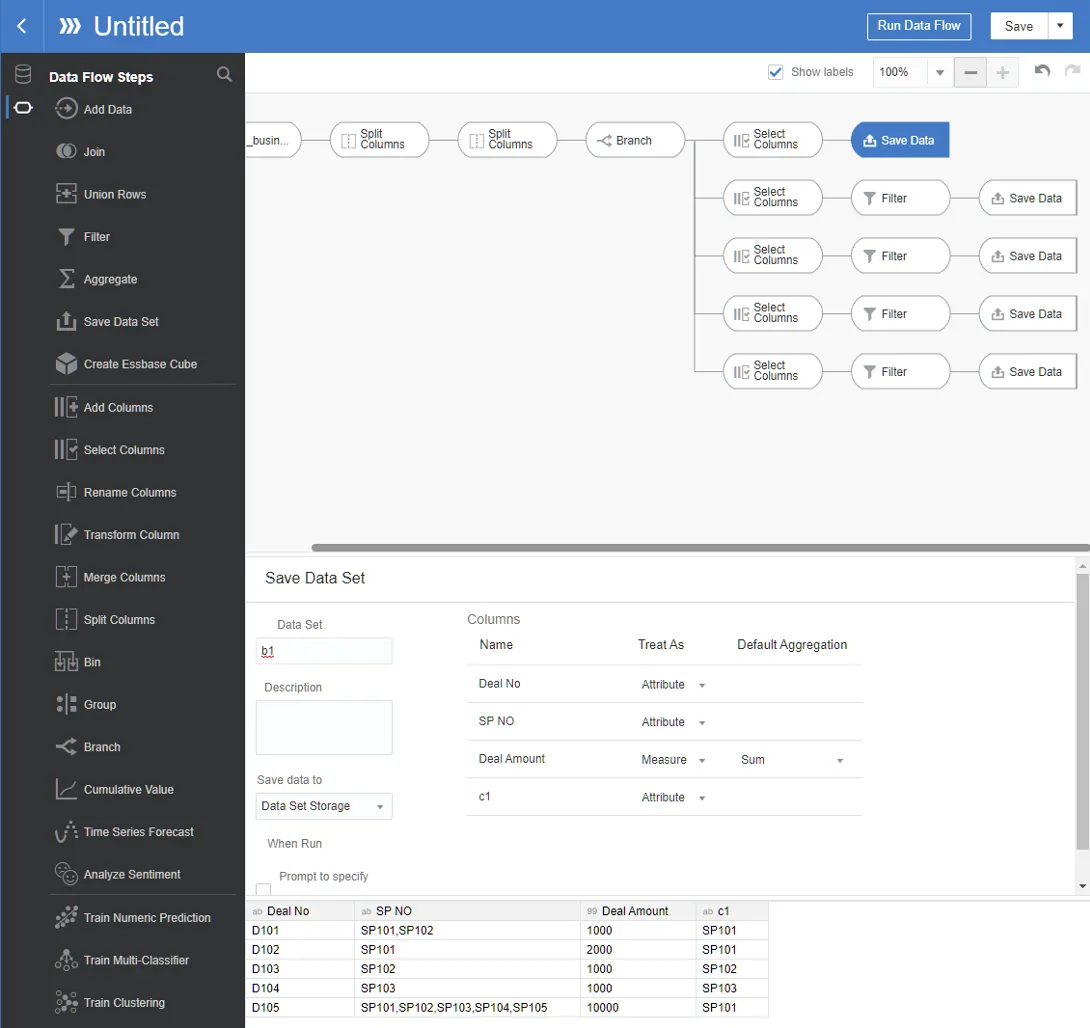
Save Data in 1st branch. Specify Data Set name as b1.
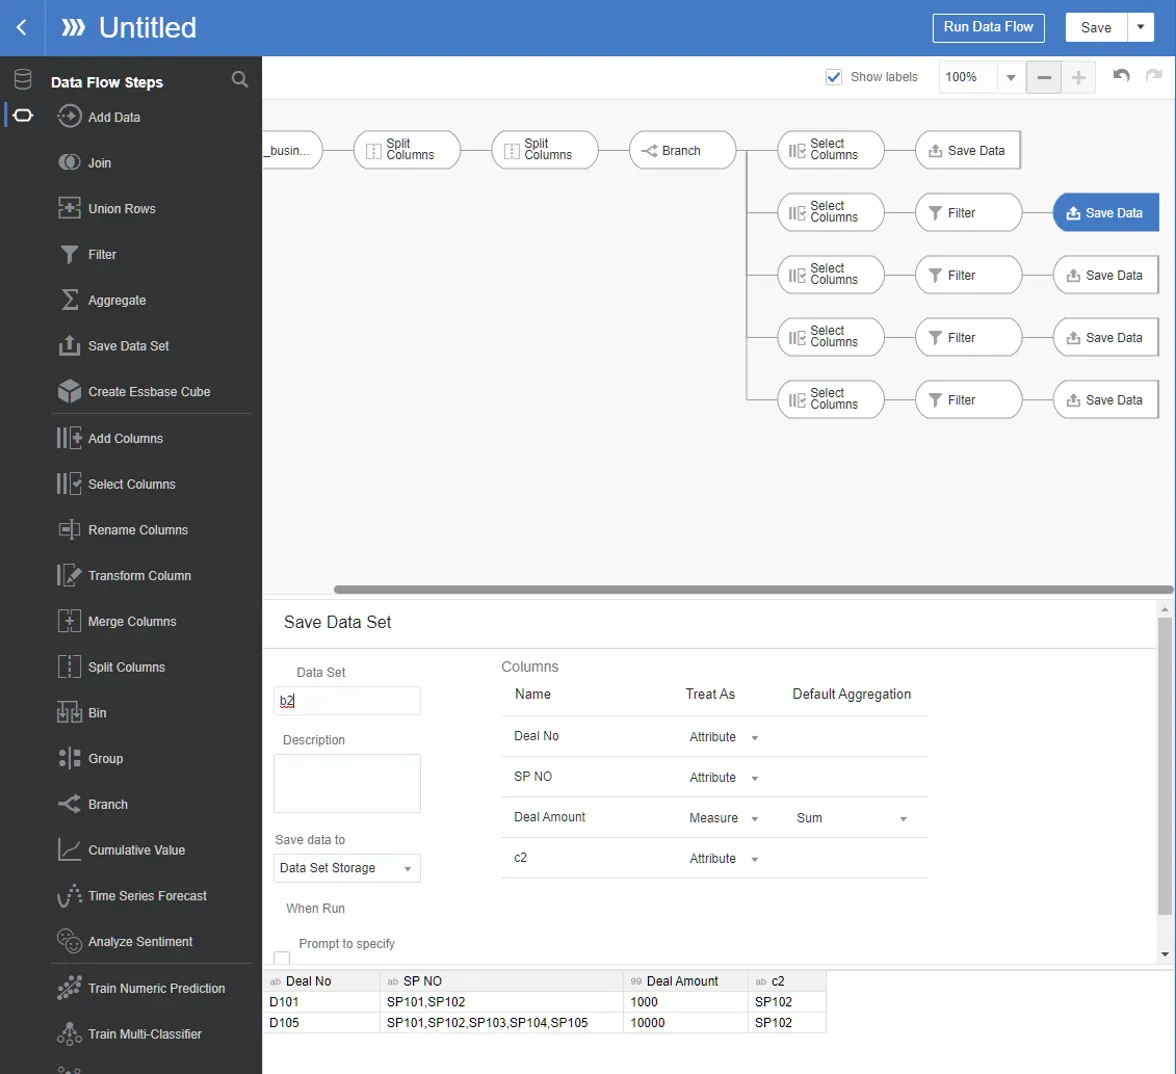
Save data in 2nd branch —> Name it as b2
Save Data in 3rd branch —> Name it b3
Save data in 4th branch and Name it b4
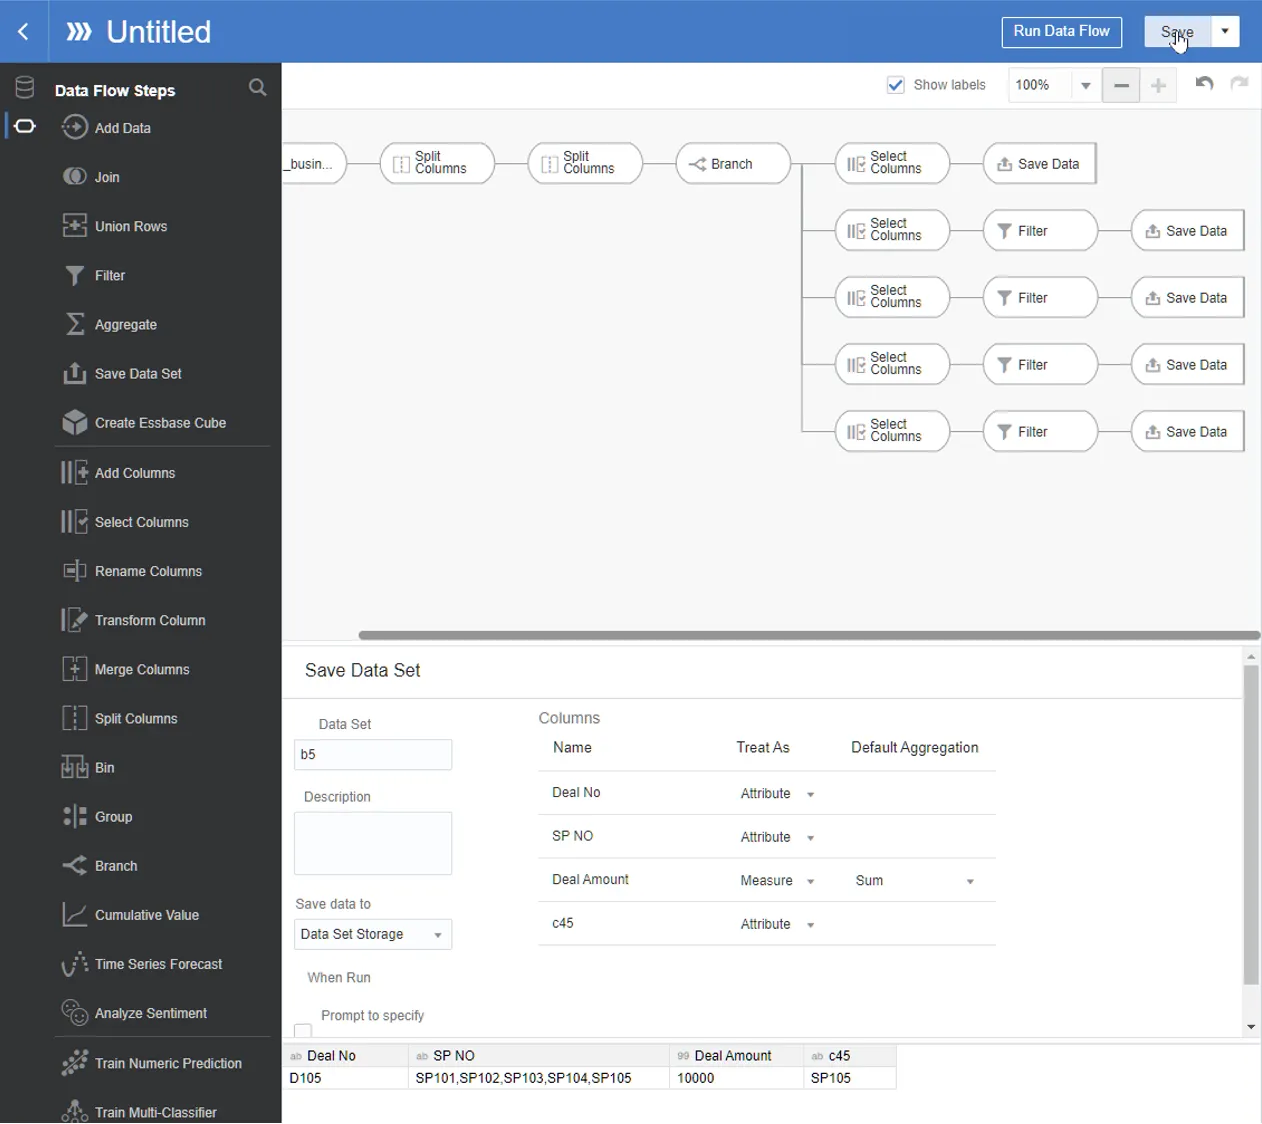
Save data in 5th branch and Name it b5
8.
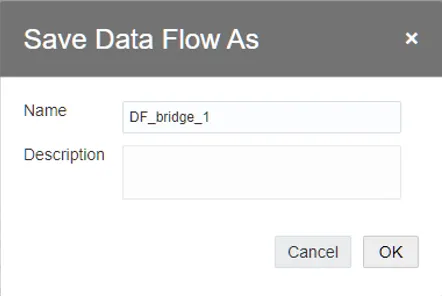
Save and run this Data Flow (DF_bridge_1).
Here is the entire steps completed for DF_bridge_1 data flow
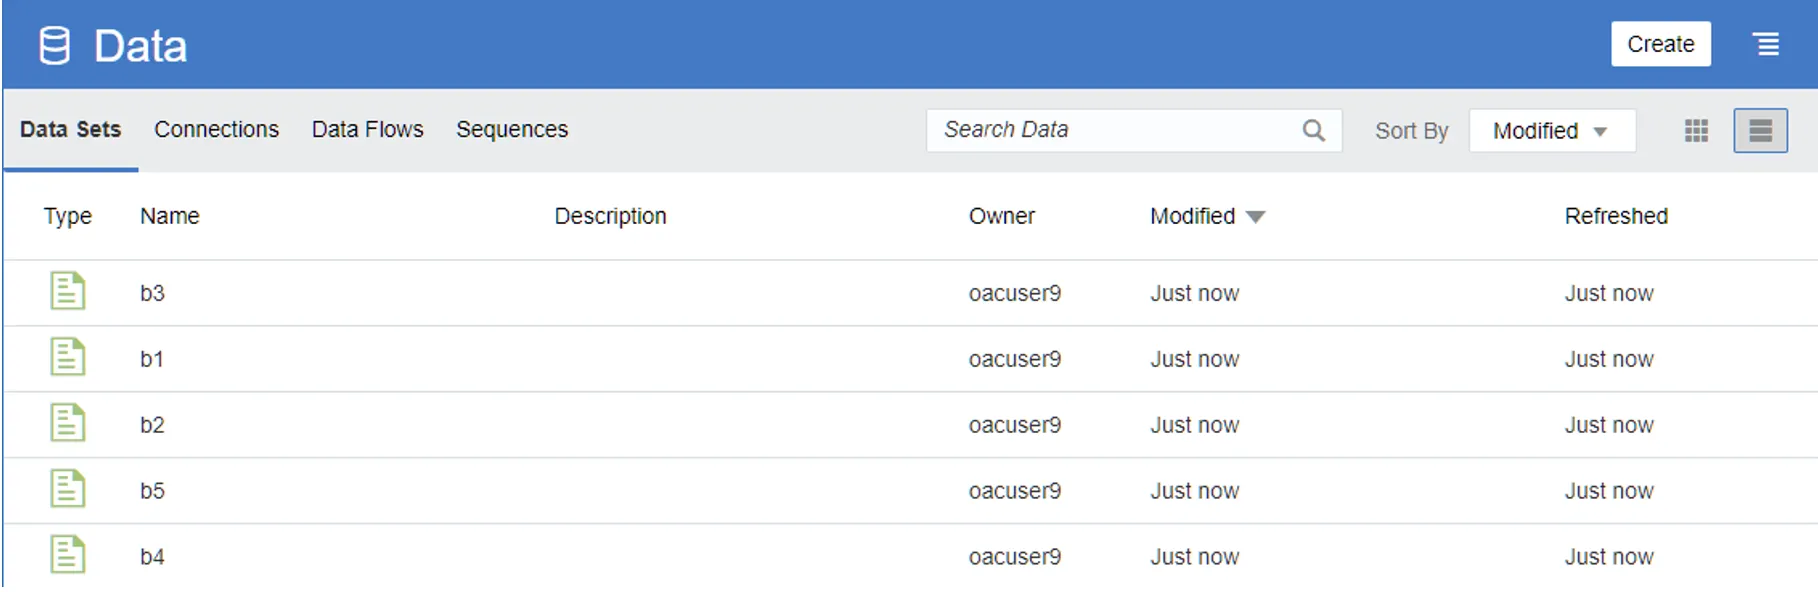
Run Data Flow to create temp data sets as defined in the previous steps

When completed, check if the data sets are created
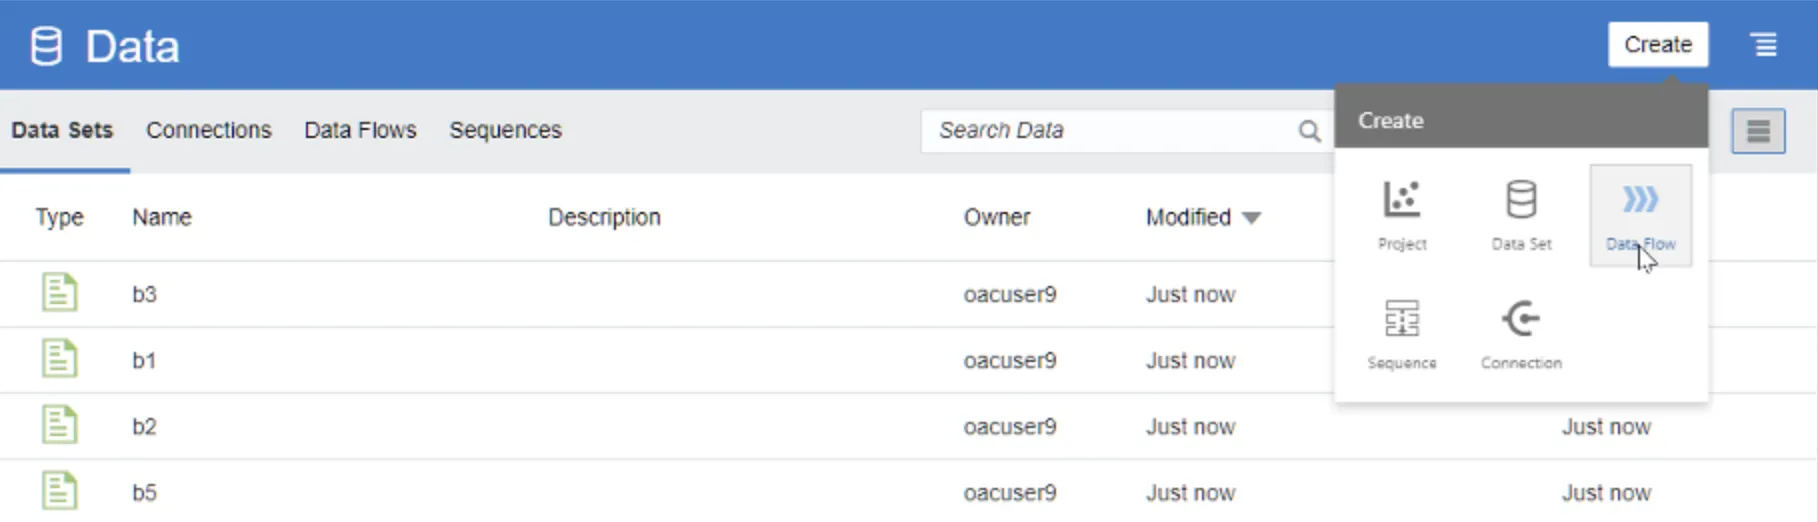
9.
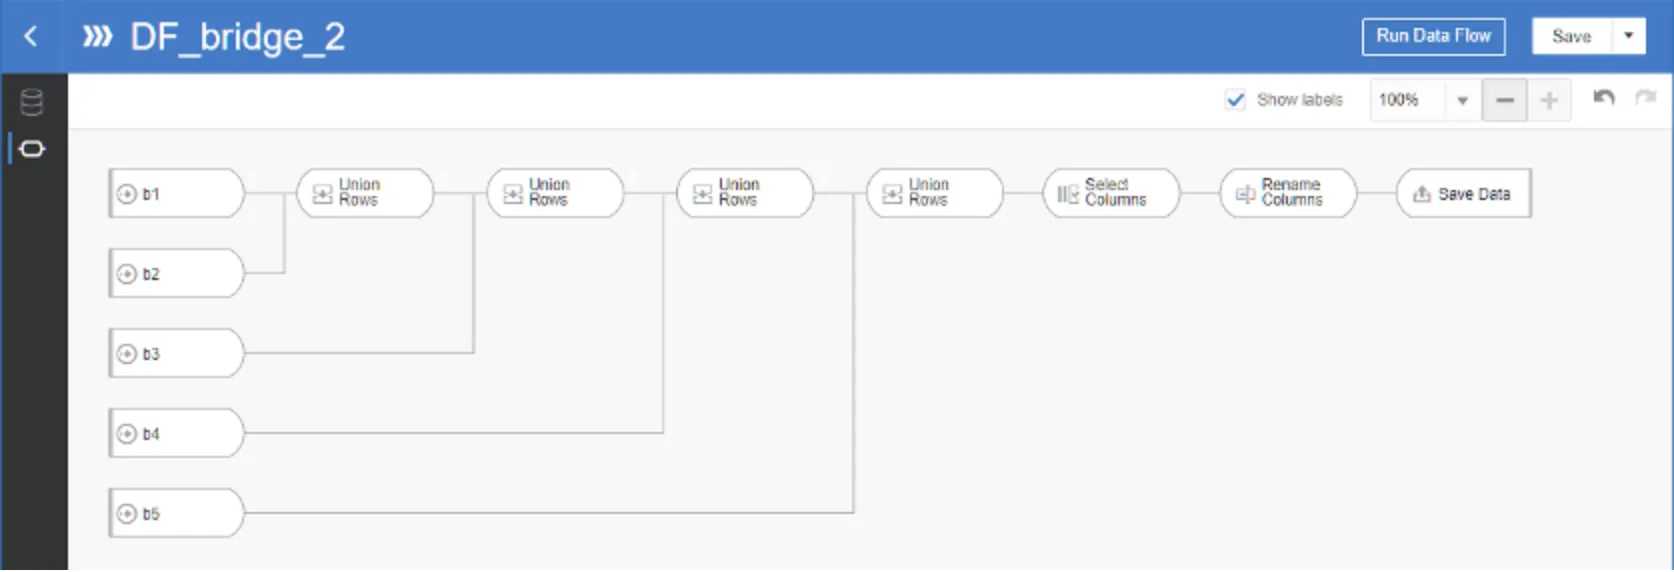
Create a second Data Flow to consolidate the temporary datasets:
Select b1 data set
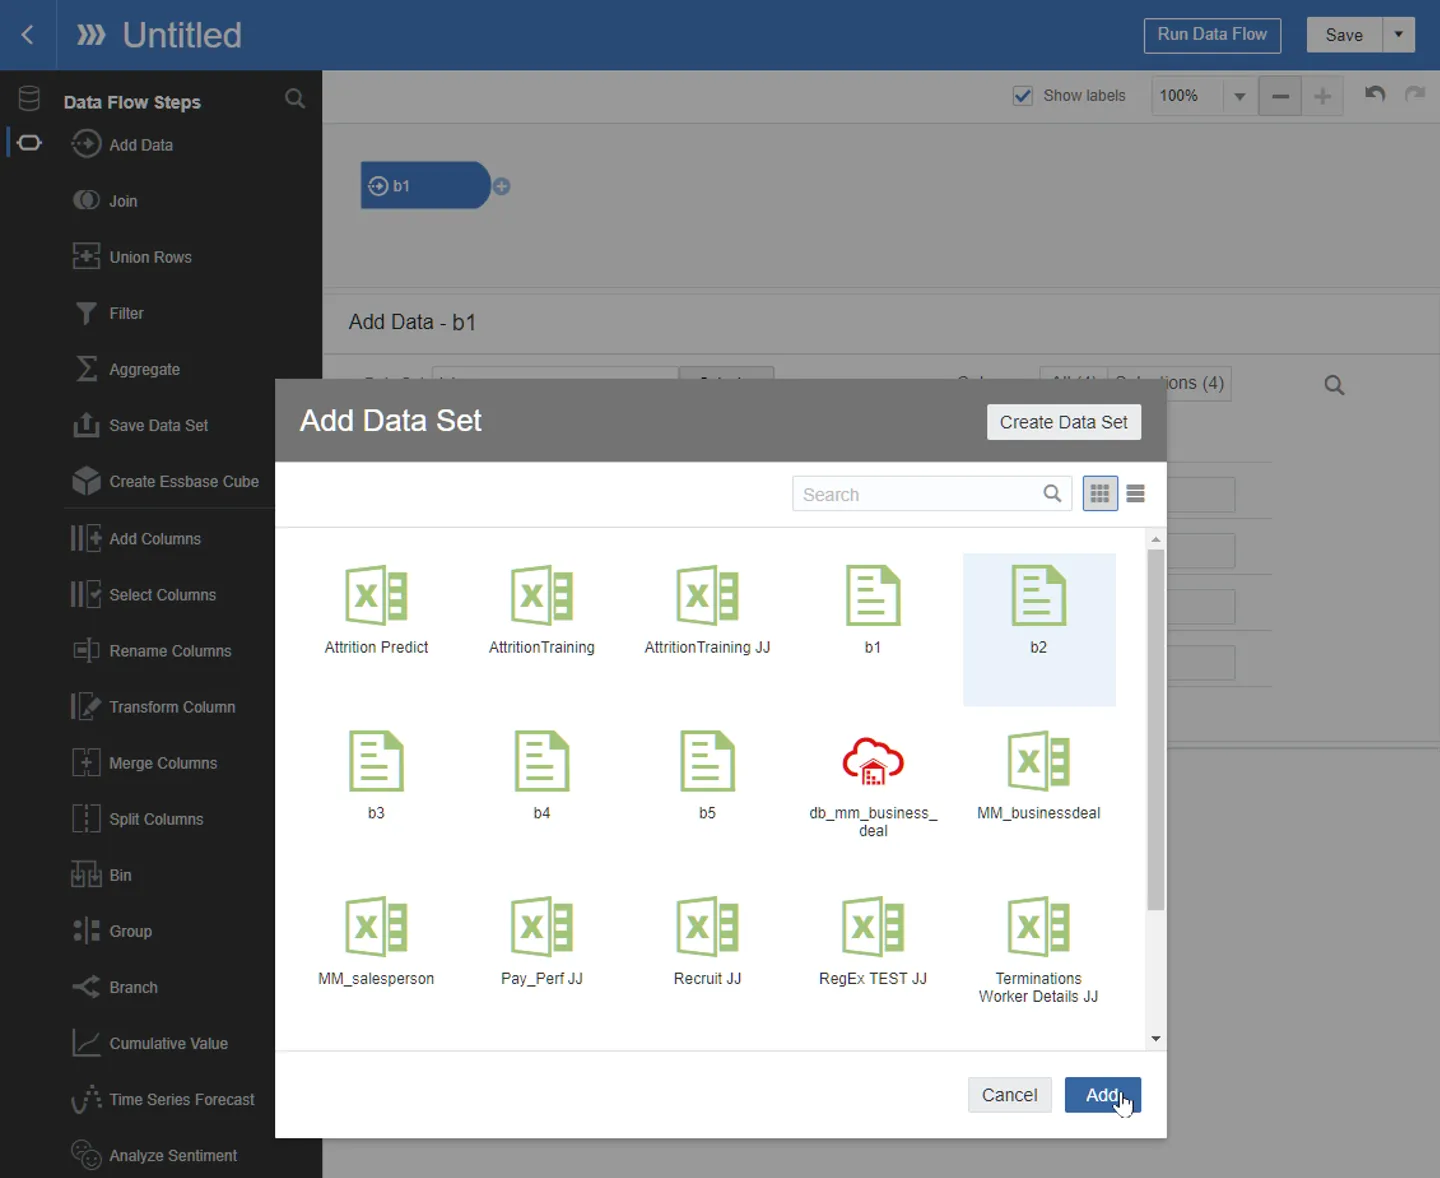
Add Data
Select b2
Repeat to select b3, b4, b5 data set

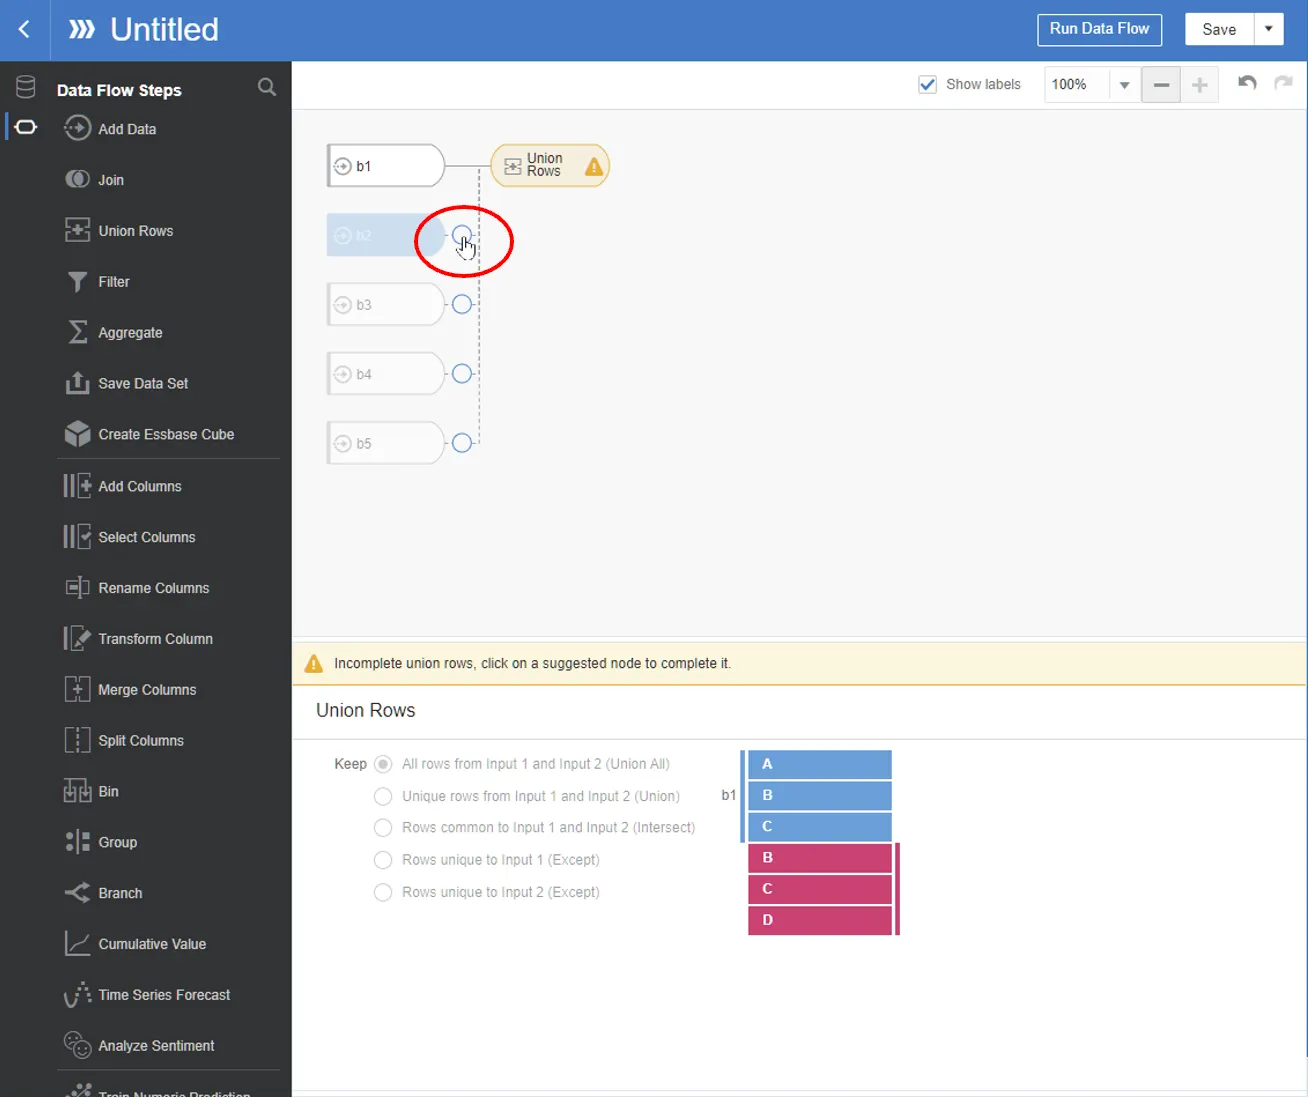
In b1, add step for Union Rows

Select to include b2
Add step —> select Union Rows

Select b3
Add step —> select Union Rows

Select b4
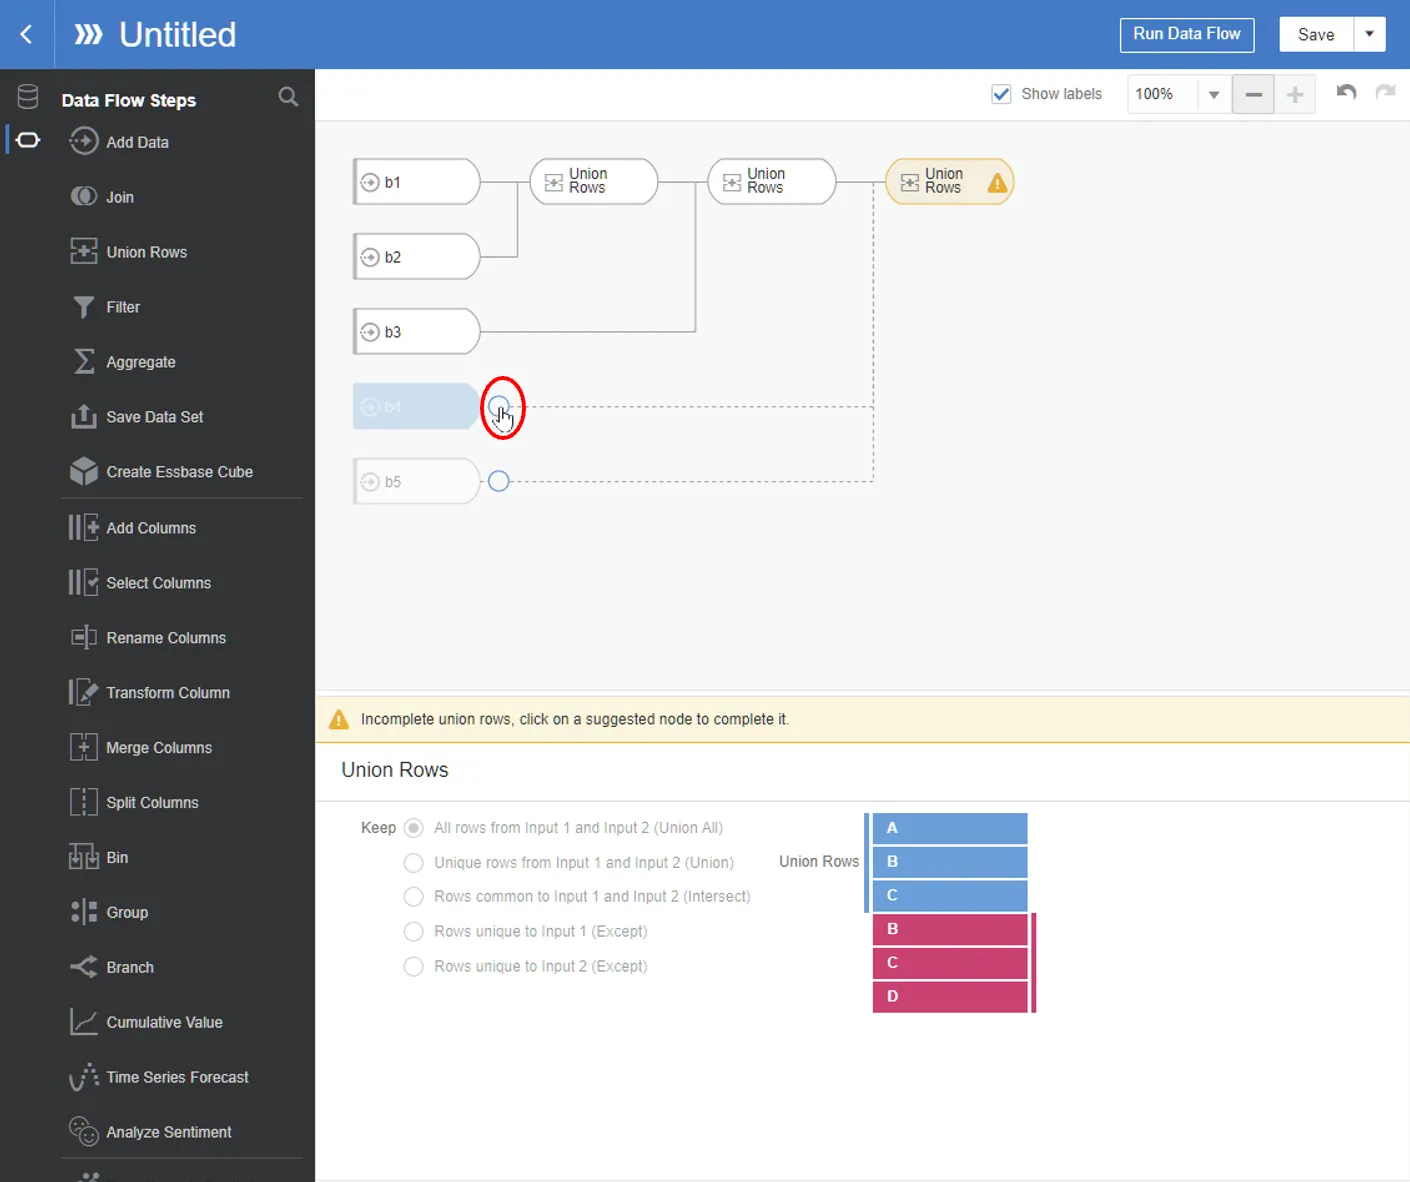
Add step —> select Union Rows
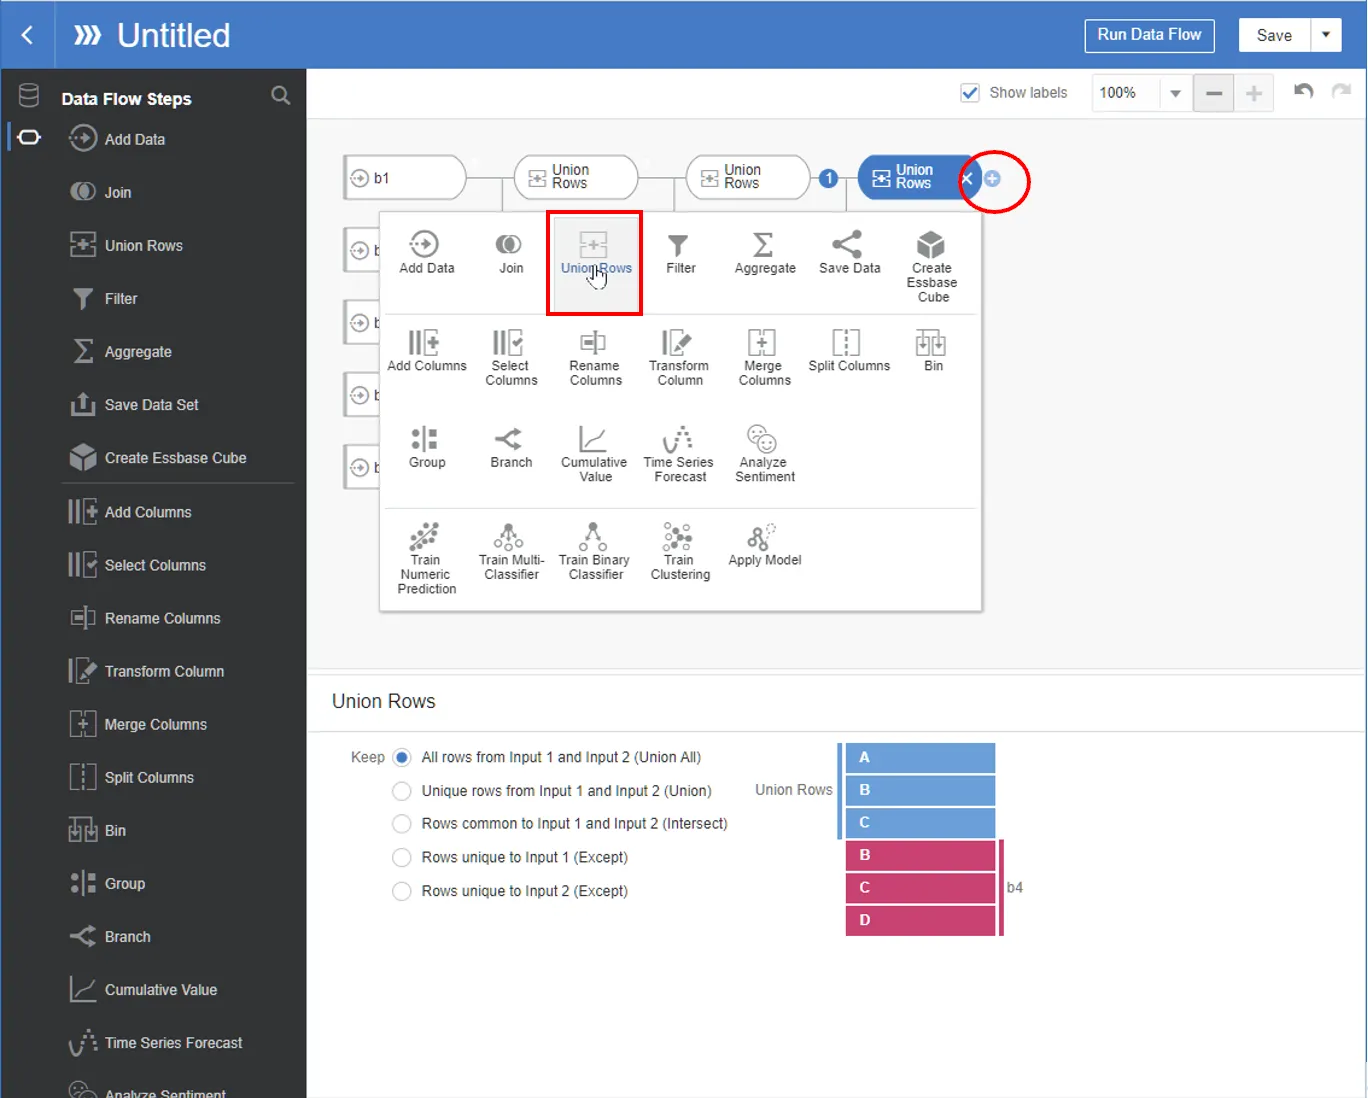
Select b5
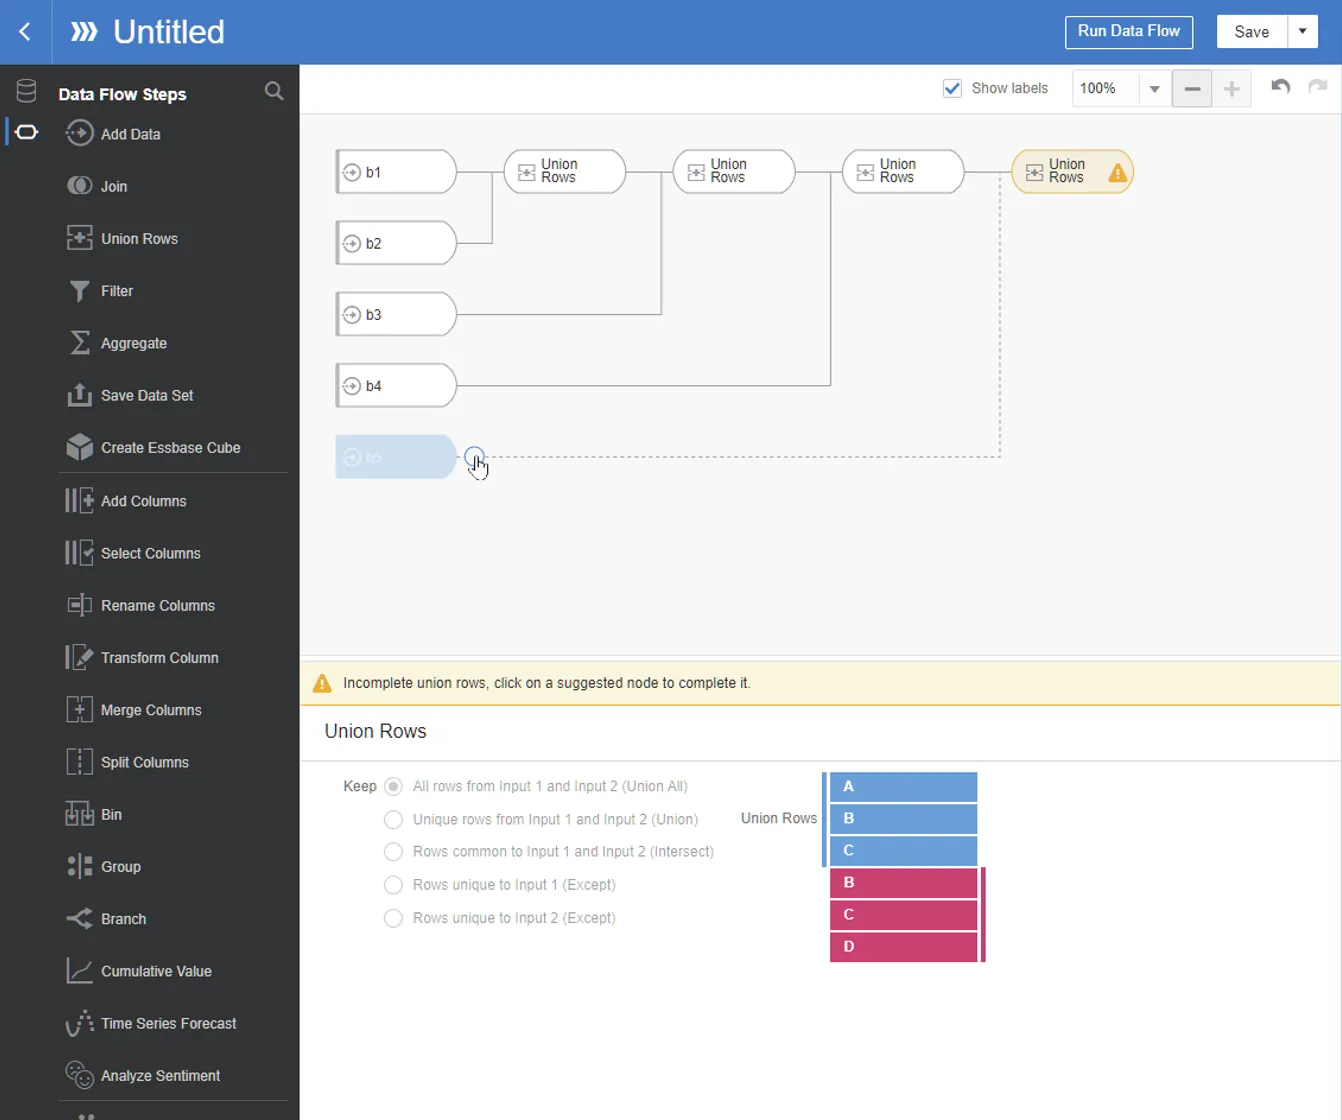
Add step —> select Select Columns —> select Deal No, Deal Amount and c1
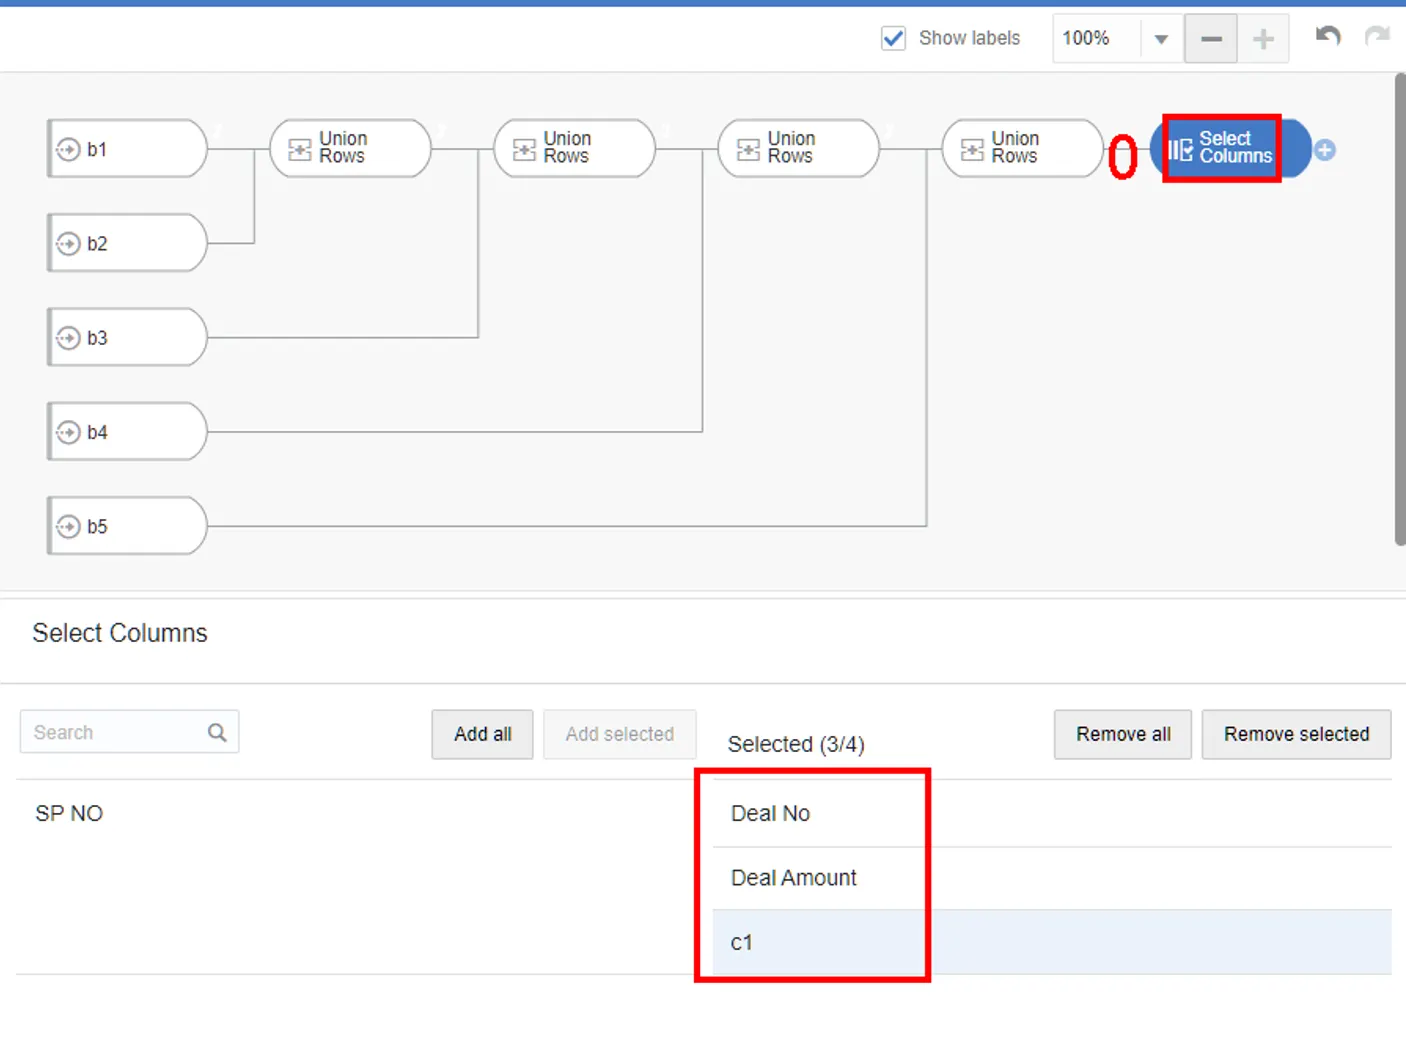
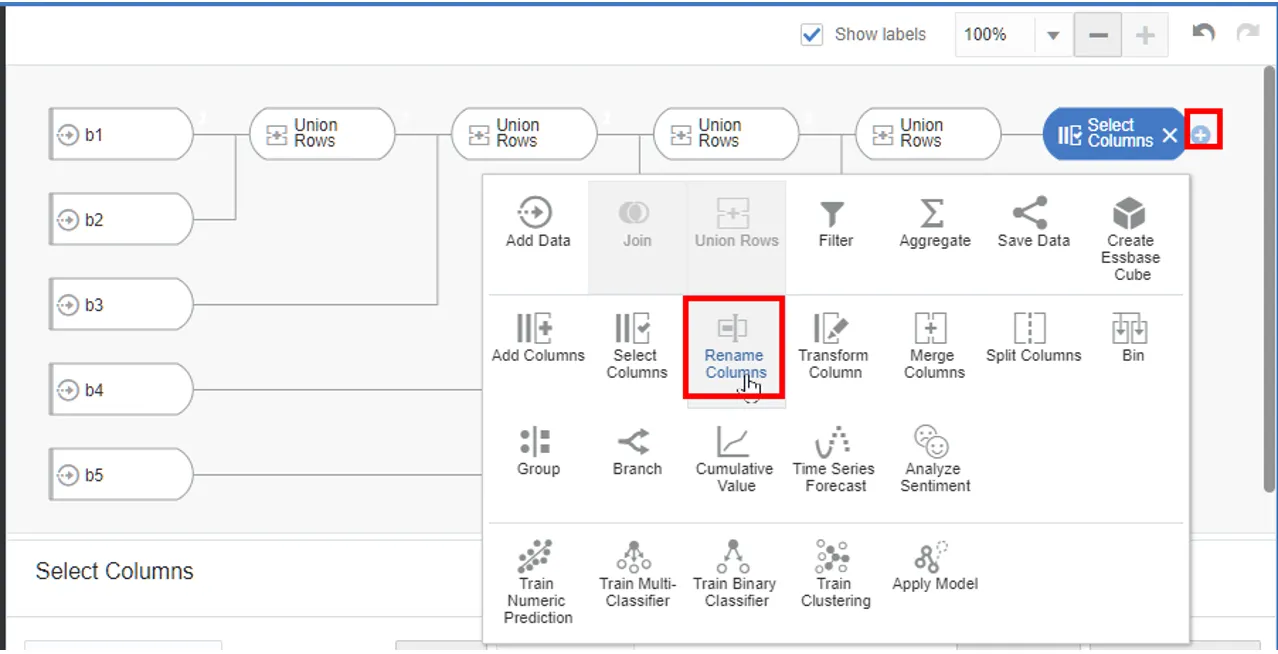
Add step —> select Rename Columns
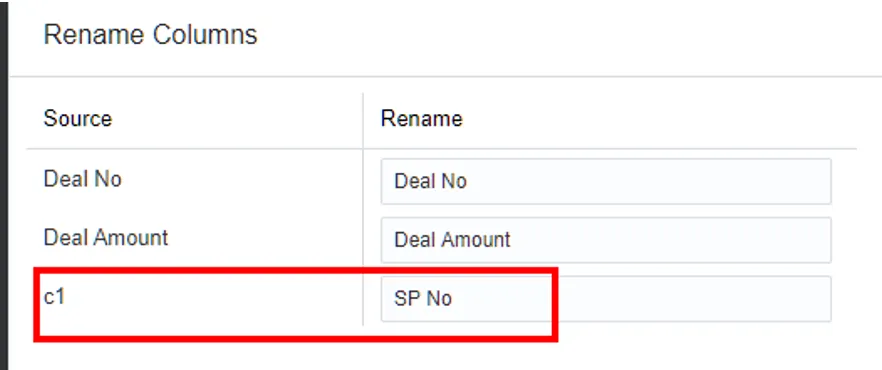
Change c1 to “SP No”
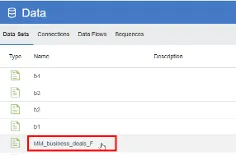
Add step —> select Save Data
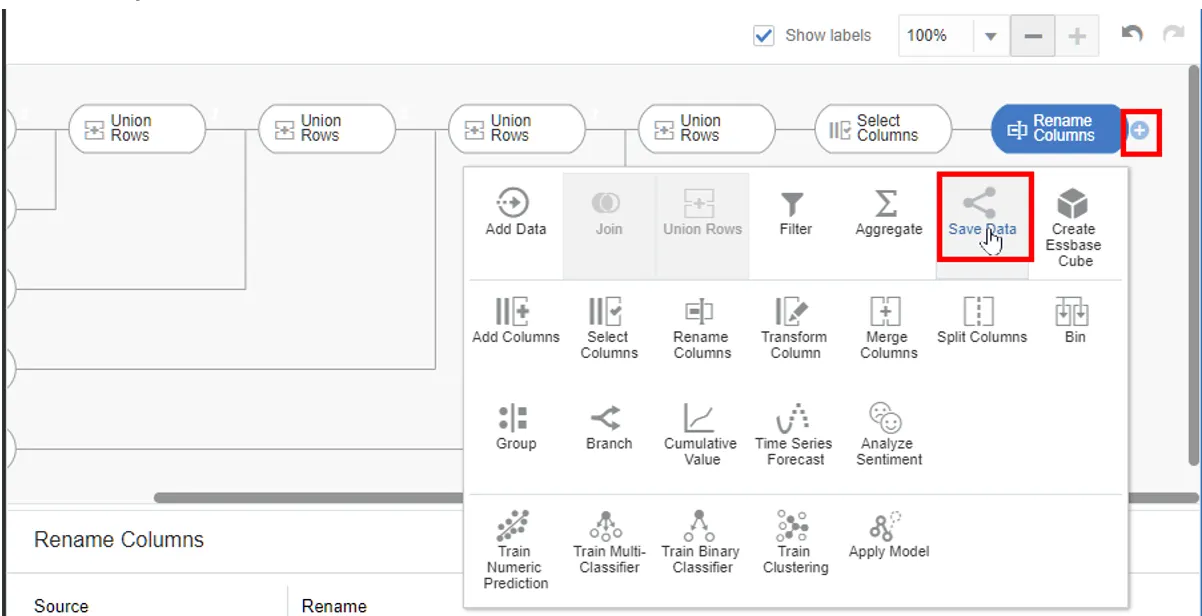
10.
Define the final dataset as MM_business_deals_F:

11.
Save and run this Data Flow (DF_bridge_2).
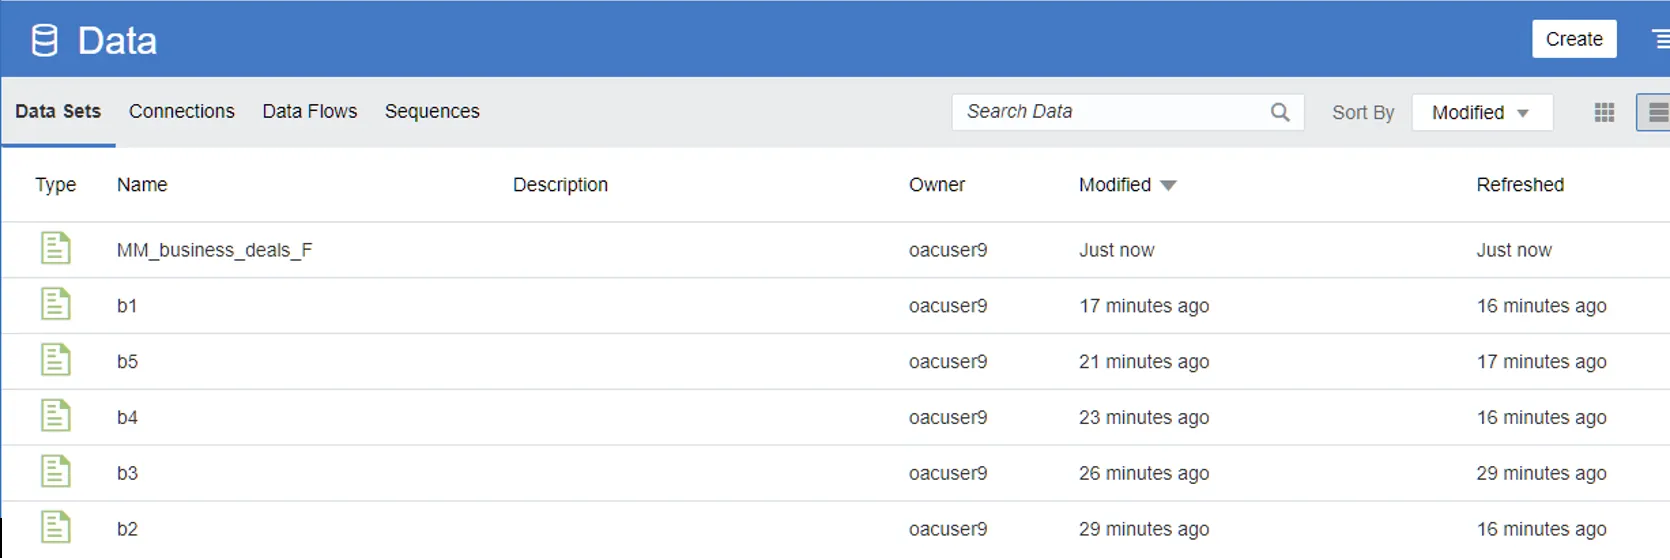
You will see the data set has been created in Data tab
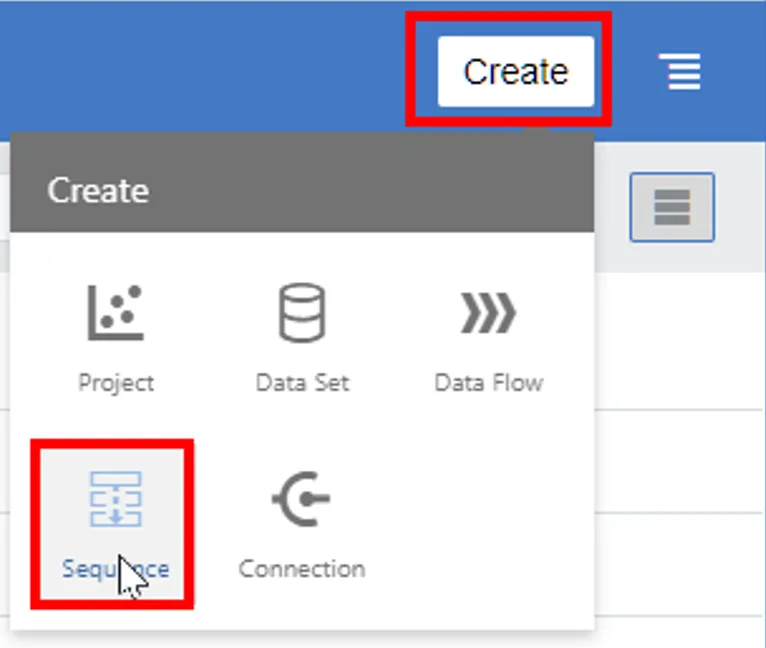
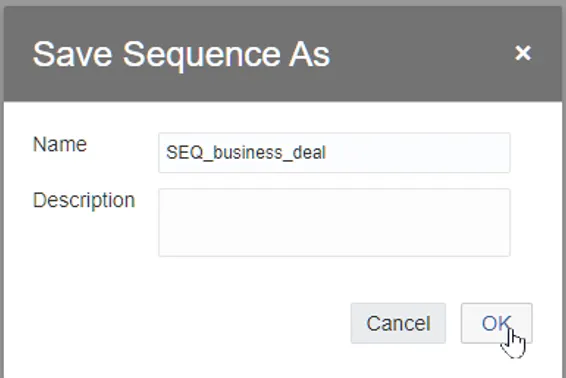
5. Creating a Sequence
To ensure both data flows run in series, we can create a sequence:
1.
Create a new sequence:
2.
Add both data flows to the sequence:
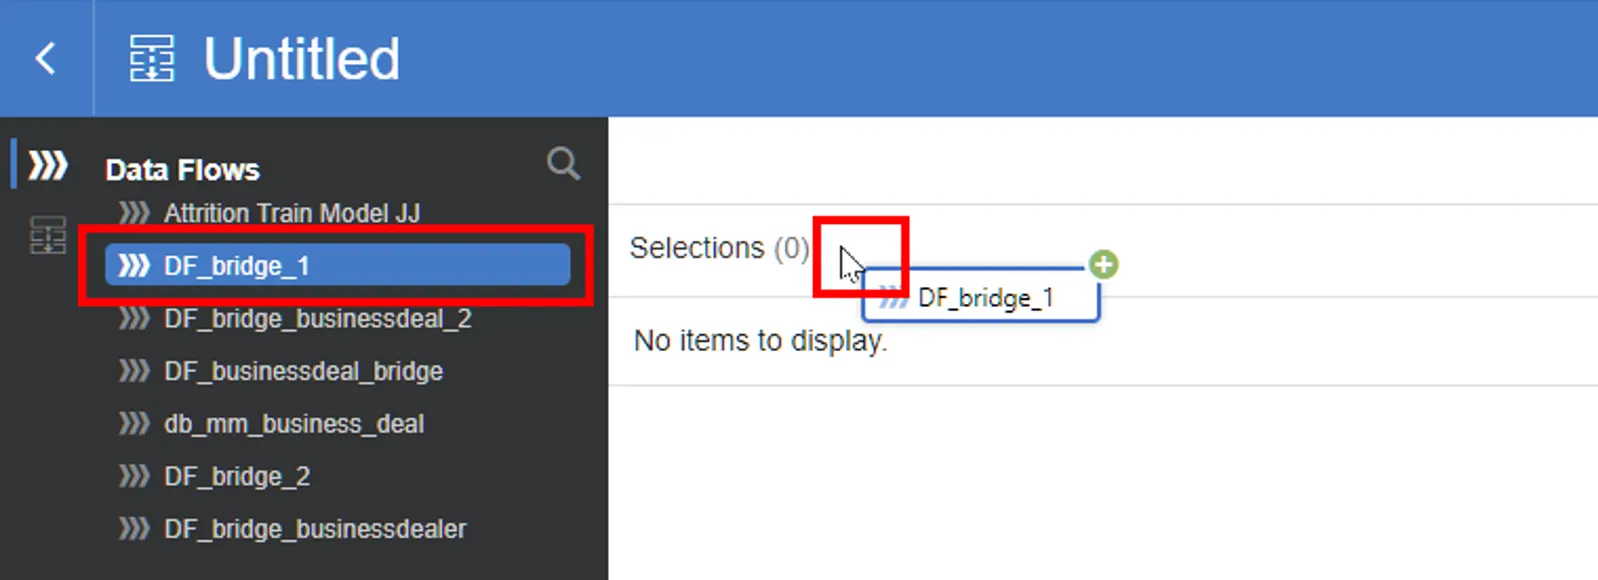
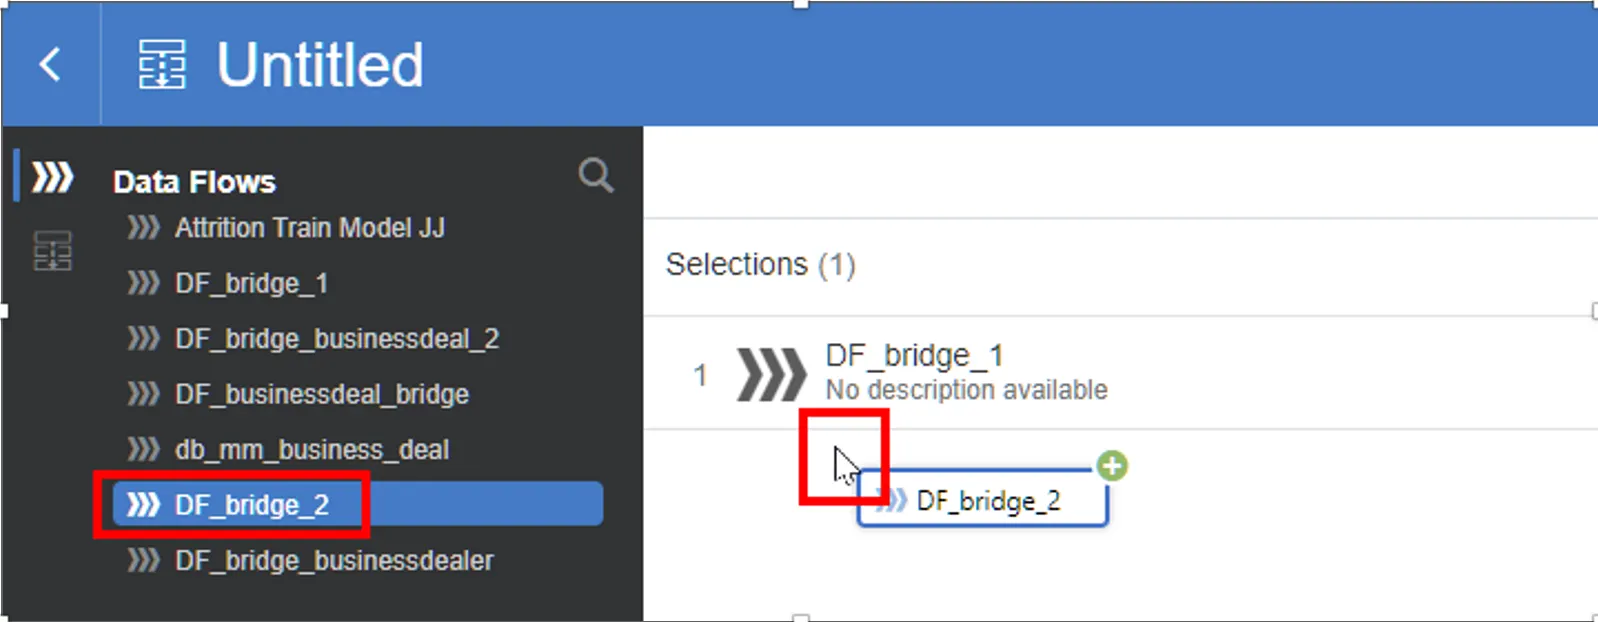
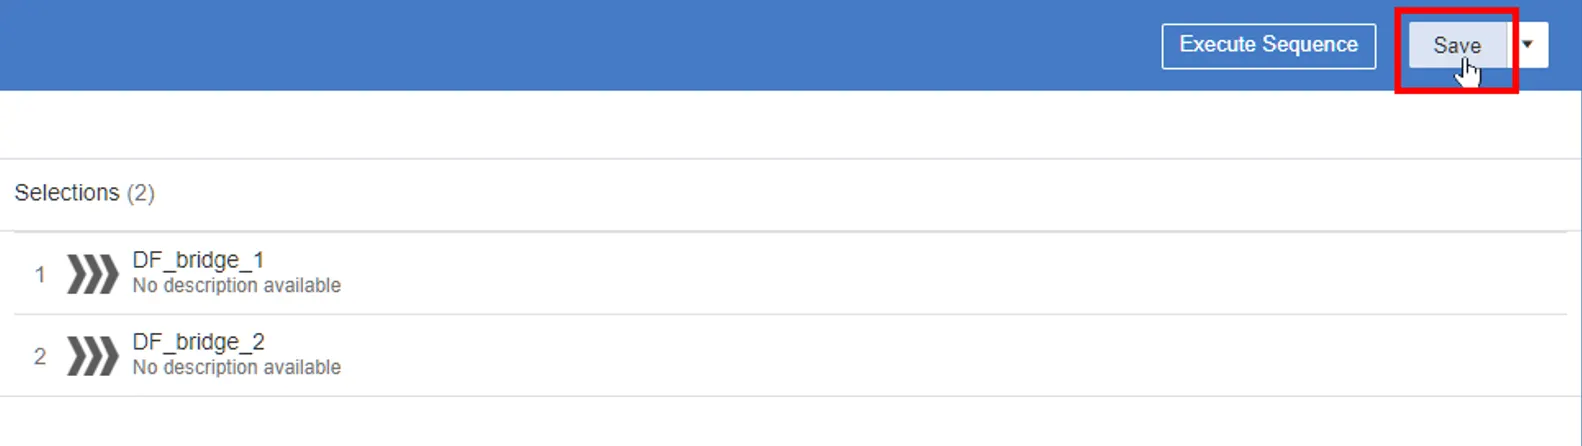
3.
Save and run the sequence to generate your final bridge dataset.

6. Building Visualizations
Now that we have our datasets, let's build some visualizations:
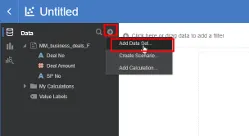
1.
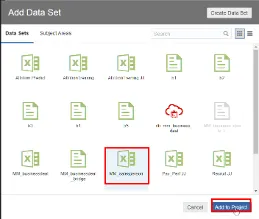
Create a new project using the MM_business_deals_F dataset:
2.
Add the MM_salesperson dataset to the project:
3.
OAC should automatically create a connection between the datasets:
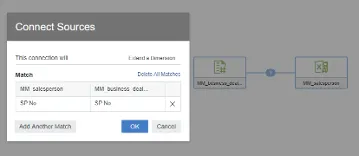

4.
If the datasets are not joined automatically, go to the Prepare tab and join them manually:

5.
When creating visuals, note that the data blending option is set to Auto by default. You can change this if needed.
7. Conclusion
In this comprehensive guide, we've walked through the entire process of implementing M:M relationships in Oracle Analytics Cloud. We've covered creating basic datasets, using Data Flows to generate a bridge dataset, creating sequences for automated processing, and building visualizations with the resulting datasets.
This approach allows for flexible and powerful analysis of complex relationships within your data. By mastering these techniques, you'll be able to handle sophisticated data models and extract deeper insights from your business data.
Remember, while this guide provides a solid foundation, OAC offers many more features and options for customization. Don't hesitate to explore and experiment with different approaches to find what works best for your specific data and analysis needs.
If you have any questions or need further clarification on any step, please feel free to ask. Happy analyzing!