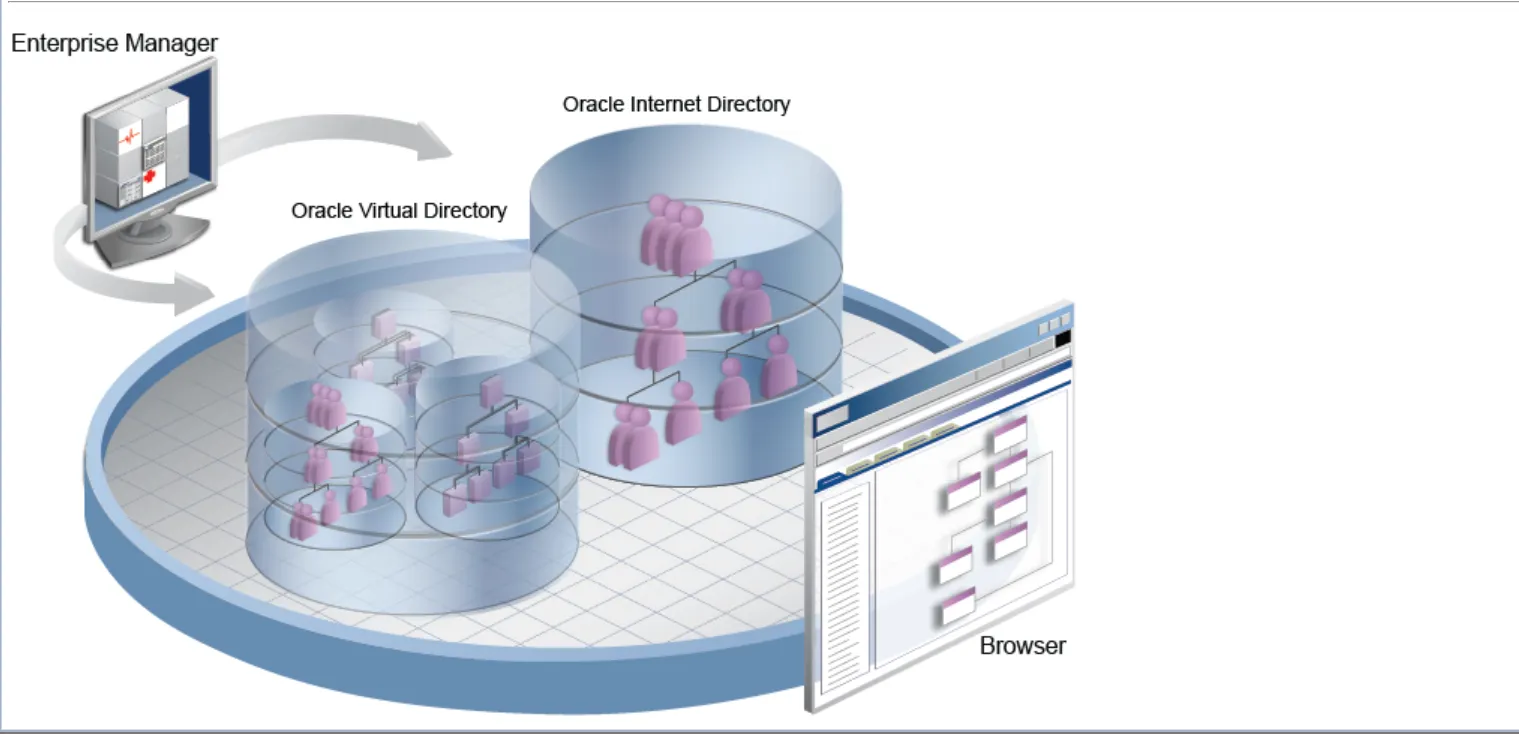
Welcome to this detailed guide on installing and configuring Oracle Internet Directory (OID) versions 12.2.1.3.0/12.2.1.4.0. This guide focuses on collocated installation in a Linux environment and includes detailed explanations, precautions, and troubleshooting tips for each step.
Table of Contents
1. Prerequisites
Before starting the OID installation, ensure you have completed the following prerequisites. Careful attention to these requirements will prevent many potential issues during installation.
1.1 System Requirements
•
Operating System: Oracle Linux 7 or Red Hat Enterprise Linux 7 recommended. Check Oracle's official support matrix for other Linux distributions.
•
Hardware Requirements:
◦
CPU: Minimum 2 cores, recommended 4+ cores
◦
RAM: Minimum 4GB, recommended 8GB+ (16GB+ recommended for production)
◦
Disk Space: Minimum 10GB for Oracle Home, plus 10GB+ for domain configuration and logs
•
Swap Space: Equal to RAM size or minimum 4GB
You can verify system specifications using these commands:
# Check CPU information
lscpu
# Check memory information
free -h
# Check disk space
df -h
# Check swap space
swapon --show
Bash
복사
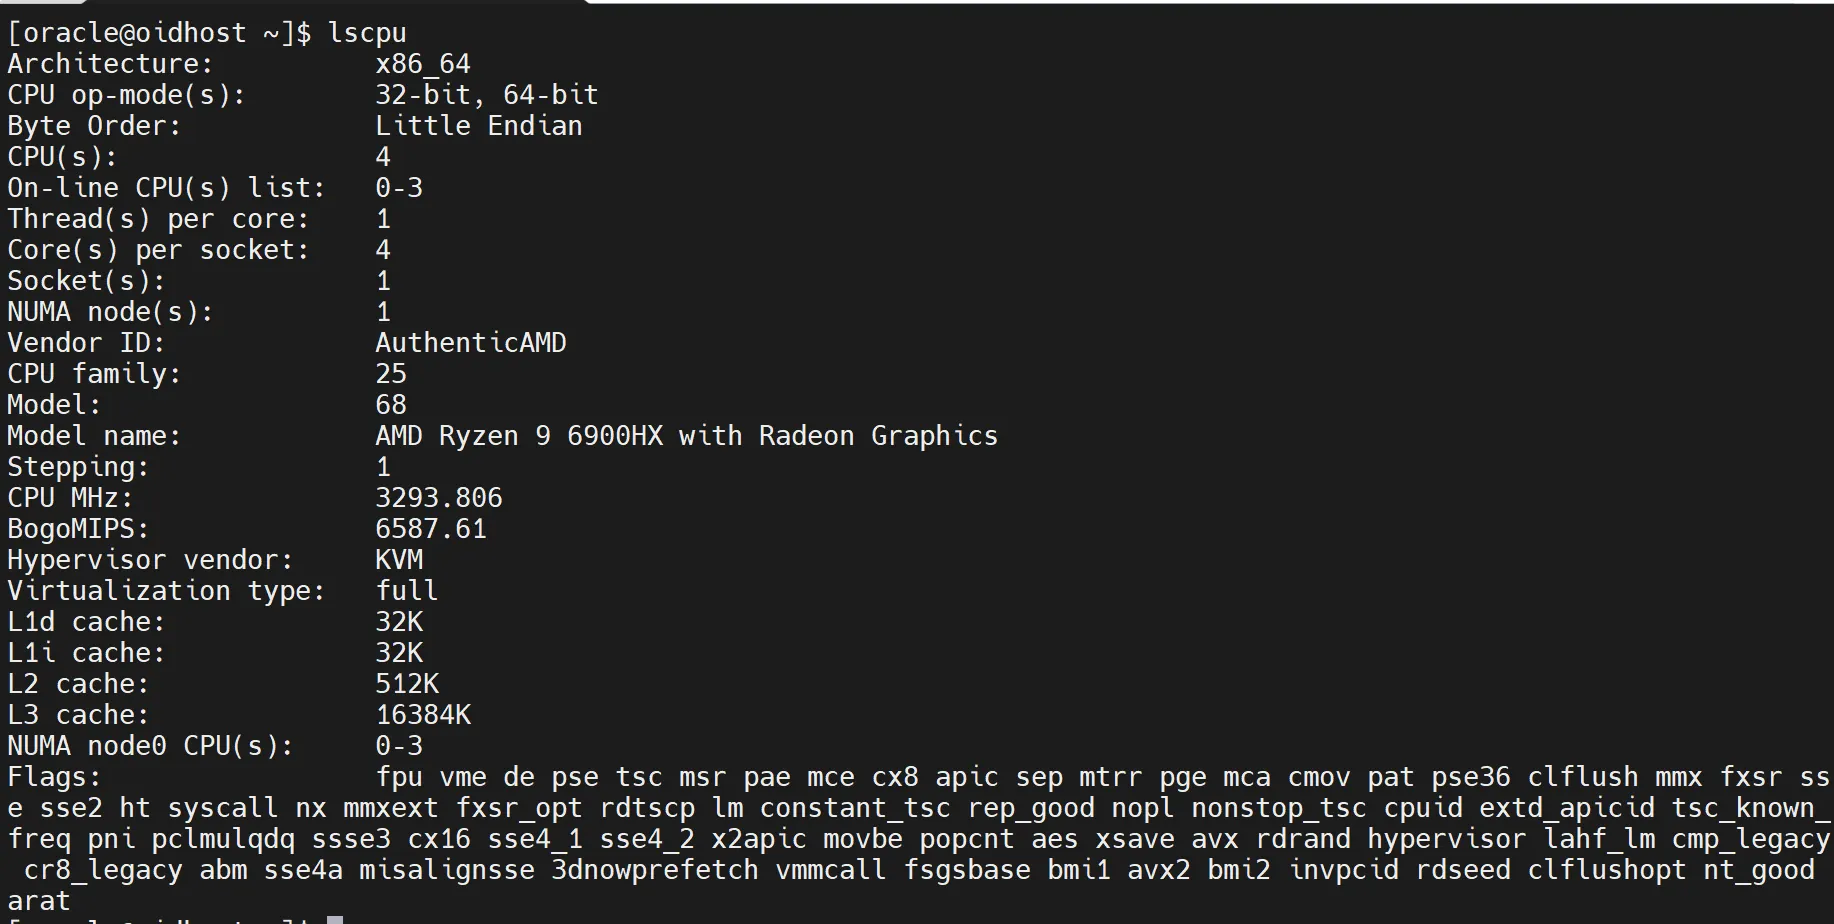
[Screenshot: System specification check command results - lscpu]

[Screenshot: System specification check command results - free]

[Screenshot: System specification check command results - df]

[Screenshot: System specification check command results - swapon]
1.2 Required Linux Packages
OID 12c requires the following packages. Install them using:
sudo yum install -y binutils compat-libcap1 compat-libstdc++-33 gcc gcc-c++ glibc \
glibc-devel ksh libaio libaio-devel libgcc libstdc++ libstdc++-devel make sysstat
Bash
복사
Verify the installation with:
rpm -q binutils compat-libcap1 compat-libstdc++-33 gcc gcc-c++ glibc glibc-devel ksh libaio libaio-devel libgcc libstdc++ libstdc++-devel make sysstat
Bash
복사
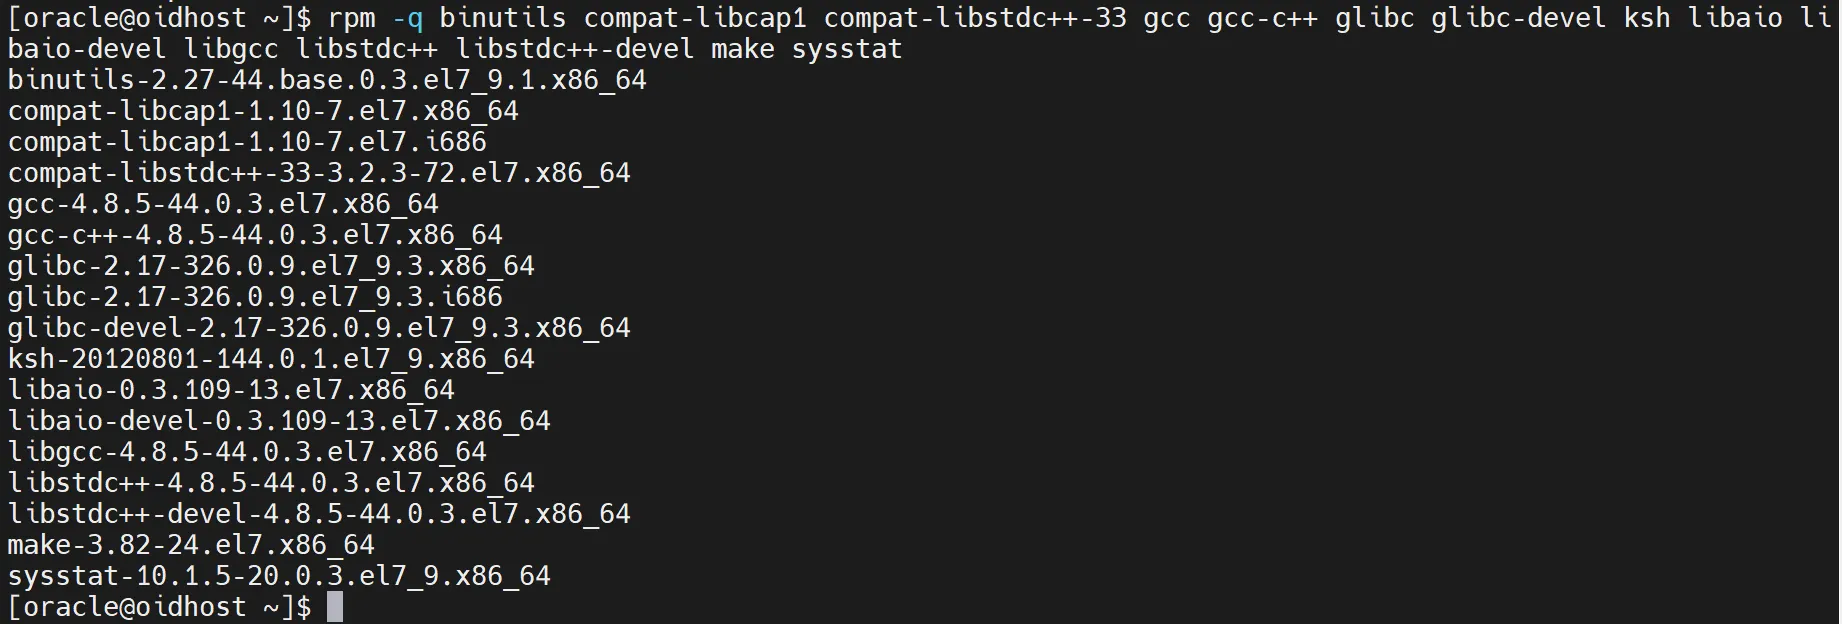
[Screenshot: Package installation verification results]
1.3 User and Group Creation
Create dedicated users and groups for running OID:
# Create groups
sudo groupadd oinstall
sudo groupadd dba
# Create user
sudo useradd -g oinstall -G dba oracle
# Set password
sudo passwd oracle
Bash
복사
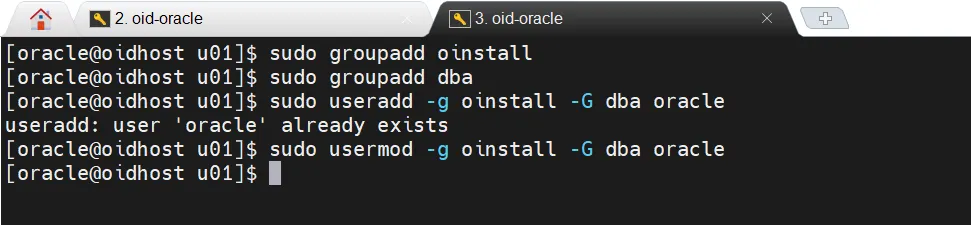
User and group creation screen - oracle/oinstall/dba
1.4 Kernel Parameters
Edit /etc/sysctl.conf and add/modify these parameters:
fs.aio-max-nr = 1048576
fs.file-max = 6815744
kernel.shmall = 2097152
kernel.shmmax = 4294967295
kernel.shmmni = 4096
kernel.sem = 250 32000 100 128
net.ipv4.ip_local_port_range = 9000 65500
net.core.rmem_default = 262144
net.core.rmem_max = 4194304
net.core.wmem_default = 262144
net.core.wmem_max = 1048586
Bash
복사
Apply changes:
sudo sysctl -p
Bash
복사
1.5 Resource Limits
Edit /etc/security/limits.conf and add:
oracle soft nofile 1024
oracle hard nofile 65536
oracle soft nproc 16384
oracle hard nproc 16384
oracle soft stack 10240
oracle hard stack 32768
Bash
복사
1.6 JDK Installation
OID 12c requires JDK 8 or higher. Follow these steps:
1.
Download appropriate JDK from Oracle website or use OpenJDK
2.
Extract to desired location (e.g., /usr/java/jdk1.8.0_xxx)
3.
Set environment variables:
export JAVA_HOME=/usr/java/jdk1.8.0_xxx
export PATH=$JAVA_HOME/bin:$PATH
Bash
복사
4.
Verify installation:
java -version
Bash
복사

[Screenshot: Java version information output]
1.7 Oracle Database Installation and Configuration
OID requires a supported Oracle Database. Here's a brief overview of database setup:
1.
OID requires a supported Oracle Database. Here's a brief overview of database setup:
2.
Install Oracle Database 12c or higher
3.
Create a new database instance for OID
4.
Verify the database is configured with:
•
AL32UTF8 as the database character set
•
Minimum 400MB of memory
•
Minimum 1GB of disk space
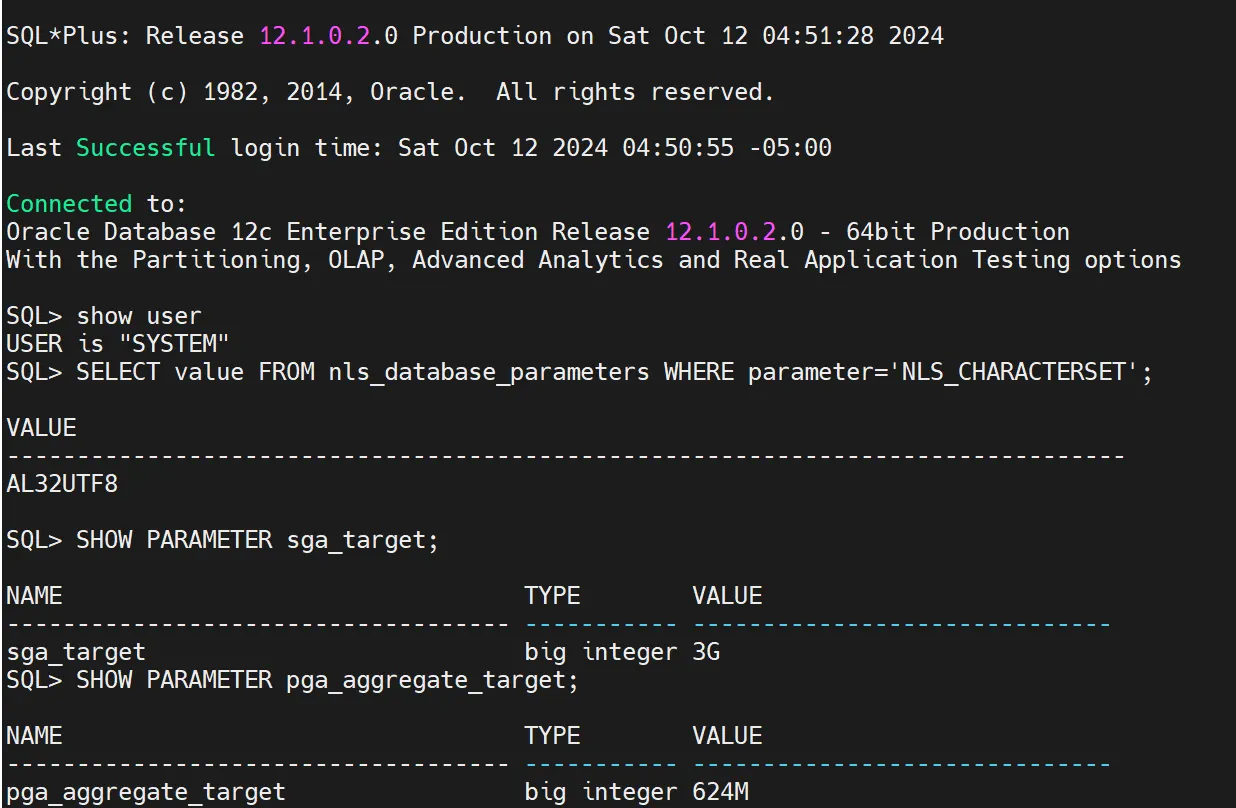
After database installation, verify settings with these SQL commands:
-- Check character set
SELECT value FROM nls_database_parameters WHERE parameter='NLS_CHARACTERSET';
-- Check memory settings
SHOW PARAMETER sga_target;
SHOW PARAMETER pga_aggregate_target;
-- Check tablespace space
SELECT tablespace_name, SUM(bytes)/1024/1024 MB
FROM dba_data_files
GROUP BY tablespace_name;
SQL
복사
[Screenshot: Database configuration check SQL execution results]
1.8 Environment Variable Initialization
Initialize all Oracle-related environment variables to prevent conflicts during installation:
unset TNS_ADMIN
unset ORACLE_HOME
# Remove Oracle entries from PATH
export PATH=$(echo $PATH | tr ':' '\n' | grep -v oracle | tr '\n' ':' | sed 's/:$//')
Bash
복사
1.9 Host File Configuration

Note:
Always use Fully Qualified Host Names (FQHN) and service names for database instances. Check host settings in /etc/hosts and configure if needed in the following format:
<IP Address> <Fully Qualified Hostname> <Short Hostname>
Example:
192.168.1.100 myserver.example.com myserver
Plain Text
복사
1.10 Firewall Configuration
OID requires the following ports to be open:
•
389: LDAP/Directory service access
•
636: LDAPS (SSL)/SSL encrypted version of LDAP
•
3060: Used for communication with OID
•
7001: WebLogic Admin Server
•
7002: WebLogic Admin Server (SSL)
If using firewalld, open ports with these commands:
sudo firewall-cmd --permanent --add-port=389/tcp
sudo firewall-cmd --permanent --add-port=636/tcp
sudo firewall-cmd --permanent --add-port=3060/tcp
sudo firewall-cmd --permanent --add-port=7001/tcp
sudo firewall-cmd --permanent --add-port=7002/tcp
sudo firewall-cmd --reload
Bash
복사
Verify configuration:
sudo firewall-cmd --list-all
Bash
복사
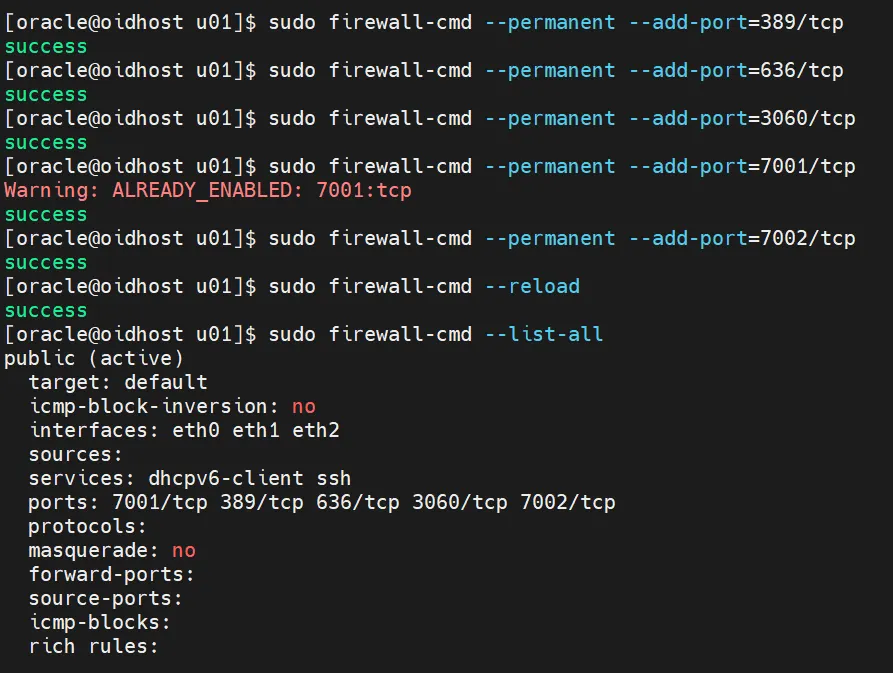
OID installation firewall port opening
Port Allocation Principles
The Oracle installer assigns default port numbers to each component following these principles:
1.
Default Port Check: The installer first checks if the default port number for that component is available. If the default port is free, it assigns that port number to the component.
2.
If the default port is already in use by another Oracle product or running application, the installer attempts an alternative method. It searches for an available port within the allocated port number range for that component, starting from the lowest number.
For example, if OID's default non-SSL port 389 is already in use, the installer will sequentially check ports from 3060 to 3129 and assign the first available port.
2. Oracle Fusion Middleware Infrastructure Installation
Now that prerequisites are complete, we can begin installing Oracle Fusion Middleware Infrastructure. This process includes installing WebLogic Server, Oracle core libraries, and Repository Creation Utility (RCU).
2.1 Preparing Installation Files
1.
Download these files from the Oracle website:
•
For version 12.2.1.3.0: fmw_12.2.1.3.0_infrastructure.jar
•
For version 12.2.1.4.0: fmw_12.2.1.4.0_infrastructure.jar
2.
Copy the downloaded file to an appropriate location on your installation server.
2.2 Starting Installation
Execute the following command to start installation:
java -jar fmw_12.2.1.x.0_infrastructure.jar
Bash
복사
Note: If running java shows an OpenJDK error like:
The OpenJDK JVM is not supported on this platform.
Plain Text
복사
2.3 Installation Process
Follow these steps in the installation wizard:
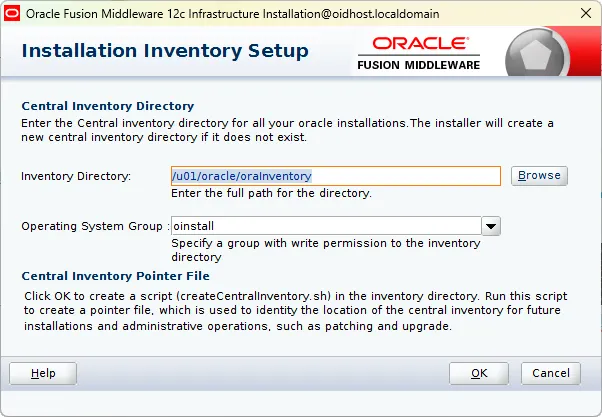
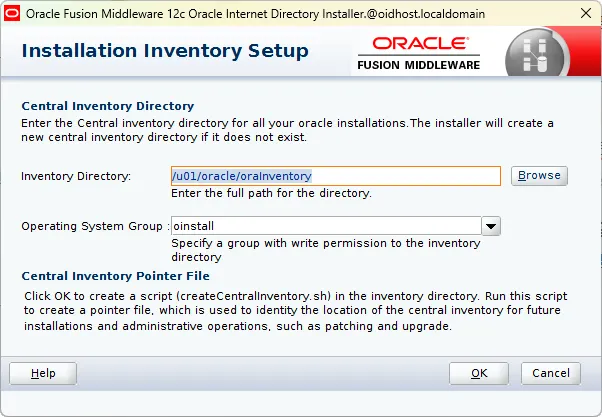
1.
Central Inventory Setup
•
Inventory Directory: Specify /u01/oracle/oraInventory
•
Operating System Group: Select oinstall
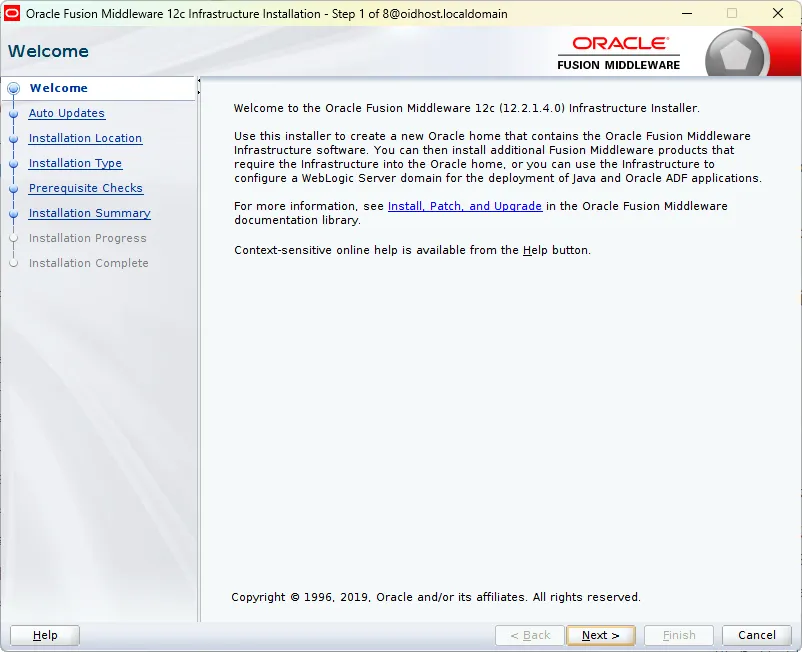
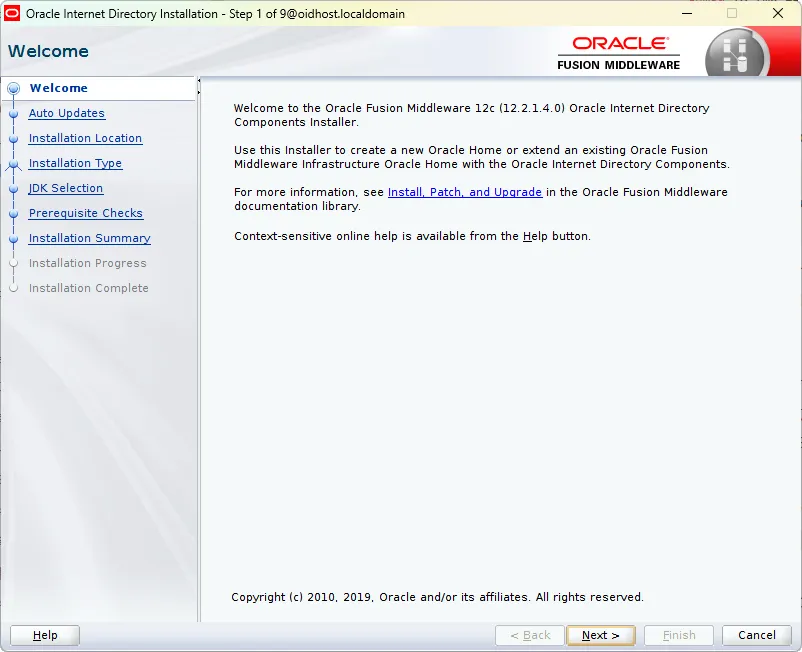
2.
Welcome Screen: Click 'Next'
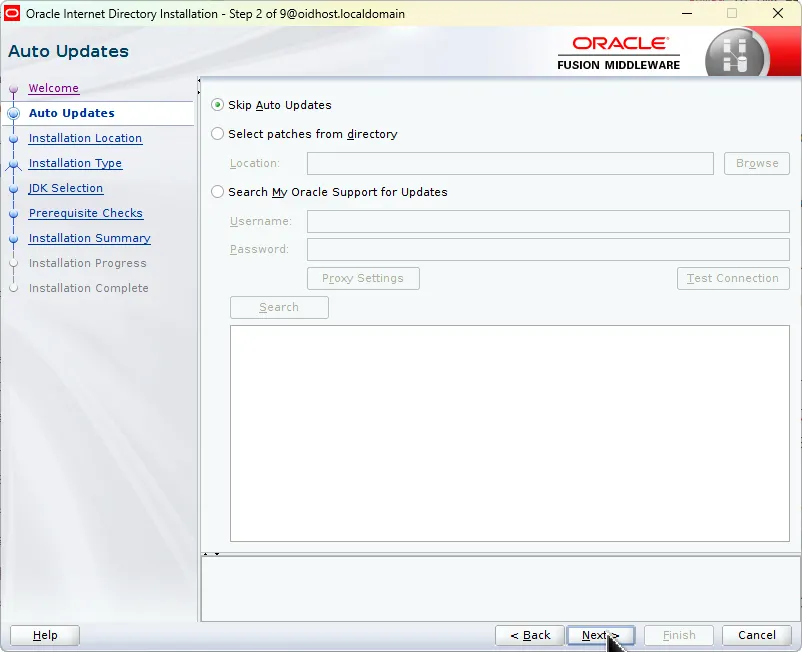
3.
Auto Updates: Select 'Skip Auto Updates'. You can skip patch installation.
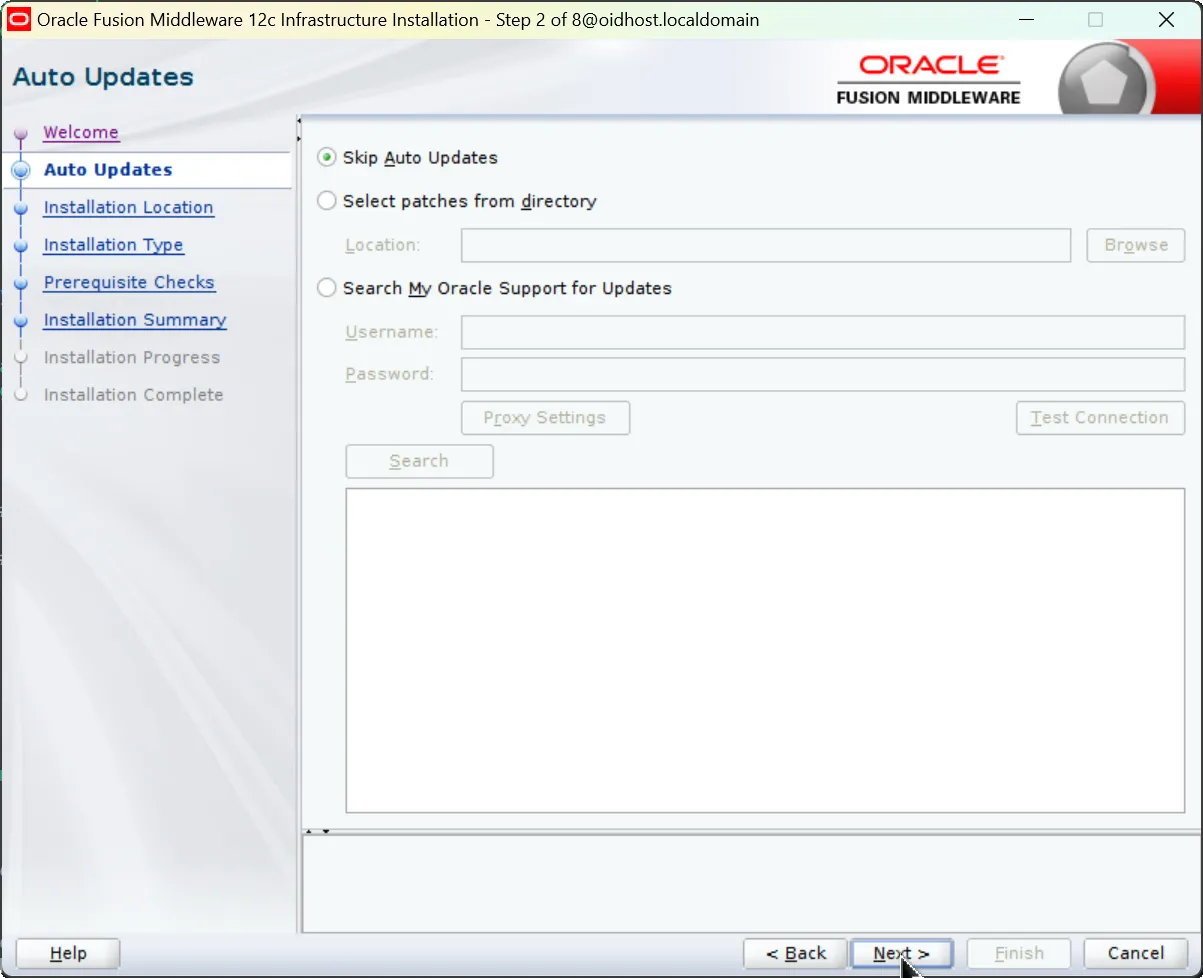
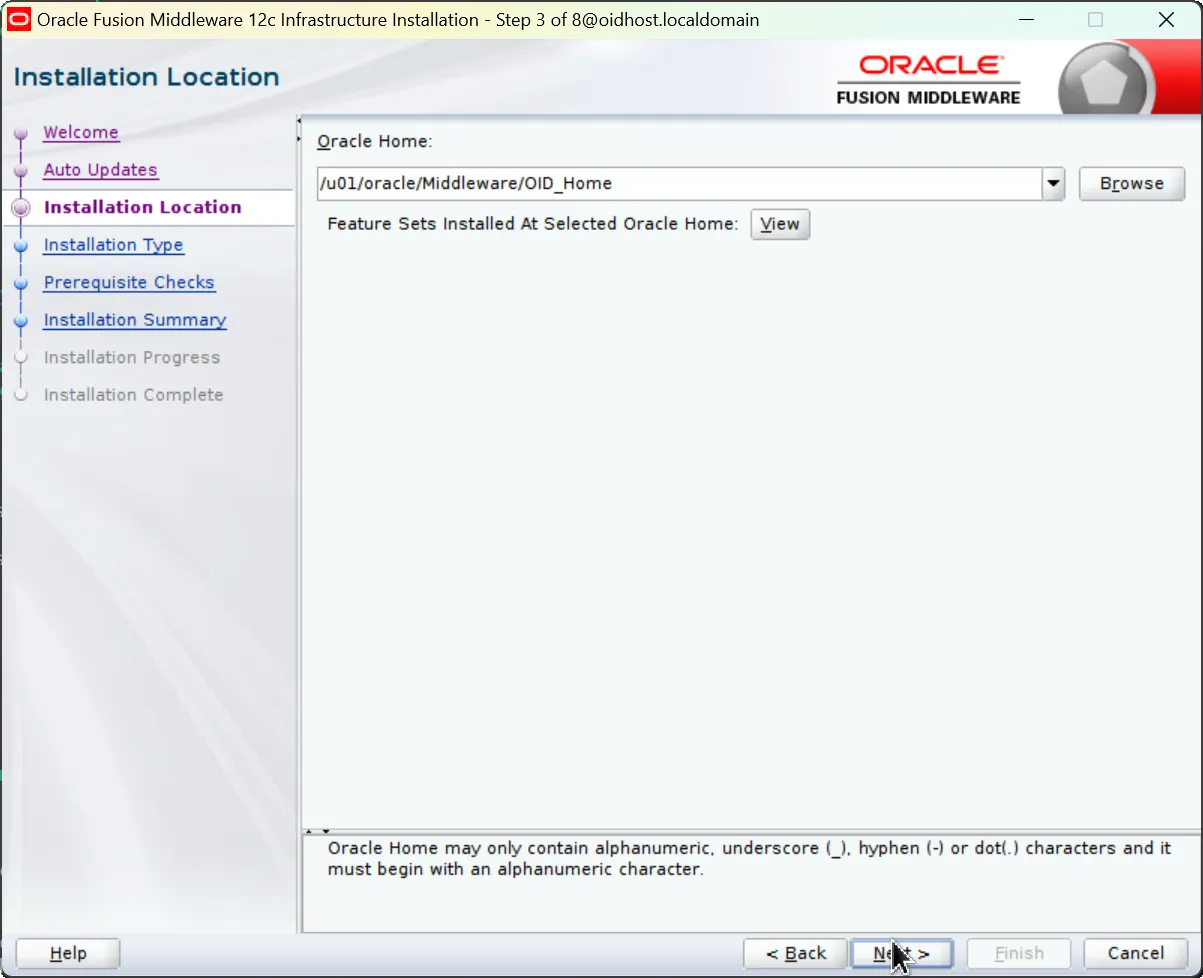
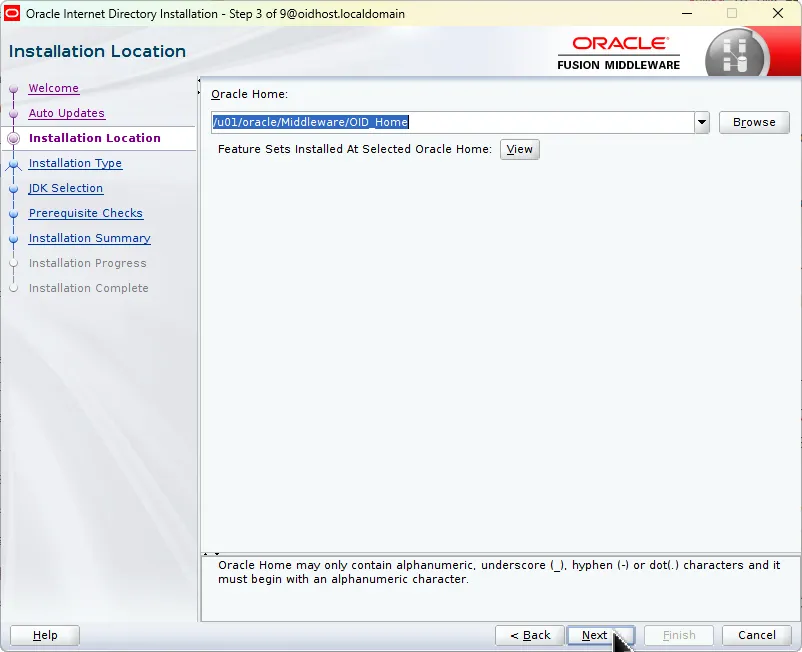
4.
Installation Location: Set Oracle Home path
•
Example: /u01/oracle/middleware
•
Remember this path as it will be used for OID installation later
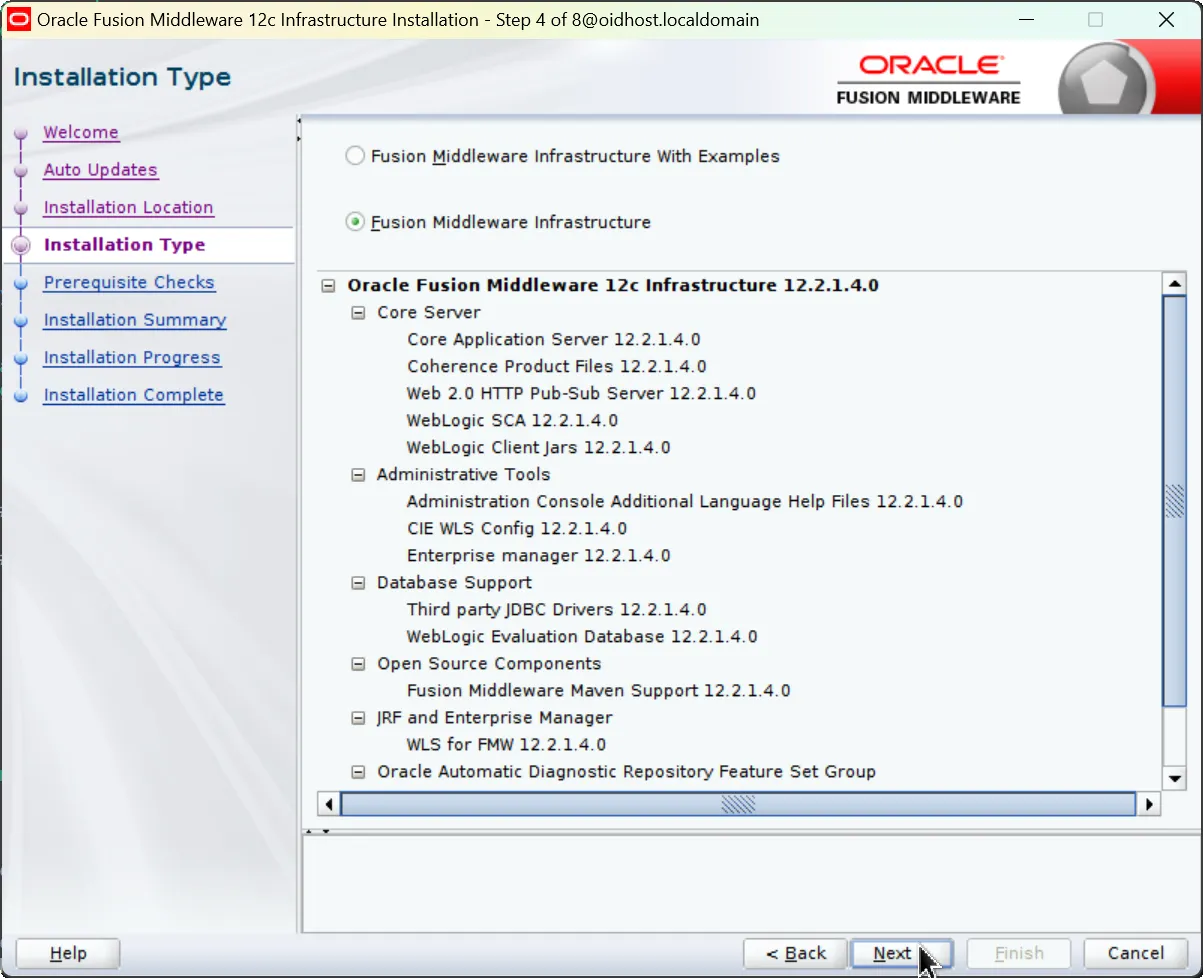
5.
Installation Type: Select 'Fusion Middleware Infrastructure'
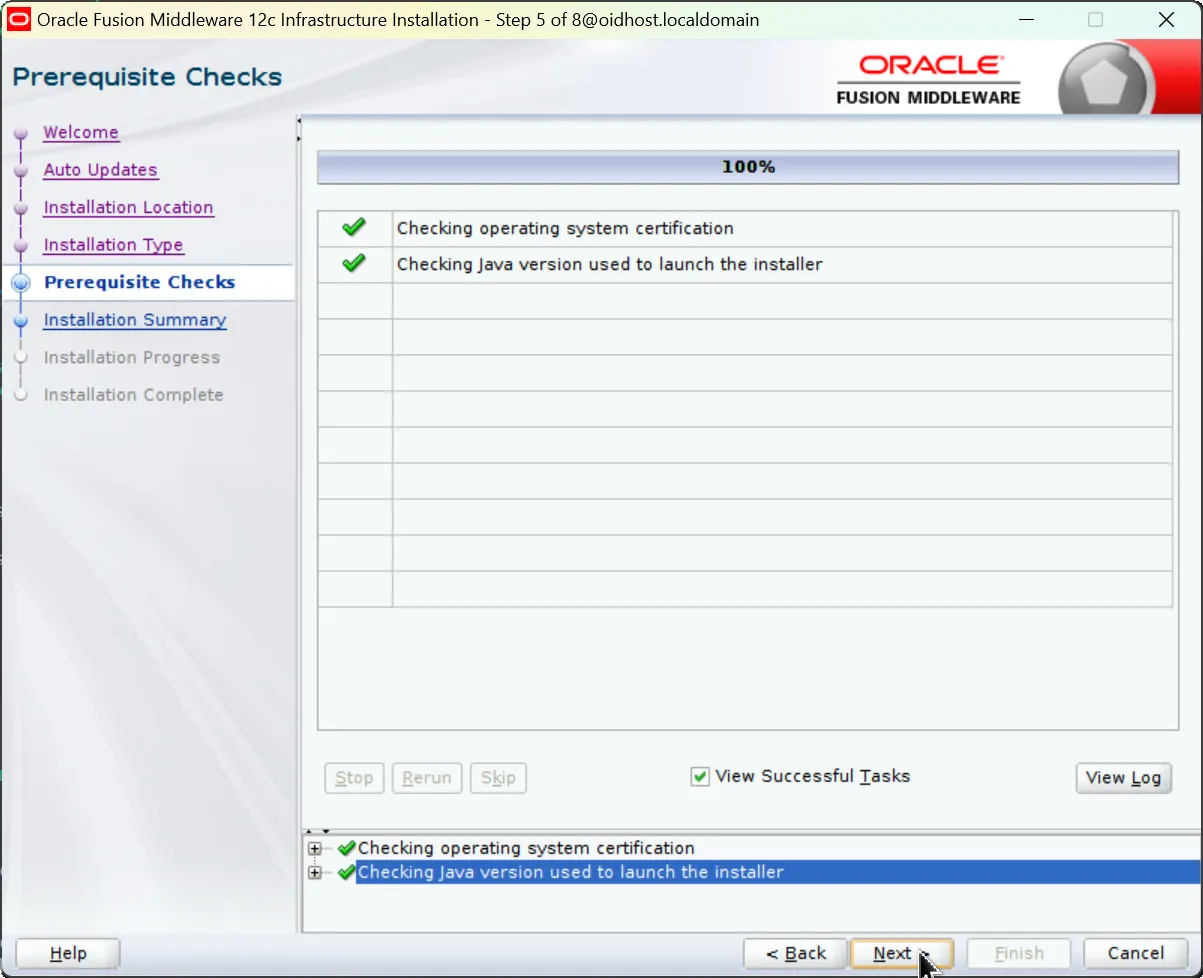
6.
Prerequisite Checks: System verifies all prerequisites are met. Resolve any issues and rerun checks if needed.
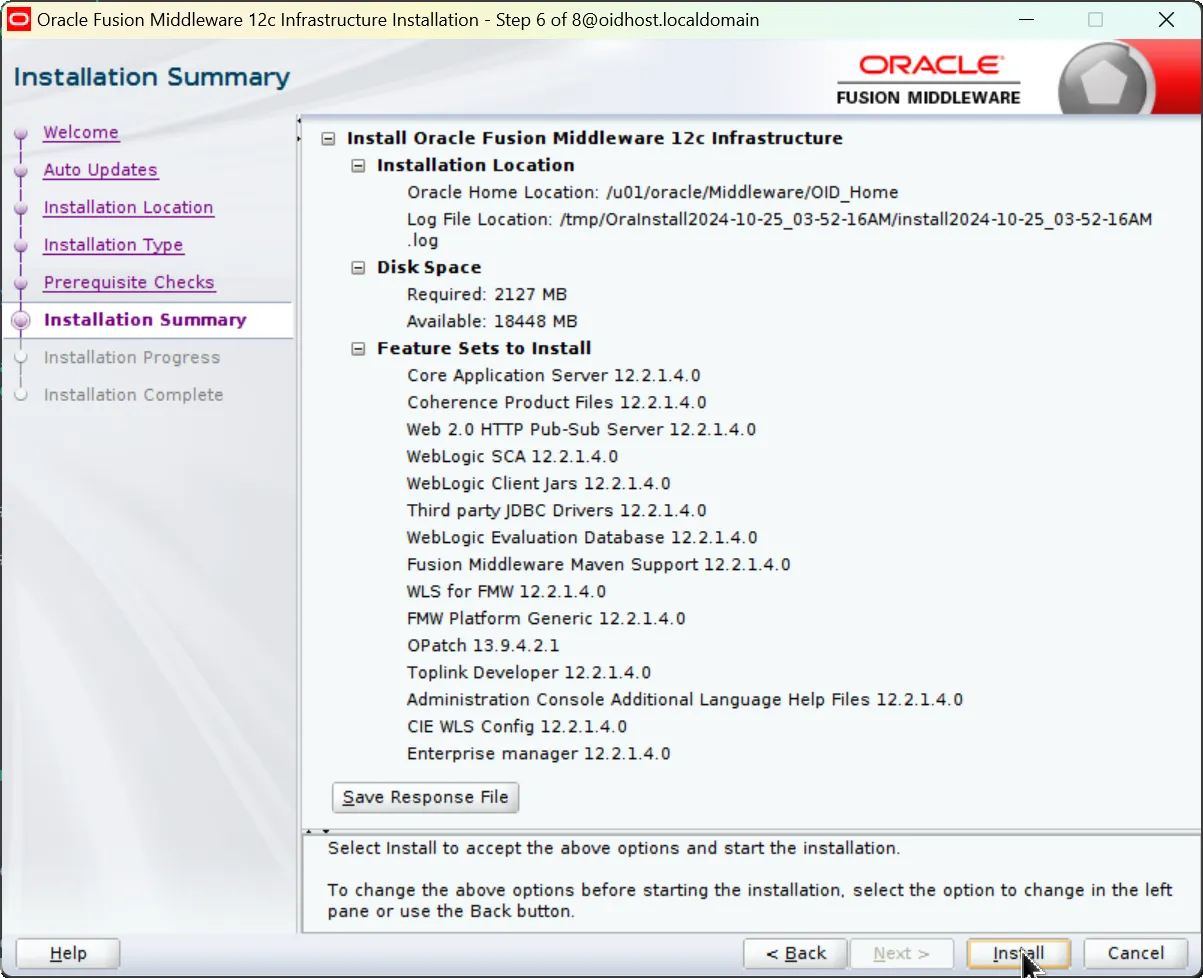
7.
Installation Summary:
•
Review installation path: /u01/oracle/Middleware/OID_Home
•
Required space: 2127MB
•
Features to install: WebLogic Server, Coherence, JDBC Drivers, etc.
•
Click 'Install' when ready
8.
Wait for the installation process to complete. This may take 30-60 minutes depending on system performance.
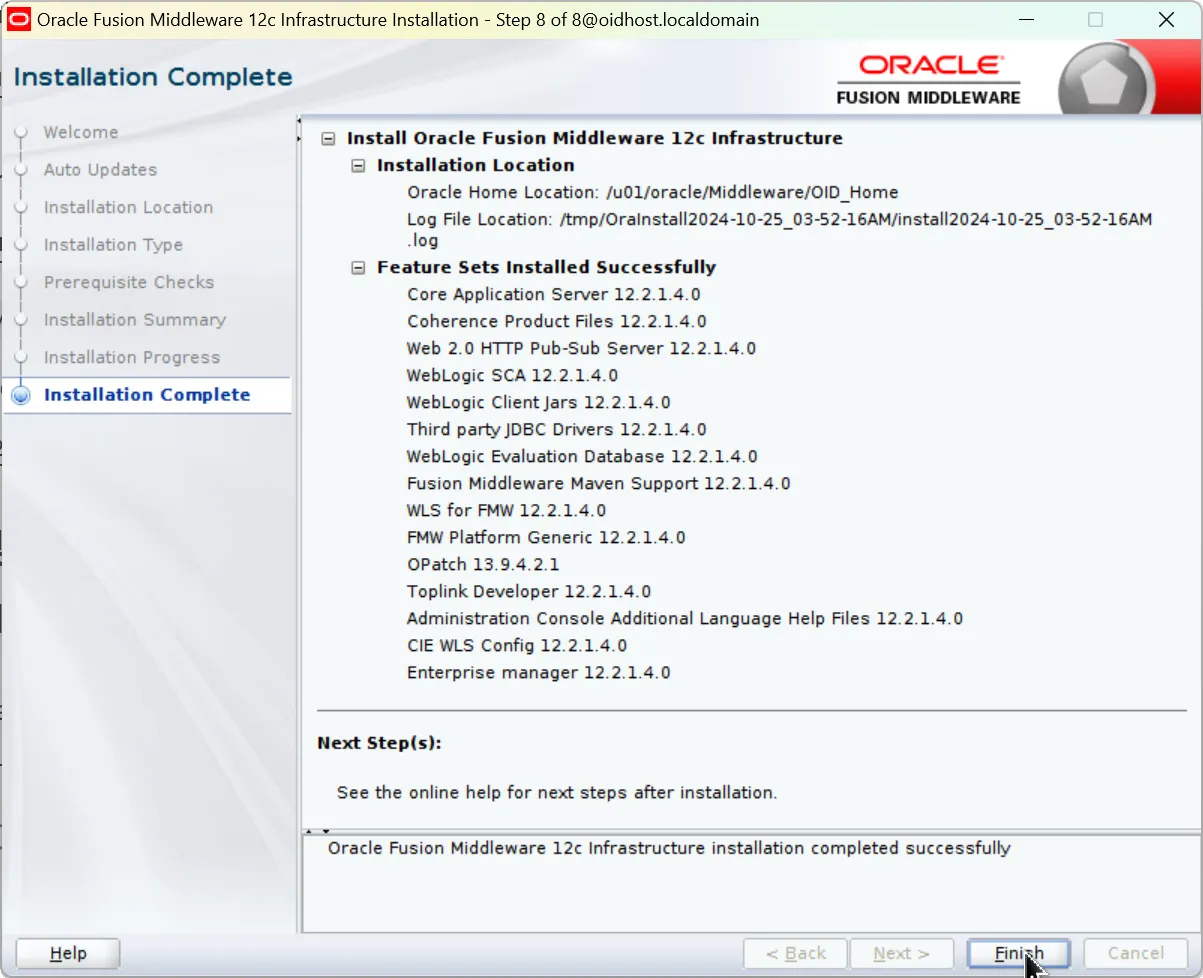
2.4 Installation Completion
Click 'Finish' to exit the installer when installation completes.
3. OID Software Installation
After completing the Infrastructure installation, we can now install the OID software in the same Oracle Home.
3.1 Preparing OID Installation Files
1.
Download these files from the Oracle website:
•
For version 12.2.1.3.0: fmw_12.2.1.3.0_oid_linux64.bin
•
For version 12.2.1.4.0: fmw_12.2.1.4.0_oid_linux64.bin
2.
Copy the downloaded file to an appropriate location on your installation server
3.
Grant execute permissions to the file:
chmod +x fmw_12.2.1.x.0_oid_linux64.bin
Bash
복사
3.2 Starting Installation
Execute the following command to begin OID installation:
./fmw_12.2.1.x.0_oid_linux64.bin
Bash
복사
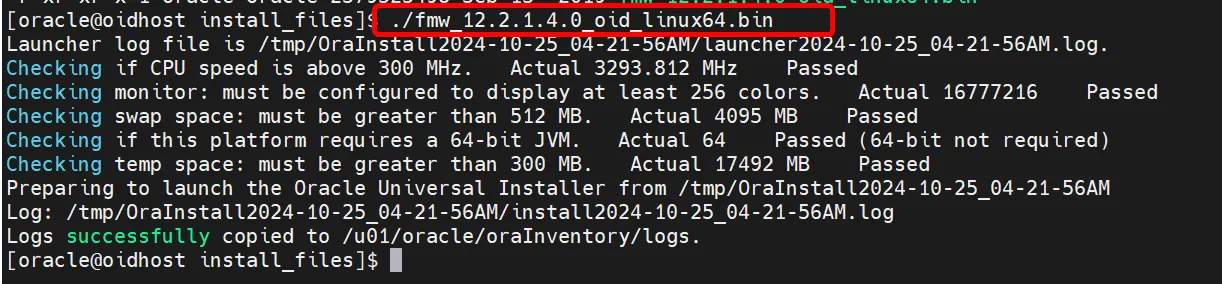
OID installation file execution
3.3 Installation Process
Follow these steps in the OID installation wizard:
1.
Central Inventory Setup (Central Inventory Setup)
•
Inventory Directory: Set path to /u01/oracle/oraInventory
•
Operating System Group: Select oinstall
•
After these settings, the central inventory pointer file will be created
2.
Welcome Screen: Click 'Next'
3.
Auto Updates: Select 'Skip Auto Updates'
4.
Installation Location:
•
Select the same Oracle Home where Infrastructure was installed
•
Example: /u01/oracle/Middleware/OID_Home
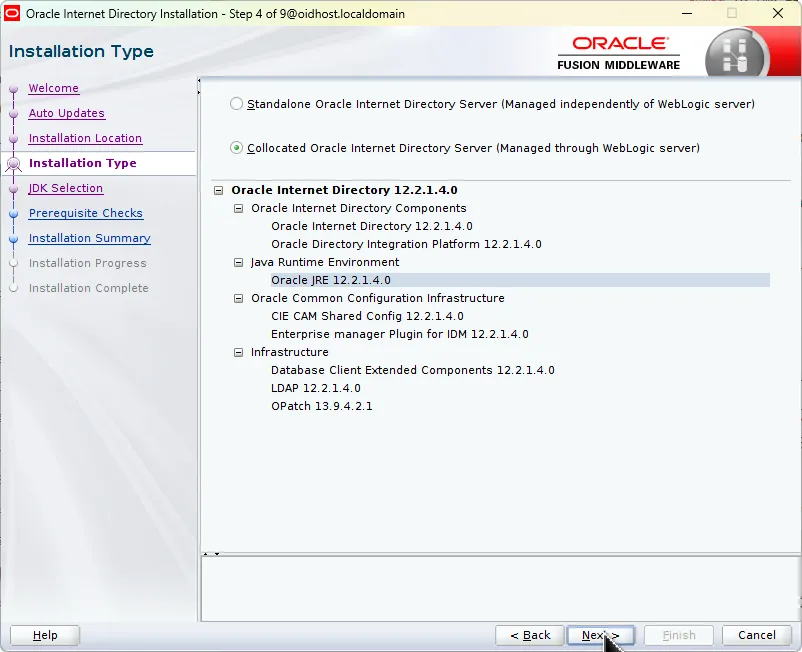
5.
Installation Type:
•
Select 'Collocated Oracle Internet Directory Server'
•
This option installs OID integrated with WebLogic server for unified management
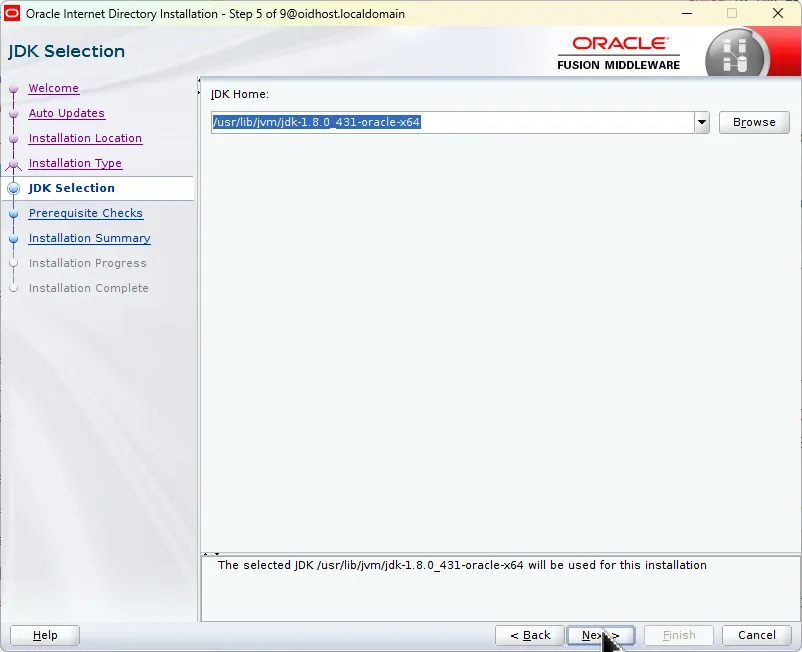
6.
JDK Selection:
•
Select the JDK installed on your system or use the JDK included in Oracle Home
•
Specify the path to the previously installed JDK
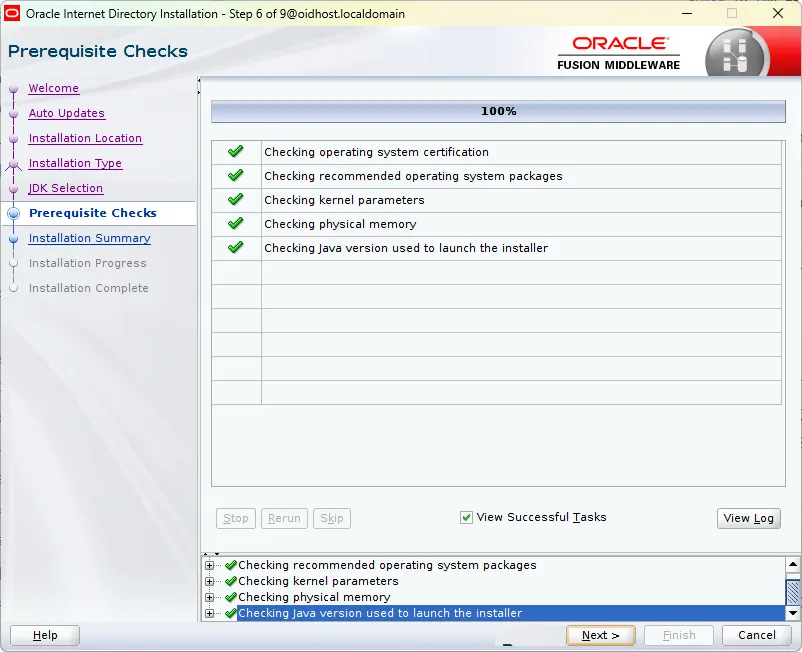
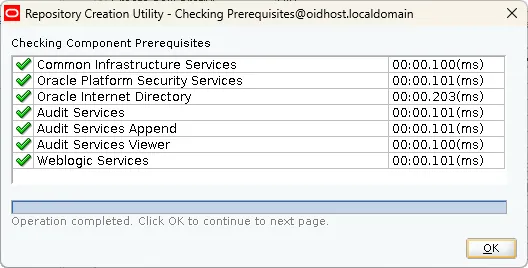
7.
Prerequisite Checks (Prerequisite Checks):
•
System verifies operating system, kernel parameters, memory, etc.
•
Click 'Next' when all items show 100% complete
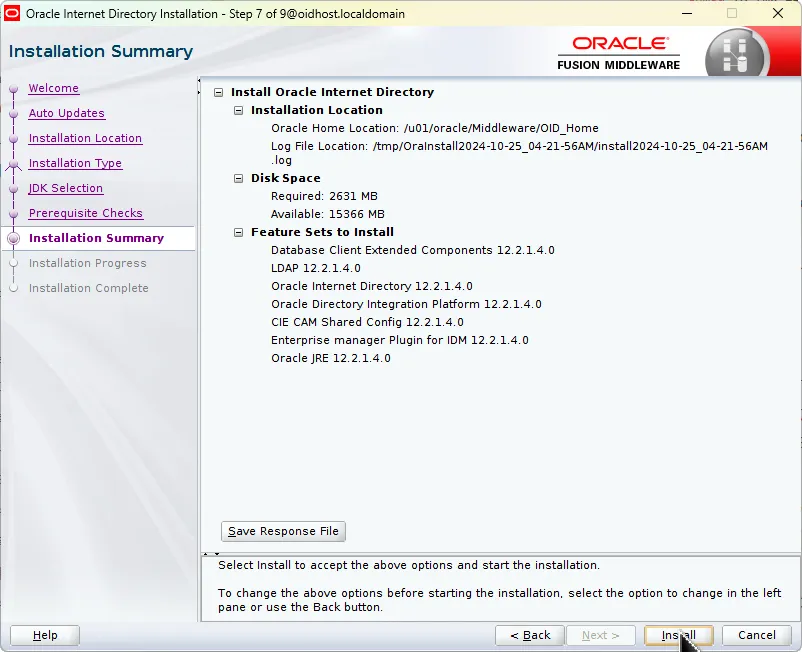
8.
Installation Summary
•
Review installation path, required disk space, and feature set
•
Verify correct features are selected
•
Click 'Install' to begin installation

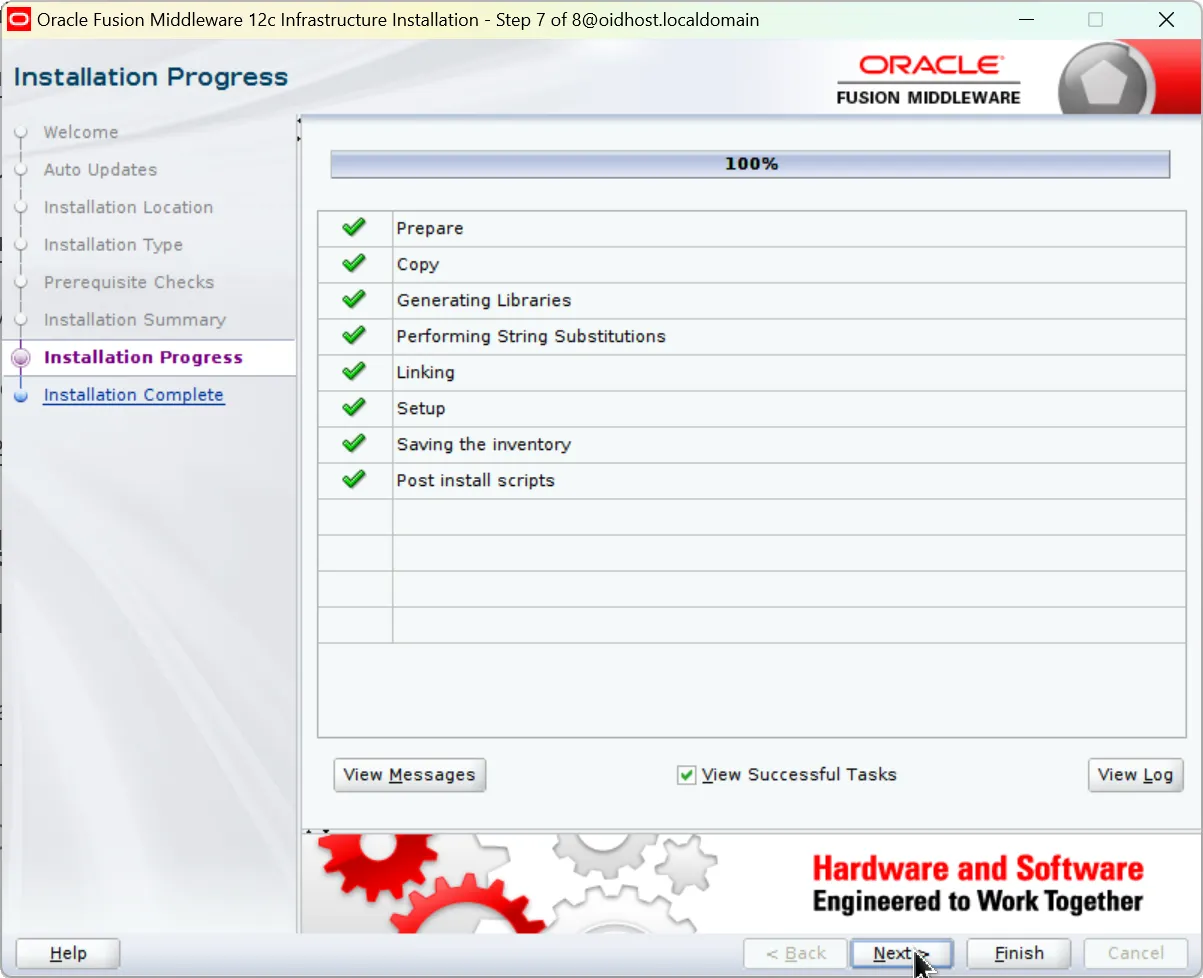
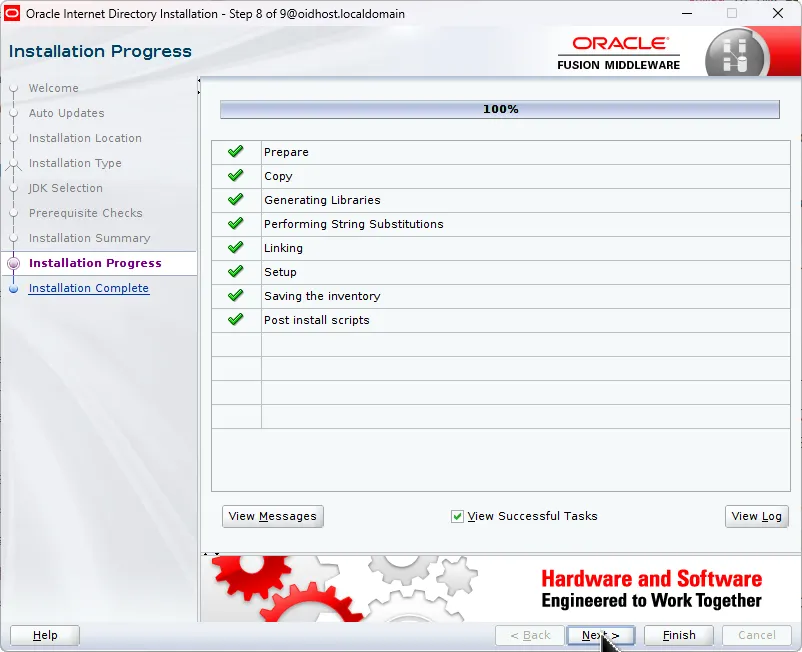
9.
Installation Progress
•
Monitor preparation, copying, library creation, and configuration saving
•
Click 'Next' when all items complete successfully
10.
Installation Complete
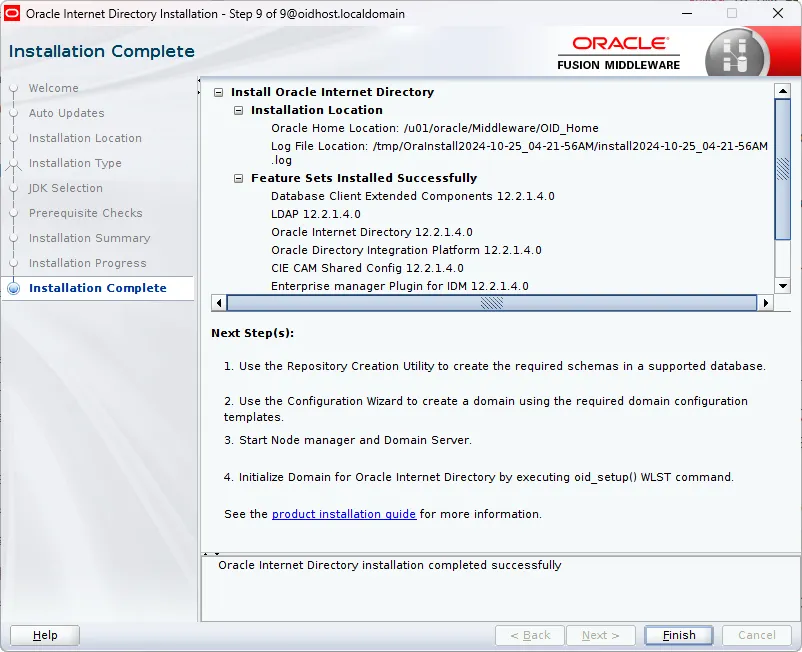
•
After OID installation completes, proceed to next steps:
1.
Use Repository Creation Utility to create required schemas in database
2.
Create domain using Configuration Wizard
3.
Start Node Manager and Domain Server
4.
Execute WLST commands to initialize Oracle Internet Directory domain
3.4 Post-Installation Verification
1.
Verify installation directory structure:
ls -l $ORACLE_HOME
Shell
복사
2.
Check OID binary installations:
ls -l $ORACLE_HOME/bin/oid*
Shell
복사
3.5 Environment Variables Setup
Create or update the environment file (e.g., .bash_profile) with these settings:
# Oracle Environment Settings
export ORACLE_HOME=/u01/oracle/Middleware/OID_Home
export PATH=$ORACLE_HOME/bin:$PATH
export LD_LIBRARY_PATH=$ORACLE_HOME/lib:$LD_LIBRARY_PATH
Shell
복사
Apply the changes:
source ~/.bash_profile
Shell
복사
3.6 Cleanup
1.
Remove temporary installation files:
rm -rf /tmp/orcl*.tmp
Shell
복사
2.
Clear any temporary response files:
rm -rf /tmp/*.rsp
Shell
복사
4. Database Schema Creation (Using RCU)
OID requires several database schemas. These schemas are created using the Repository Creation Utility (RCU).
4.1 RCU Preparation
Before running RCU, verify the following:
1.
Database must be running
2.
Have database connection information ready (host, port, service name)
3.
Know the SYS user password
4.2 Starting RCU
Execute RCU using this command:
$ORACLE_HOME/oracle_common/bin/rcu
Bash
복사

rcu execution location
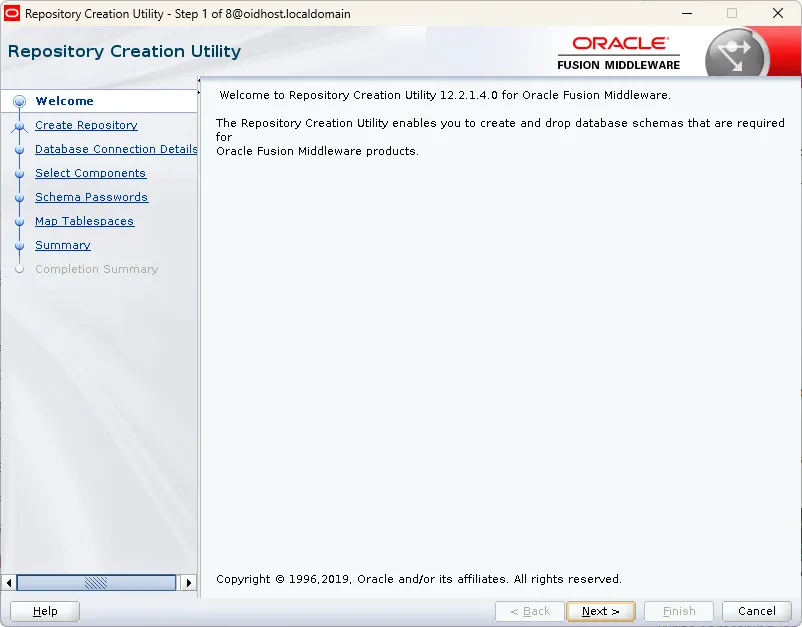
4.3 Schema Creation Process
1.
Welcome Screen: Click 'Next'
2.
Operation Selection:
•
Select Create Repository
•
Choose 'System Load and Product Load' option
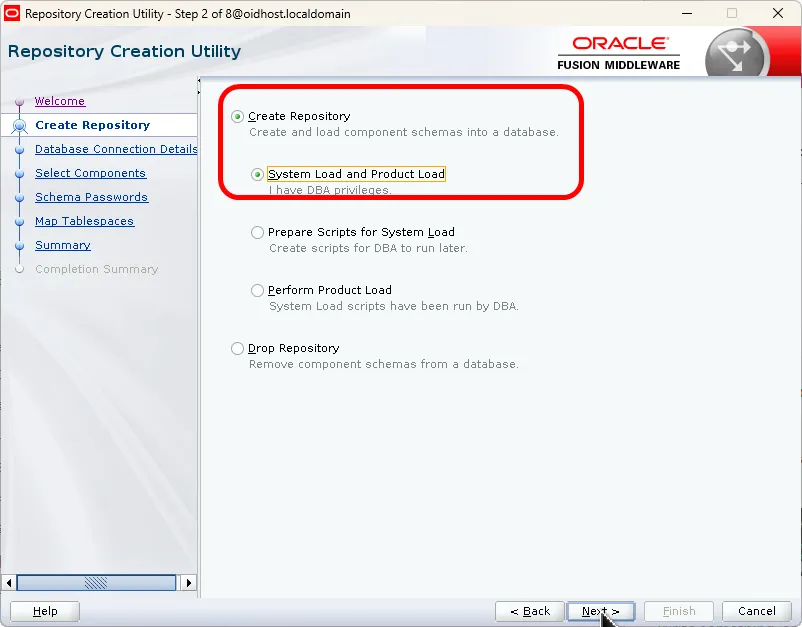
OID installation RCU execution screen - Create Repository selection
3.
Database Connection Details:
•
Database Type: Oracle Database
•
Host Name: Database server hostname or IP address
•
Port: Database listening port (default: 1521)
•
Service Name: Database service name
•
Username: SYS
•
Password: SYS user password
•
Role: SYSDBA
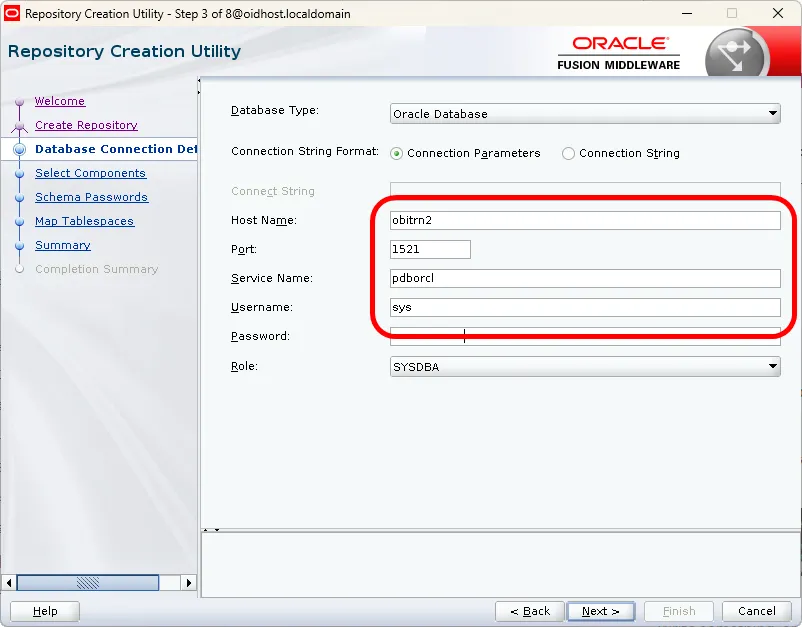
OID installation RCU execution screen - Database connection settings
4.
Component Selection:
•
Specify Prefix
•
Select 'Oracle Internet Directory' component
•
Required dependent schemas will be automatically selected
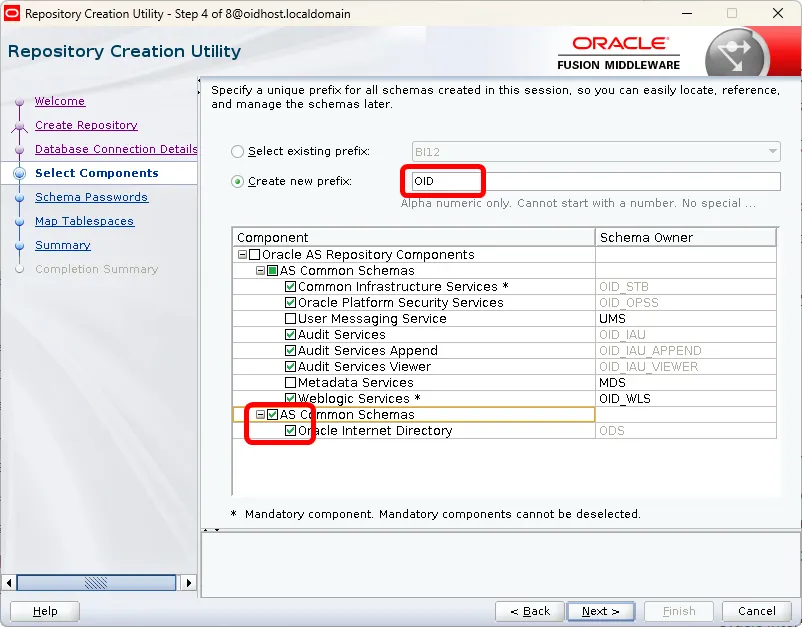
OID installation RCU execution screen - Component selection step
5.
Schema Passwords
•
Set passwords for all schemas
•
You can use the same password for all schemas or set individual passwords
•
Note: Remember these passwords as they'll be needed during domain configuration
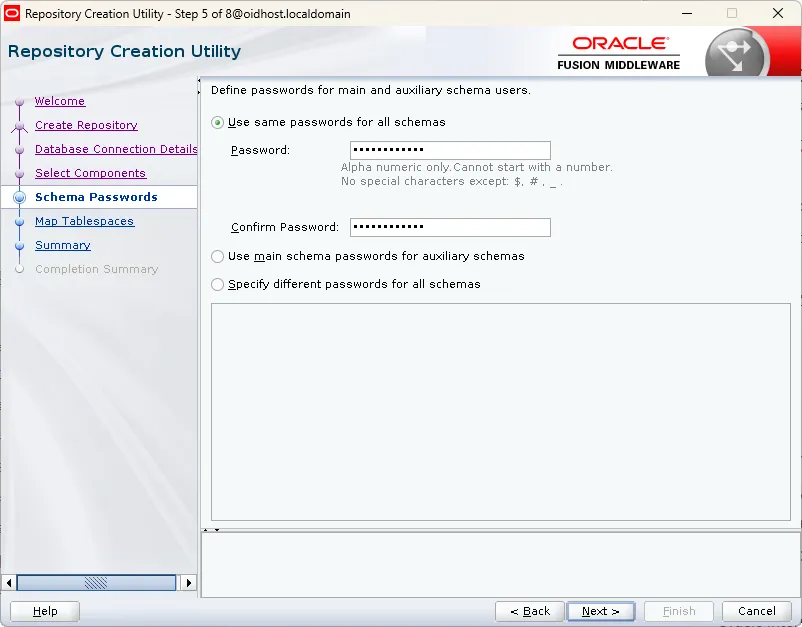
OID installation RCU execution screen - Schema prefix and password setting screen
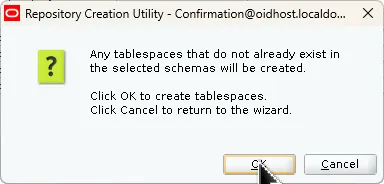
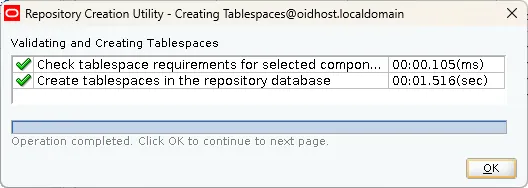
6.
Tablespace Mapping:
•
Review default tablespace mappings
•
Adjust if necessary based on your requirements
•
Ensure sufficient space is available in the selected tablespaces
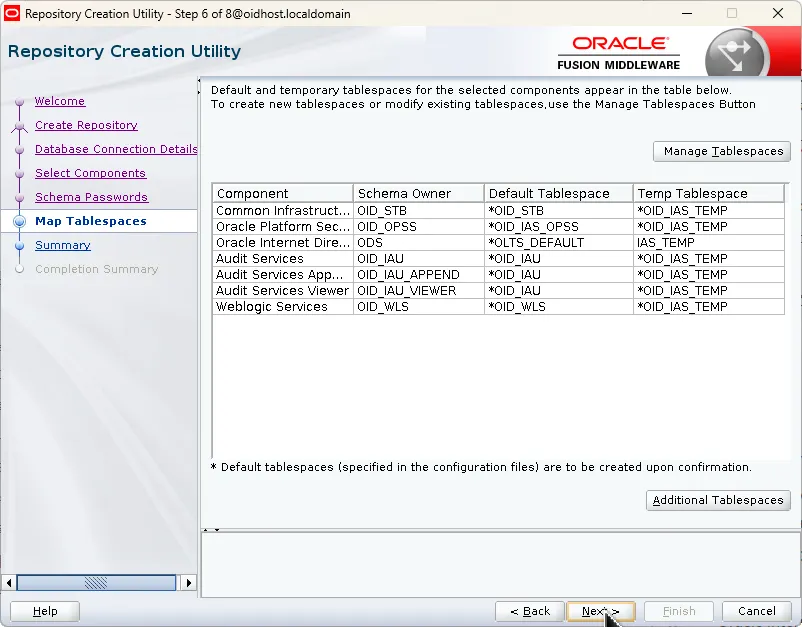
OID installation RCU execution screen - Tablespace mapping
7.
Summary: Review settings and click 'Create'
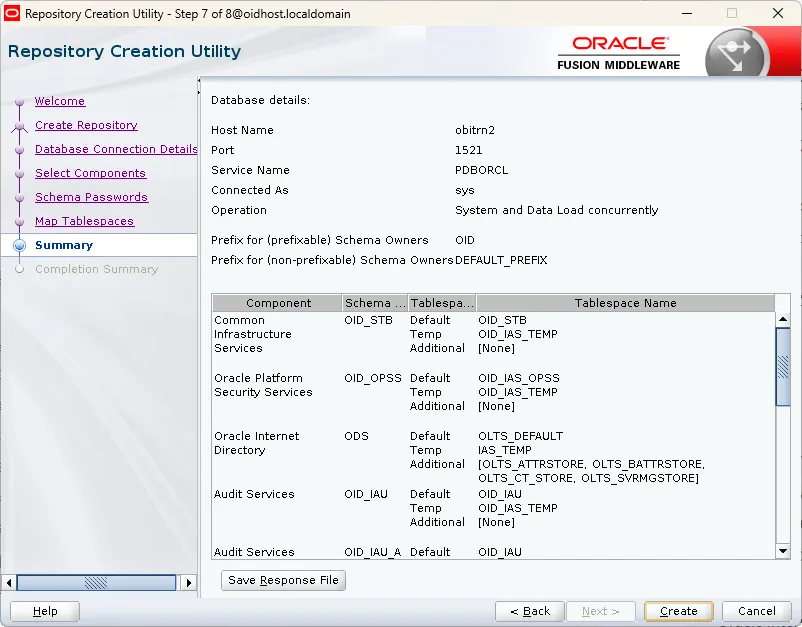
OID installation RCU execution screen - Schema creation summary
Wait for the schema creation process to complete. This may take several minutes depending on database performance and number of schemas being created.
4.4 Schema Creation Verification and Completion
1.
After schema creation completes, click 'Close' to exit RCU
2.
Verify schema creation by connecting to the database using SQL*Plus and executing:
SELECT username FROM dba_users WHERE username LIKE 'OID%';
Bash
복사
Replace 'PREFIX' with your chosen schema prefix. This query will list all created OID schemas
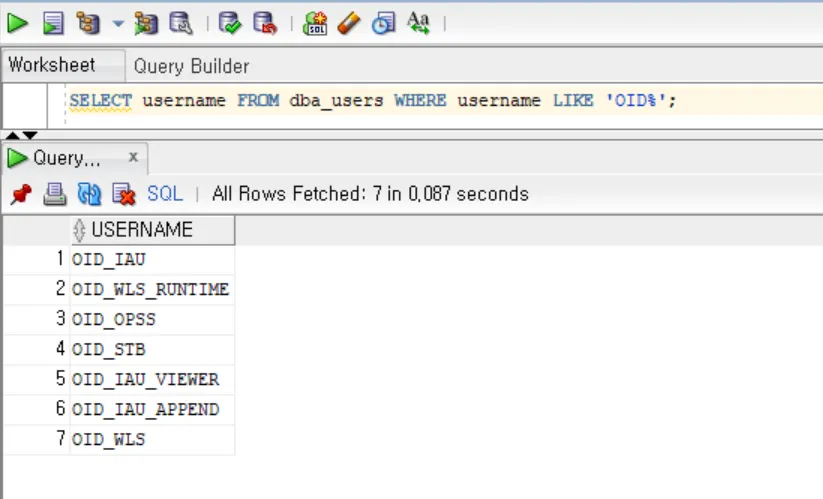
OID installation RCU execution result - Created schema list verification
4.5 Post-Schema Creation Tasks
1.
Verify Schema Objects:
-- Check schema tables
SELECT owner, table_name
FROM dba_tables
WHERE owner LIKE 'PREFIX_%'
ORDER BY owner, table_name;
-- Check schema privileges
SELECT grantee, privilege, admin_option
FROM dba_sys_privs
WHERE grantee LIKE 'PREFIX_%'
ORDER BY grantee, privilege;
SQL
복사
2.
Verify Schema Sizes:
SELECT segment_type, SUM(bytes)/1024/1024 MB
FROM dba_segments
WHERE owner LIKE 'PREFIX_%'
GROUP BY segment_type;
SQL
복사
3.
Check Schema Status:
SELECT comp_id, version, status
FROM schema_version_registry
WHERE owner LIKE 'PREFIX_%';
SQL
복사
4.6 Troubleshooting RCU
If you encounter issues during schema creation, check these common areas:
1.
Log Files:
•
RCU logs are typically located in:
$ORACLE_HOME/oracle_common/rcu/log/
Shell
복사
2.
Common Issues and Solutions:
a.
Insufficient Space:
-- Check tablespace free space
SELECT tablespace_name,
SUM(bytes)/1024/1024 MB,
SUM(DECODE(maxbytes,0,bytes,maxbytes))/1024/1024 MAX_MB
FROM dba_data_files
GROUP BY tablespace_name;
SQL
복사
b.
Connection Issues:
# Verify database connectivity
tnsping <service_name>
# Test SQL*Plus connection
sqlplus sys/<password>@<service_name> as sysdba
Shell
복사
c.
Permission Issues:
-- Verify SYS user privileges
SELECT * FROM session_privs;
SQL
복사
d.
Database Initialization Parameter Issues:
RCU logs shows the following error messages
RCU-6107: DB Init Param Prerequisite failure for: OPEN_CURSORS. Current value is 300. It should be greater than or equal to 800.
Before running RCU for OID schema creation, verify and adjust these critical database initialization parameters.
i.
Check Current Parameter Values
Connect to the database as SYSDBA and execute:
-- Check all relevant parameters at once
SELECT name, value, isdefault, issys_modifiable
FROM v$parameter
WHERE name IN (
'open_cursors',
'processes',
'sessions',
'job_queue_processes',
'sga_max_size',
'sga_target',
'pga_aggregate_target',
'shared_pool_size',
'db_cache_size'
);
SQL
복사
ii.
Required Parameter Values for OID
Here are the minimum required values for OID:
-- Verify against minimum requirements
SELECT parameter,
current_value,
CASE
WHEN parameter = 'open_cursors' AND TO_NUMBER(current_value) < 800 THEN 'Increase to 800+'
WHEN parameter = 'processes' AND TO_NUMBER(current_value) < 1000 THEN 'Increase to 1000+'
WHEN parameter = 'sessions' AND TO_NUMBER(current_value) < 1500 THEN 'Increase to 1500+'
WHEN parameter = 'job_queue_processes' AND TO_NUMBER(current_value) < 10 THEN 'Increase to 10+'
ELSE 'OK'
END as recommendation
FROM (
SELECT name as parameter, value as current_value
FROM v$parameter
WHERE name IN ('open_cursors', 'processes', 'sessions', 'job_queue_processes')
);
SQL
복사
iii.
Parameter Adjustment Scripts
Immediate Changes (Dynamic Parameters):
-- As SYSDBA
ALTER SYSTEM SET open_cursors = 800 SCOPE=BOTH;
ALTER SYSTEM SET job_queue_processes = 10 SCOPE=BOTH;
SQL
복사
Init.ora Changes (Static Parameters): Add or modify these lines in init.ora or spfile:
-- First, check if using spfile
SHOW PARAMETER spfile;
-- If using spfile, modify parameters:
ALTER SYSTEM SET processes = 1000 SCOPE=SPFILE;
ALTER SYSTEM SET sessions = 1500 SCOPE=SPFILE;
ALTER SYSTEM SET sga_max_size = 8G SCOPE=SPFILE;
ALTER SYSTEM SET sga_target = 6G SCOPE=SPFILE;
ALTER SYSTEM SET pga_aggregate_target = 2G SCOPE=SPFILE;
SQL
복사
If static parameter changes were made: restart database.
3.
RCU Repository Cleanup Process
When schema creation fails, follow these steps for proper cleanup:
a.
Recommended Method: Using RCU
i.
Launch RCU:
$ORACLE_HOME/oracle_common/bin/rcu
Bash
복사
ii.
Select Operation:
•
Choose "Drop Repository"
•
This ensures proper cleanup of:
◦
Schema objects
◦
Repository registry entries
◦
Component dependencies
◦
Metadata tables
•
Enter Database Details:
◦
Same connection information used during creation
◦
Use SYSDBA credentials
•
Select Components:
◦
Choose the same prefix used during creation
◦
Select all components that failed to create
•
Verify Dependencies:
◦
RCU will show component dependencies
◦
Ensure all related components are selected
b.
Manual Cleanup (Only if RCU Drop fails)
i.
If RCU Drop fails, follow this sequence:
1.
First, identify and record all related objects:
-- Check related schemas
SELECT username
FROM dba_users
WHERE username LIKE 'PREFIX_%';
-- Identify related tablespaces
SELECT DISTINCT tablespace_name
FROM dba_tables
WHERE owner LIKE 'PREFIX_%'
UNION
SELECT DISTINCT tablespace_name
FROM dba_segments
WHERE owner LIKE 'PREFIX_%';
-- Check data files for these tablespaces
SELECT tablespace_name, file_name
FROM dba_data_files
WHERE tablespace_name IN (
SELECT DISTINCT tablespace_name
FROM dba_segments
WHERE owner LIKE 'PREFIX_%'
);
SQL
복사
2.
Kill active sessions:
-- Generate kill session commands
SELECT 'ALTER SYSTEM KILL SESSION ''' || sid || ',' || serial# || ''' IMMEDIATE;'
FROM v$session
WHERE username LIKE 'PREFIX_%';
SQL
복사
3.
Drop schemas in correct order:
-- Drop dependent schemas first
DECLARE
v_sql VARCHAR2(200);
BEGIN
FOR r IN (SELECT username
FROM dba_users
WHERE username LIKE 'PREFIX_%')
LOOP
v_sql := 'DROP USER ' || r.username || ' CASCADE';
EXECUTE IMMEDIATE v_sql;
END LOOP;
END;
/
SQL
복사
4.
Clean up tablespaces:
-- Generate drop tablespace commands
SELECT 'DROP TABLESPACE ' || tablespace_name || ' INCLUDING CONTENTS AND DATAFILES;'
FROM dba_tablespaces
WHERE tablespace_name IN (
-- OID specific tablespaces
'PREFIX_IAS_OPSS',
'PREFIX_IAS_IAU',
'PREFIX_IAS_IAU_APPEND',
'PREFIX_ODS',
'PREFIX_STB'
)
AND tablespace_name NOT IN ('SYSTEM','SYSAUX','USERS','UNDOTBS1','TEMP');
SQL
복사
5.
Execute tablespace cleanup:
-- Drop each tablespace with its datafiles
BEGIN
-- ODS Tablespaces
EXECUTE IMMEDIATE 'DROP TABLESPACE PREFIX_ODS INCLUDING CONTENTS AND DATAFILES';
-- IAU Tablespaces
EXECUTE IMMEDIATE 'DROP TABLESPACE PREFIX_IAS_IAU INCLUDING CONTENTS AND DATAFILES';
EXECUTE IMMEDIATE 'DROP TABLESPACE PREFIX_IAS_IAU_APPEND INCLUDING CONTENTS AND DATAFILES';
-- OPSS Tablespaces
EXECUTE IMMEDIATE 'DROP TABLESPACE PREFIX_IAS_OPSS INCLUDING CONTENTS AND DATAFILES';
-- STB Tablespaces
EXECUTE IMMEDIATE 'DROP TABLESPACE PREFIX_STB INCLUDING CONTENTS AND DATAFILES';
EXCEPTION
WHEN OTHERS THEN
DBMS_OUTPUT.PUT_LINE('Error dropping tablespace: ' || SQLERRM);
END;
/
SQL
복사
6.
Verify cleanup completion:
-- Check for remaining schemas
SELECT username
FROM dba_users
WHERE username LIKE 'PREFIX_%';
-- Check for remaining tablespaces
SELECT tablespace_name
FROM dba_tablespaces
WHERE tablespace_name LIKE 'PREFIX_%';
-- Check for any remaining datafiles
SELECT file_name
FROM dba_data_files
WHERE tablespace_name LIKE 'PREFIX_%'
UNION
SELECT file_name
FROM dba_temp_files
WHERE tablespace_name LIKE 'PREFIX_%';
SQL
복사
7.
Clean up any orphaned files:
-- Generate OS-level cleanup commands for any remaining datafiles
SELECT 'rm ' || file_name
FROM dba_data_files
WHERE tablespace_name LIKE 'PREFIX_%'
UNION
SELECT 'rm ' || file_name
FROM dba_temp_files
WHERE tablespace_name LIKE 'PREFIX_%';
SQL
복사
ii.
Post-Cleanup Verification
1.
Verify schema removal:
-- Check users
SELECT username
FROM dba_users
WHERE username LIKE 'PREFIX_%';
-- Check segments
SELECT owner, segment_type, COUNT(*)
FROM dba_segments
WHERE owner LIKE 'PREFIX_%'
GROUP BY owner, segment_type;
SQL
복사
2.
Verify tablespace cleanup:
-- Check tablespaces
SELECT tablespace_name, status
FROM dba_tablespaces
WHERE tablespace_name LIKE 'PREFIX_%';
-- Check datafiles
SELECT file_name, status
FROM dba_data_files
WHERE tablespace_name LIKE 'PREFIX_%'
UNION
SELECT file_name, status
FROM dba_temp_files
WHERE tablespace_name LIKE 'PREFIX_%';
SQL
복사
3.
Check registry entries:
-- Verify removal from registry
SELECT comp_id, comp_name, version, status
FROM schema_version_registry
WHERE owner LIKE 'PREFIX_%';
SQL
복사
5. WebLogic Domain Configuration
Now we'll create and configure the WebLogic domain that will host OID.
5.1 Configuration Wizard Preparation
Before running the Configuration Wizard, ensure you have:
1.
Schema information (prefix, passwords) created by RCU
2.
Database connection information ready
3.
Determined the directory path for domain creation
5.2 Starting Configuration Wizard
Execute the configuration wizard using:
$ORACLE_HOME/oracle_common/common/bin/config.sh
Bash
복사

OID 구성 마법사 시작
5.3 Domain Creation and Configuration Process
Follow these steps in the configuration wizard:
1.
Welcome Screen: Click 'Next'
2.
Domain Creation Options:
•
Select 'Create a new domain'
•
Specify domain location
•
Example: /u01/oracle/config/domains/oid_domain
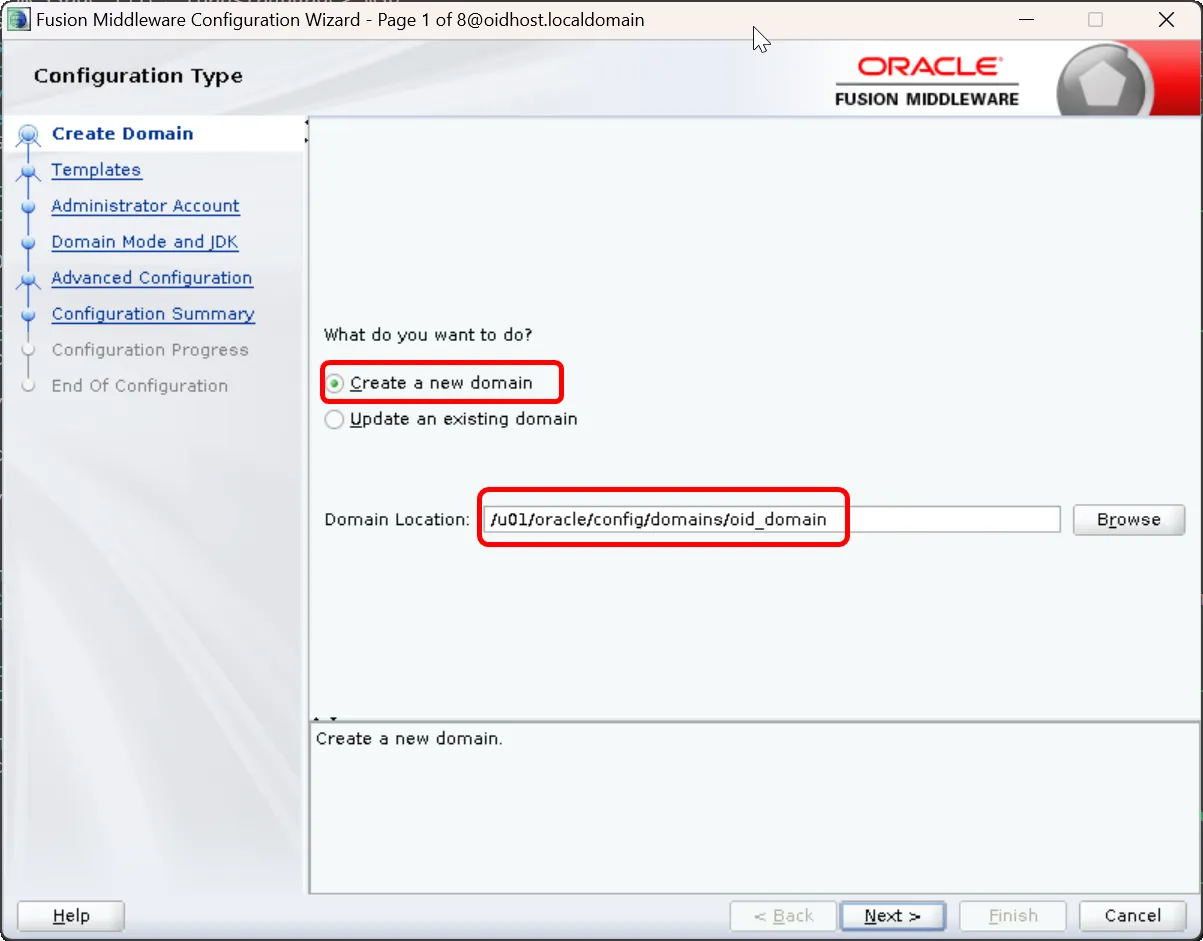
Create Domain
3.
Template Selection:
•
Select 'Oracle Internet Directory (Collocated)' template
•
This template automatically selects all required components for OID
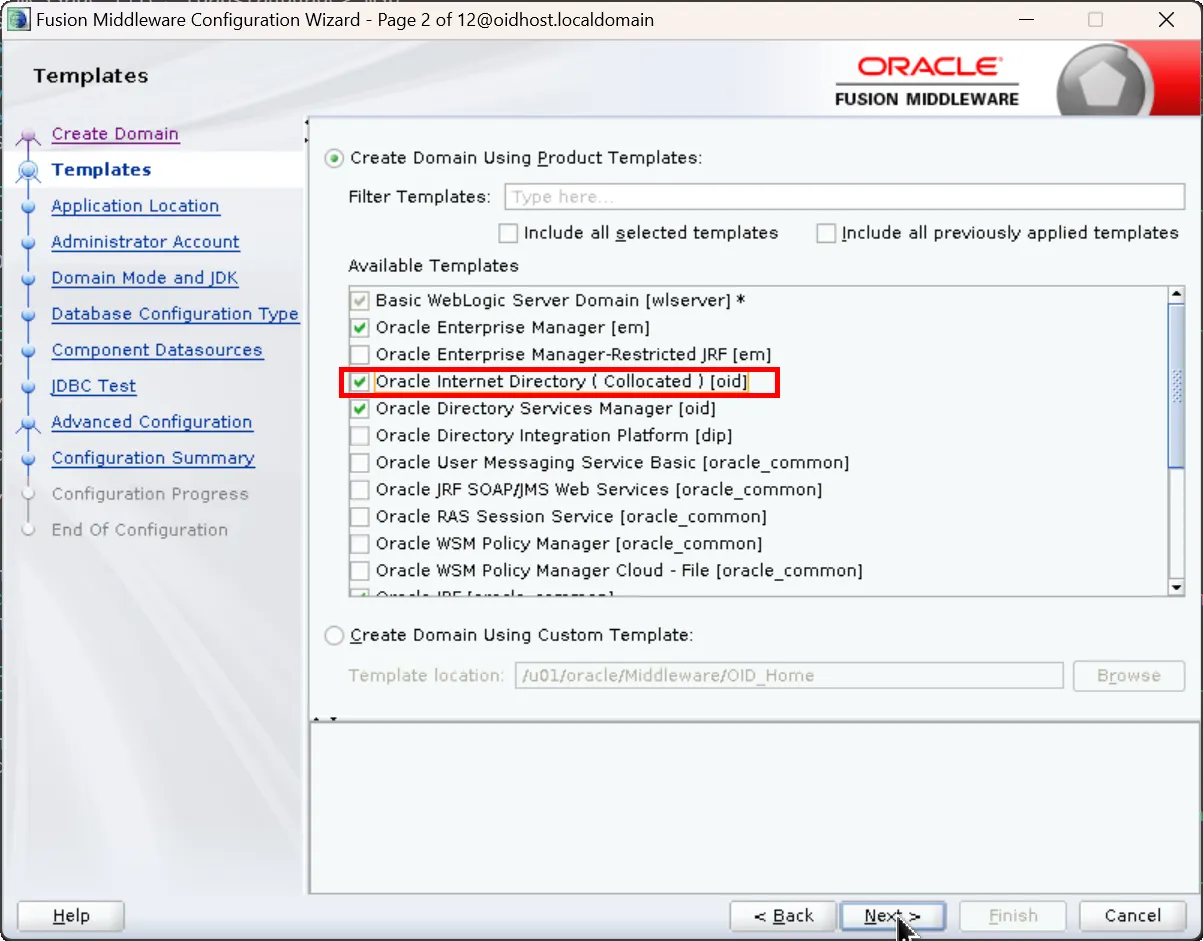
Collocated OID Template
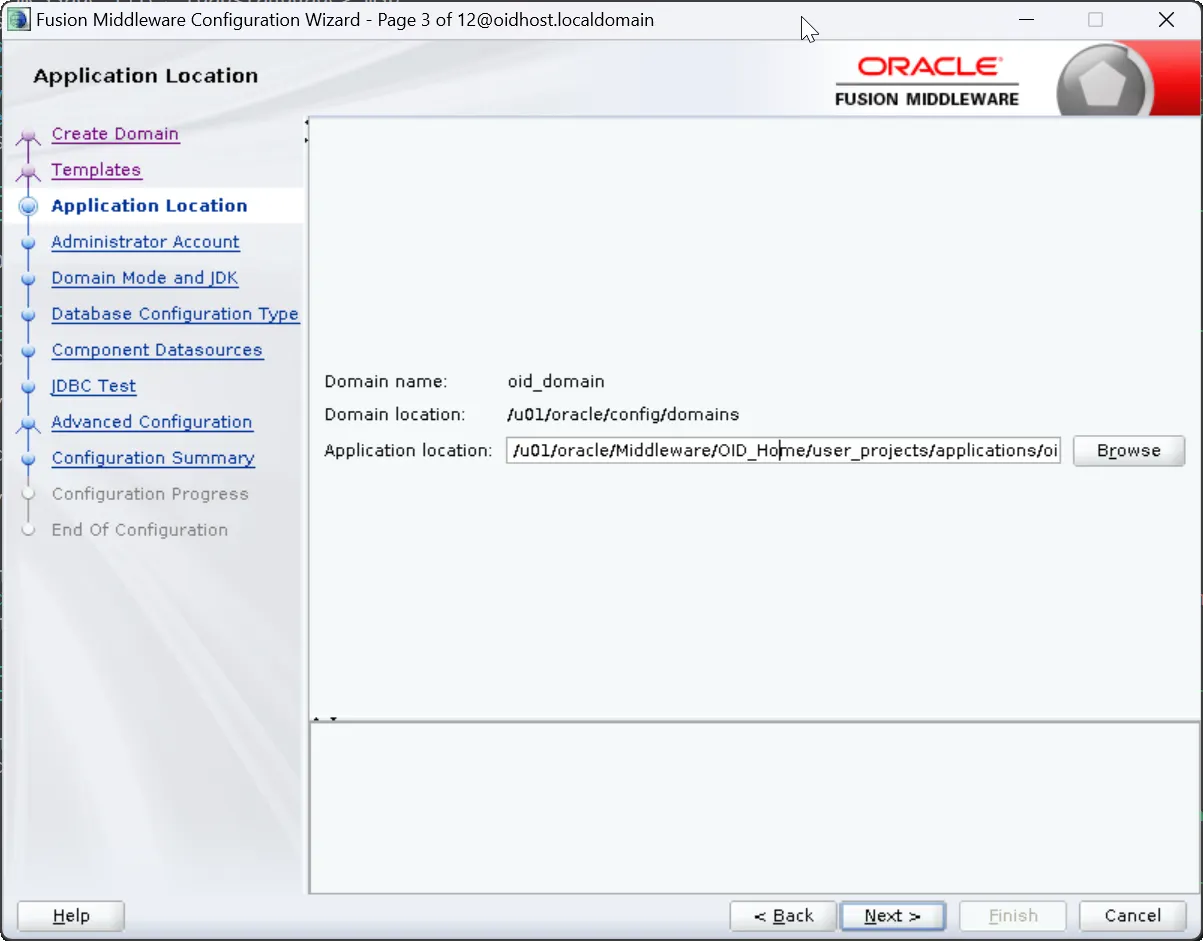
4.
Application Location:
•
Accept default values
•
Click 'Next'
5.
Administrator Account Creation:
•
Username: weblogic (default)
•
Password: Set a strong password
•
Note: Remember these credentials as they'll be needed for WebLogic Console access
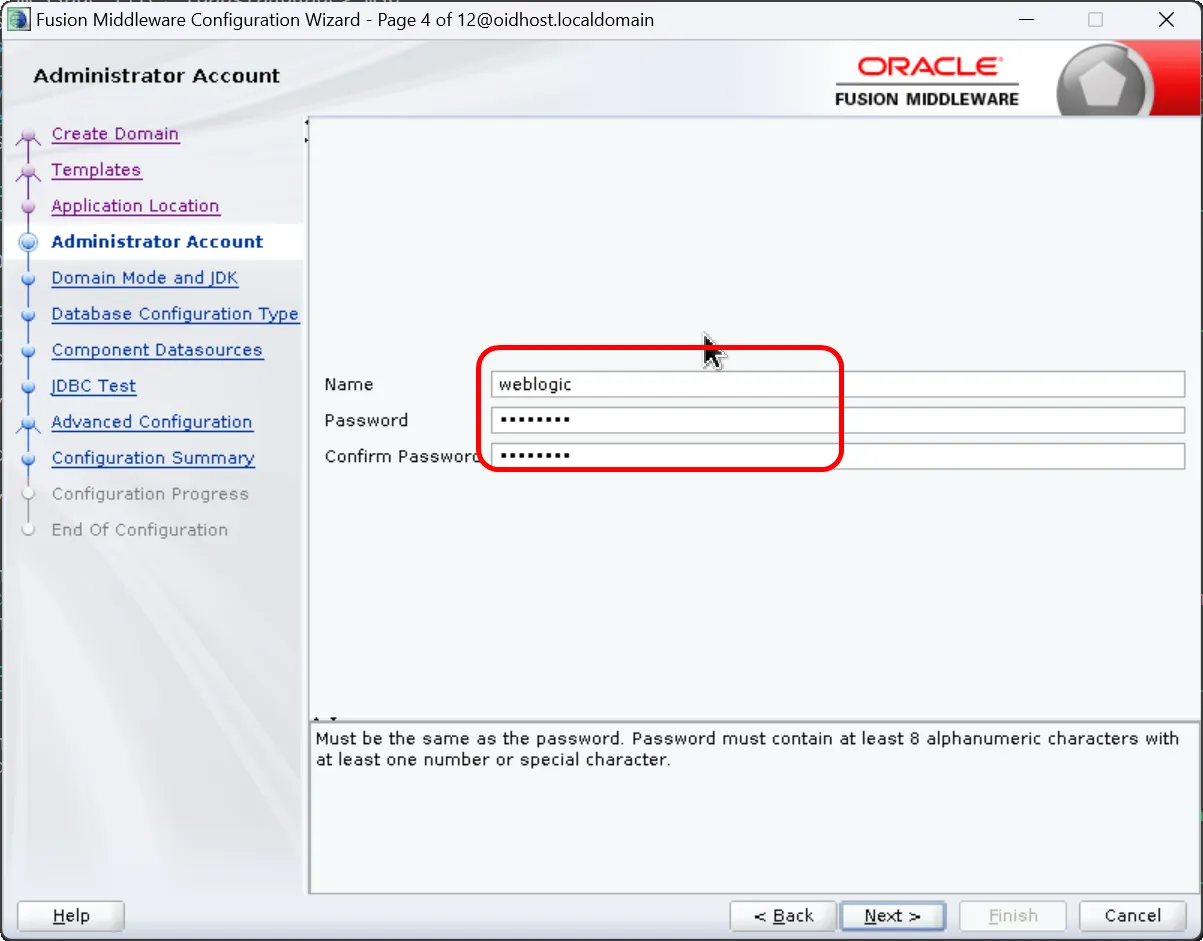
Administrator Account
6.
Domain Mode and JDK Selection:
•
Domain Mode: Select Production or Development
•
JDK: Select previously installed JDK
•
Note: Production mode is recommended for production environments
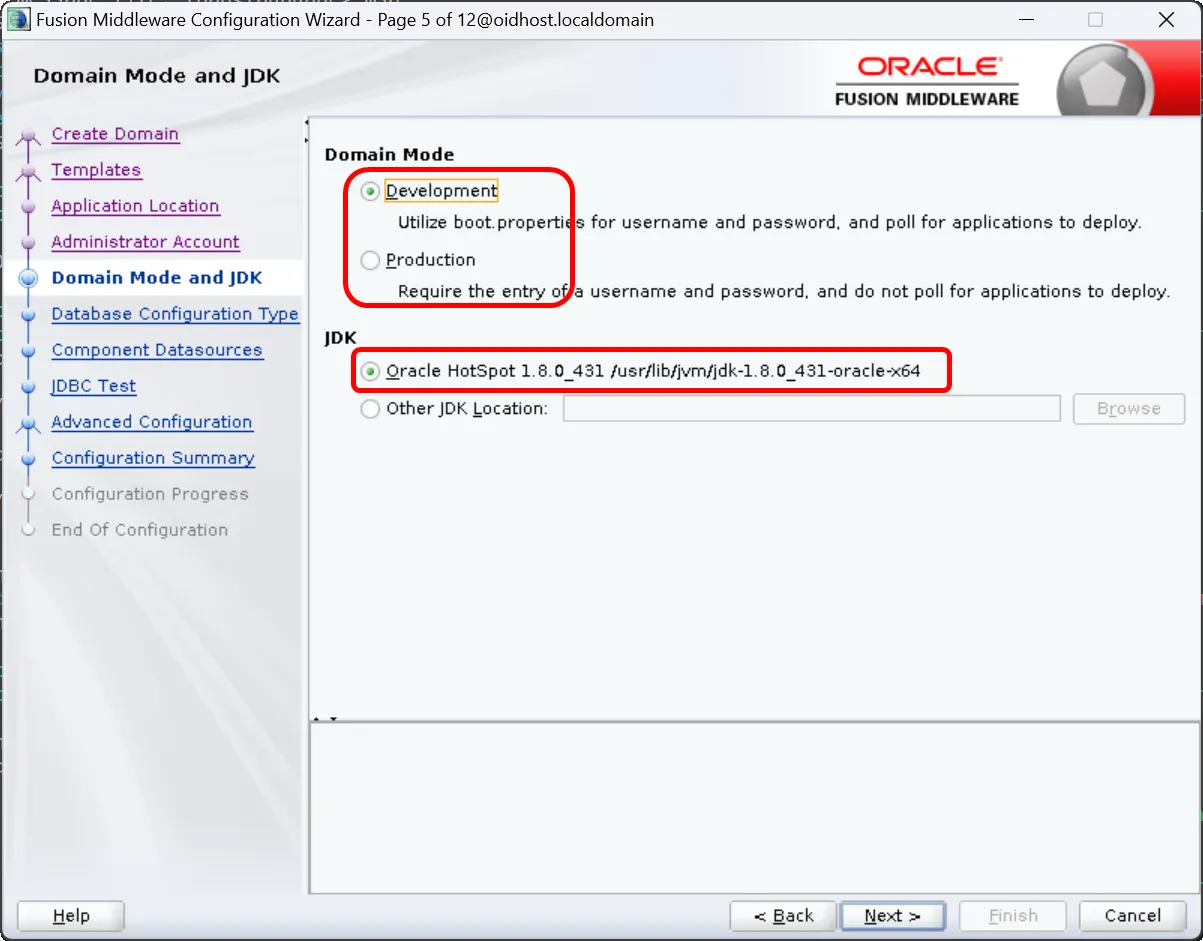
Domain Node and JDK
7.
Database Configuration:
•
Vendor: Oracle
•
DBMS/Service: Database service name
•
Host Name: Database server hostname or IP
•
Port: Database listening port
•
Schema Owner: RCU schema prefix_STB (e.g., OID_STB)
•
Password: Schema password
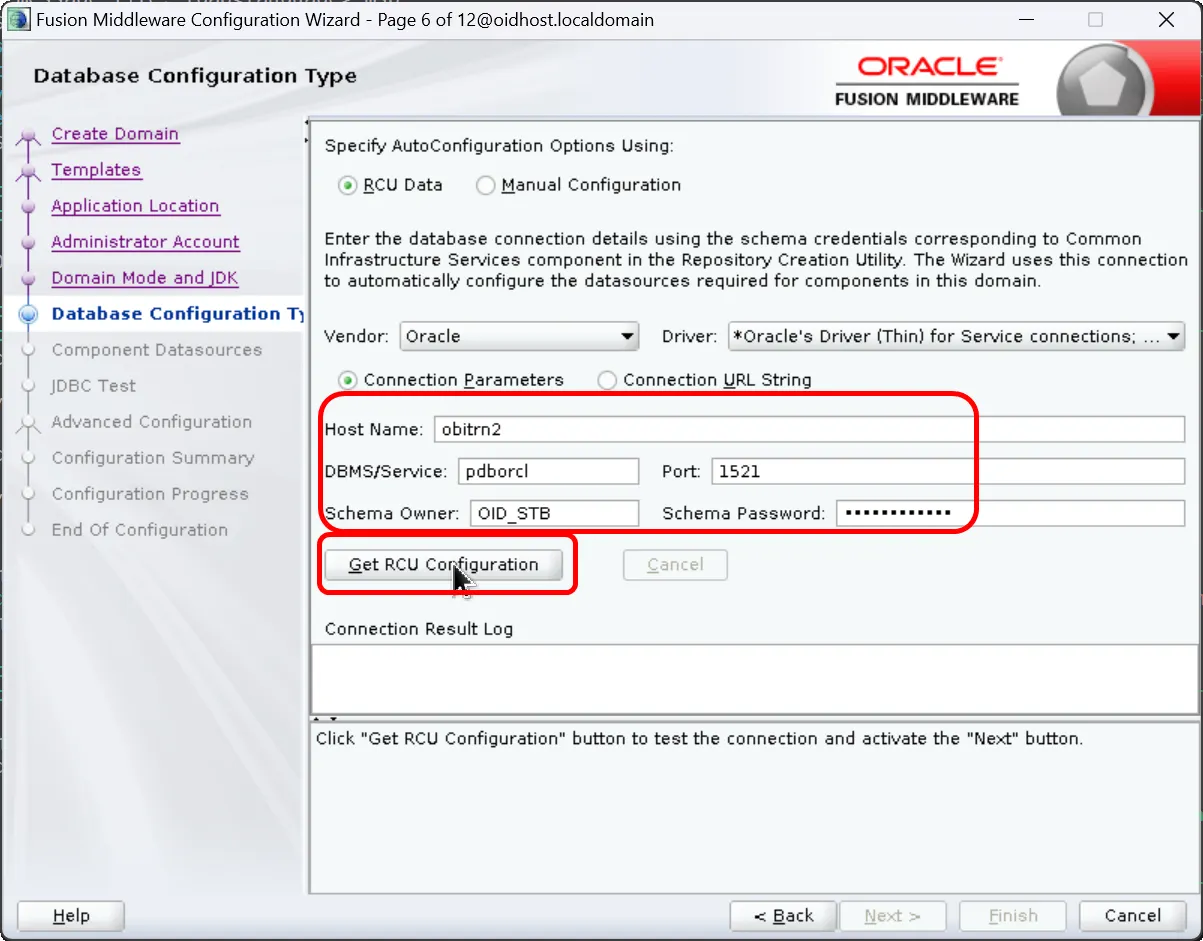
Database Configuration Type
8.
Click 'Get RCU Configuration' button
9.
Test Component Datasources:
•
Select all datasources
•
Click 'Test All Connections'
•
All tests must pass to proceed
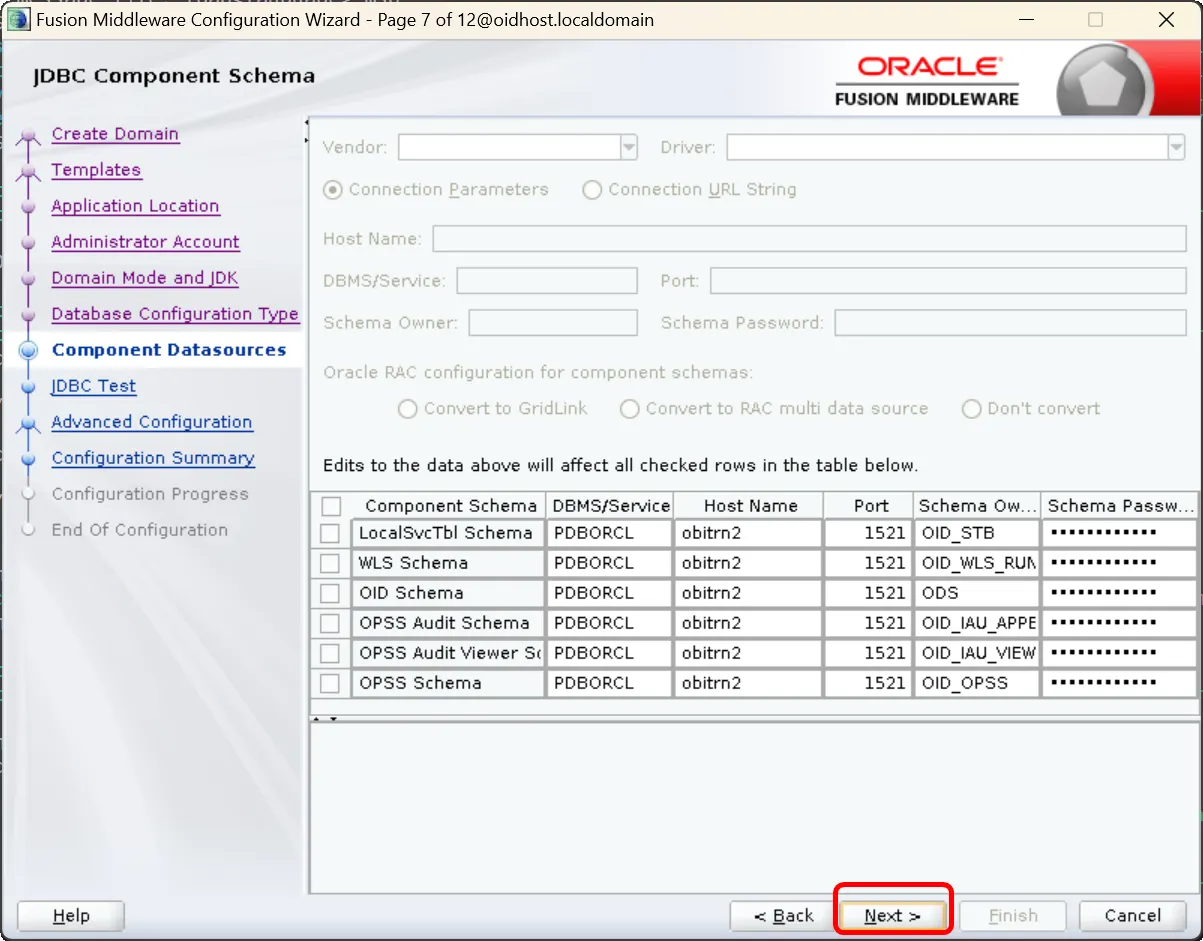
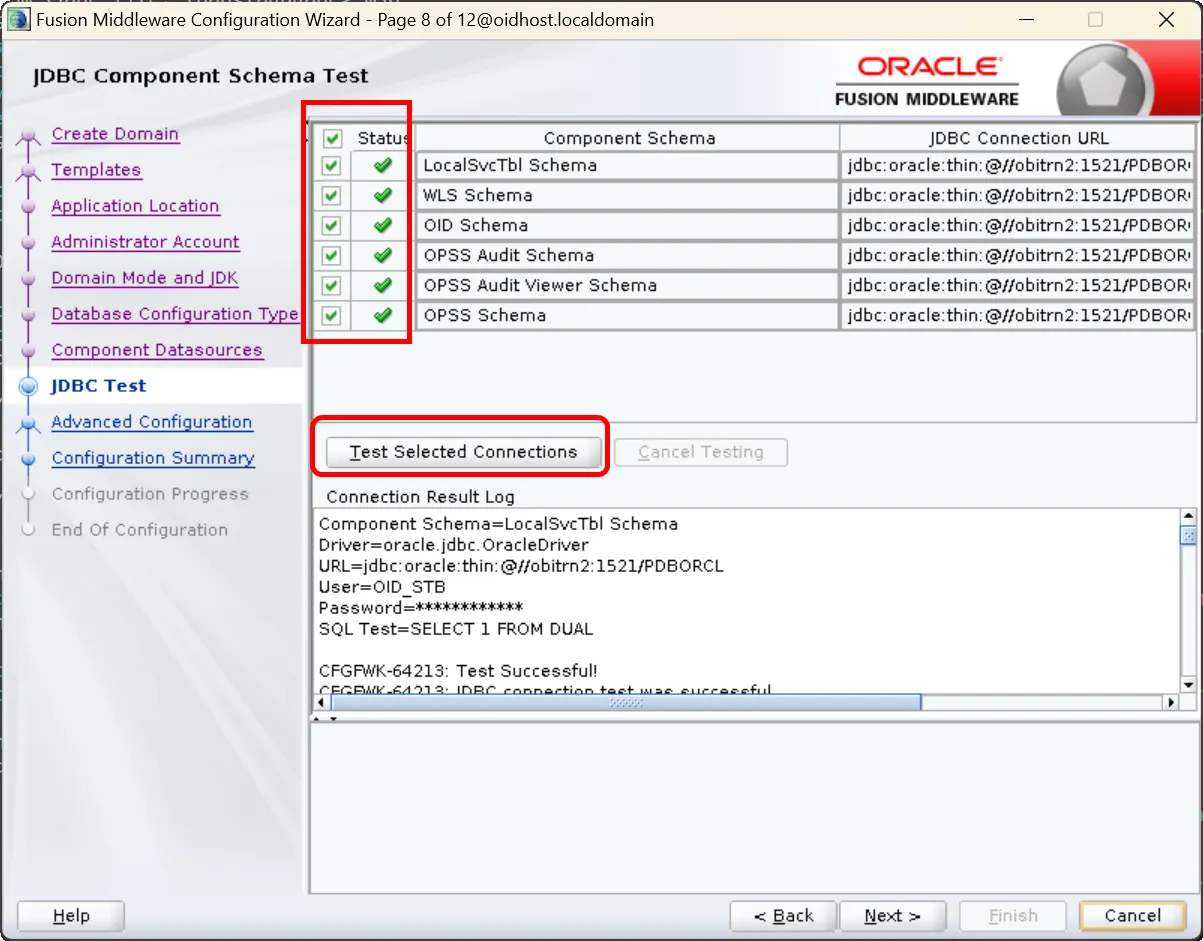
JDBC Test
10.
Advanced Configuration Options: Select these options:
•
Administration Server
•
Node Manager
•
Topology
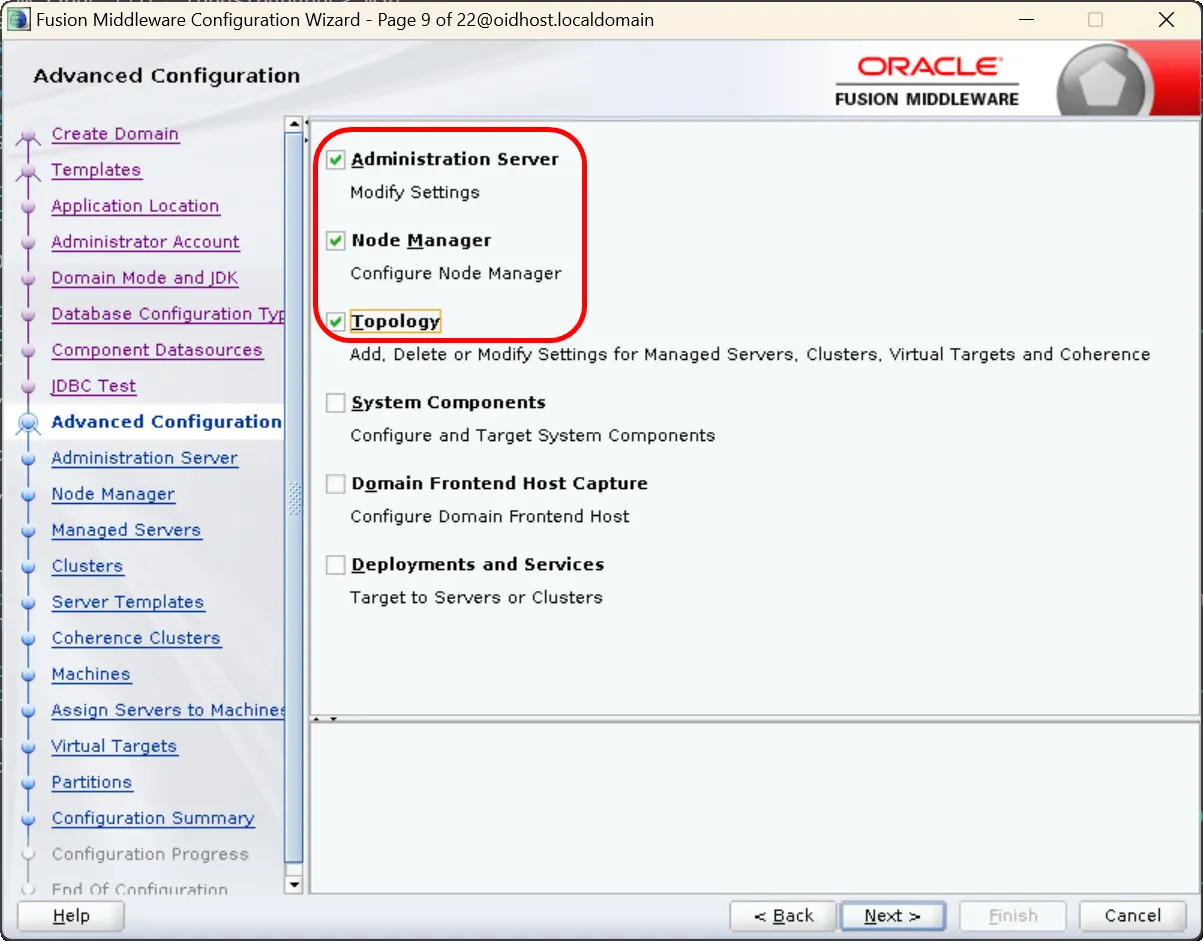
Advanced Configuration - Administration Server, Node Manager, Topology
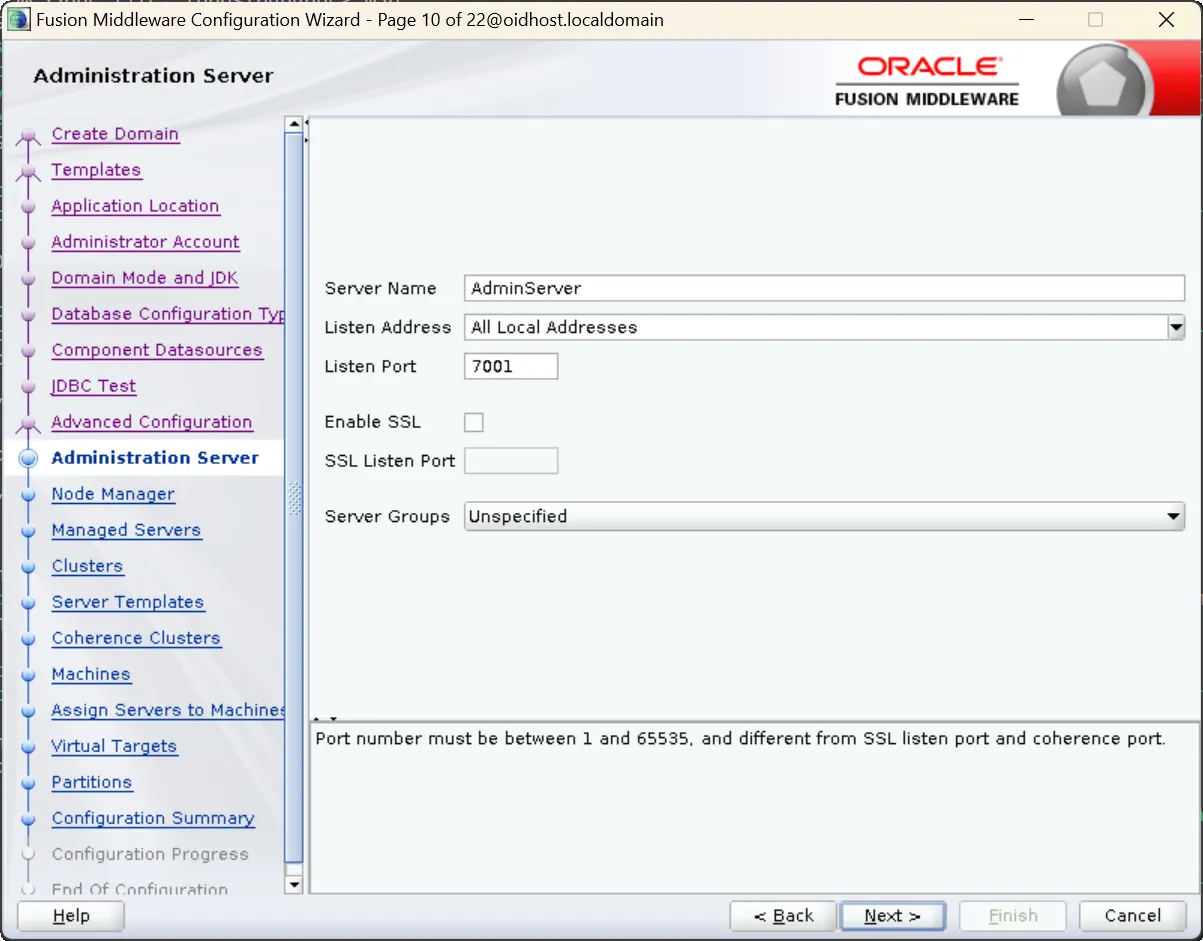
11.
Administration Server Configuration:
•
Name: AdminServer (default)
•
Listen Address: Leave blank for all addresses, or specify IP
•
Listen Port: 7001 (default) or preferred port number
•
Note: Use a different port if 7001 is already in use
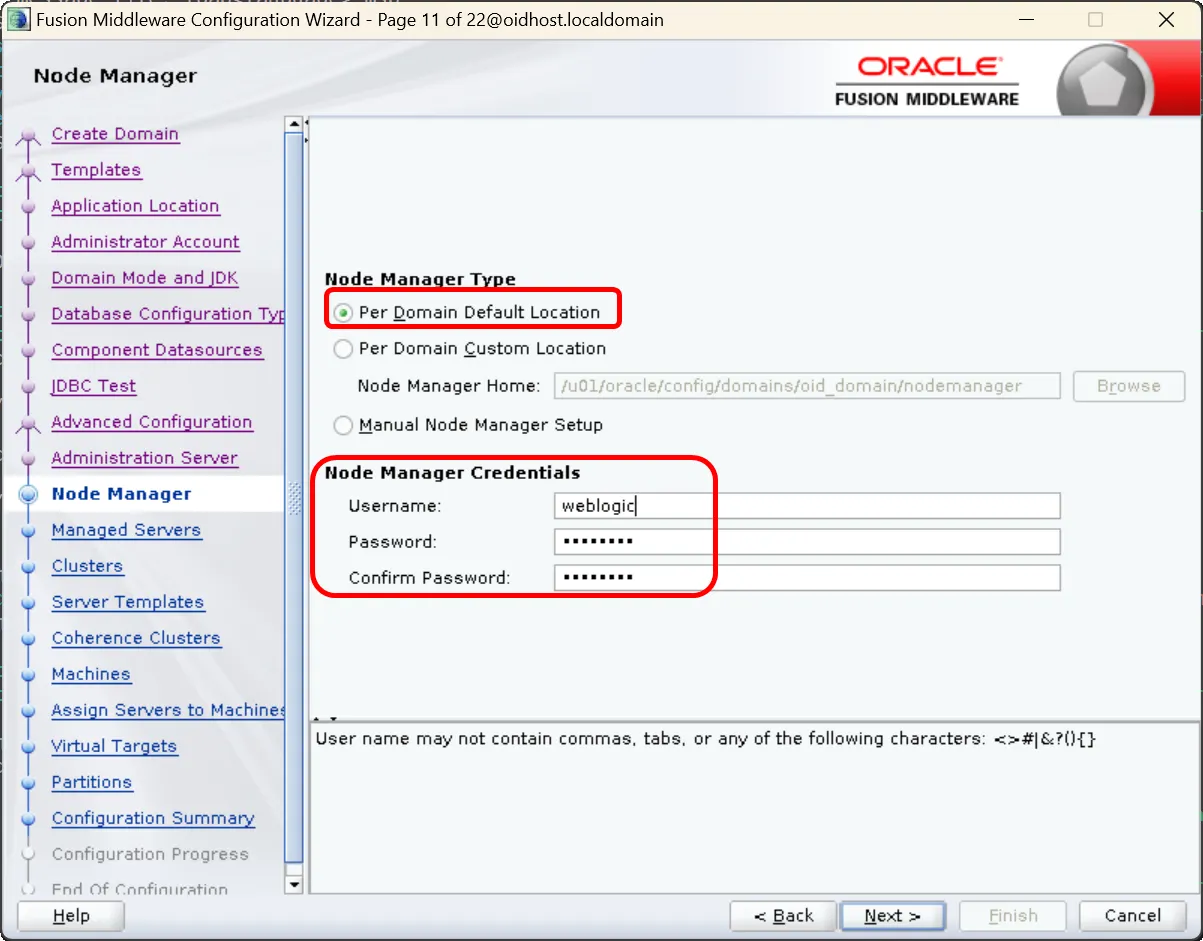
12.
Node Manager Configuration:
•
Select "Per Domain Default Location"
•
Username: weblogic or preferred username
•
Password: Set password
•
Note: These credentials are used for Node Manager access
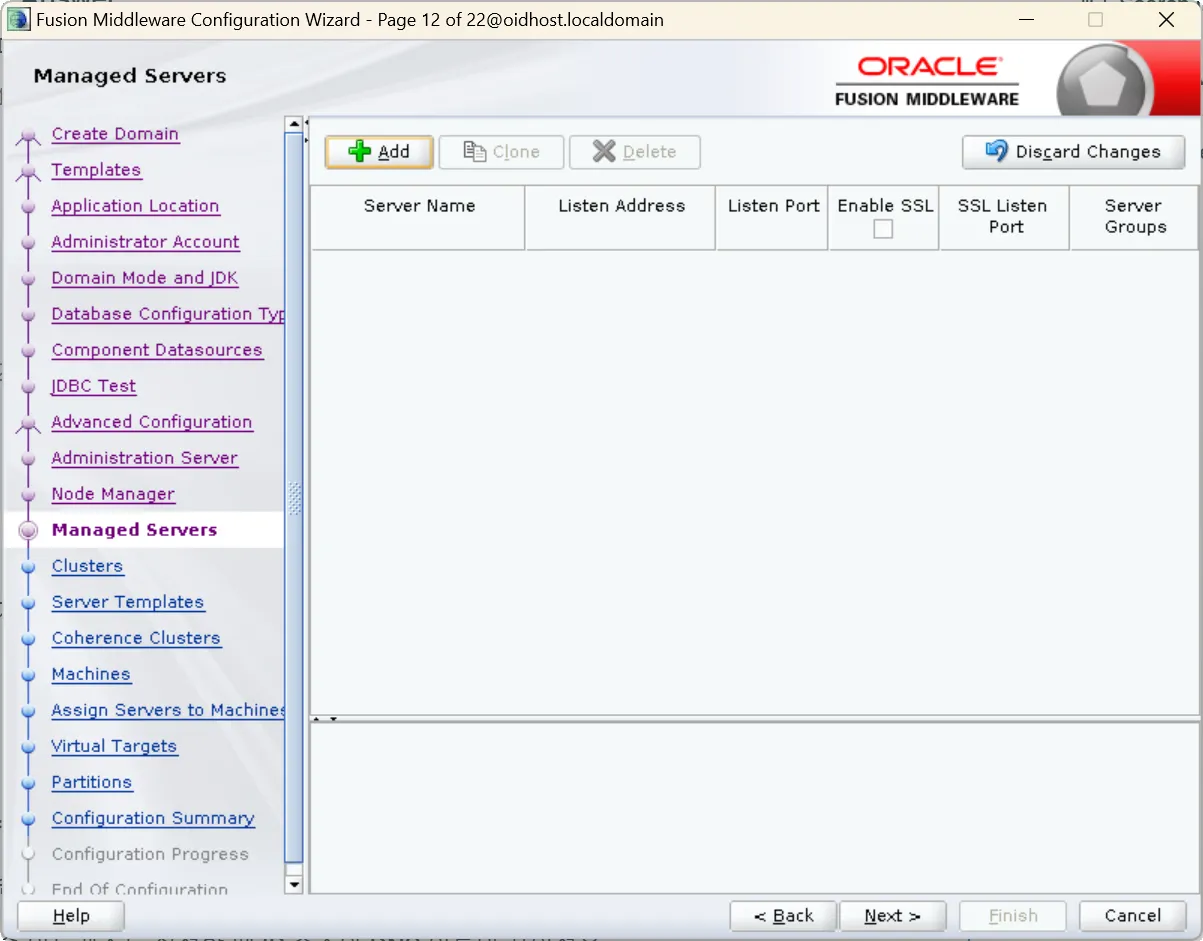
13.
Managed Server Configuration:
•
Click 'Next' if you don't plan to create WebLogic managed servers
•
Note: OID 12c doesn't require WebLogic managed servers, ODSM deploys to Admin Server
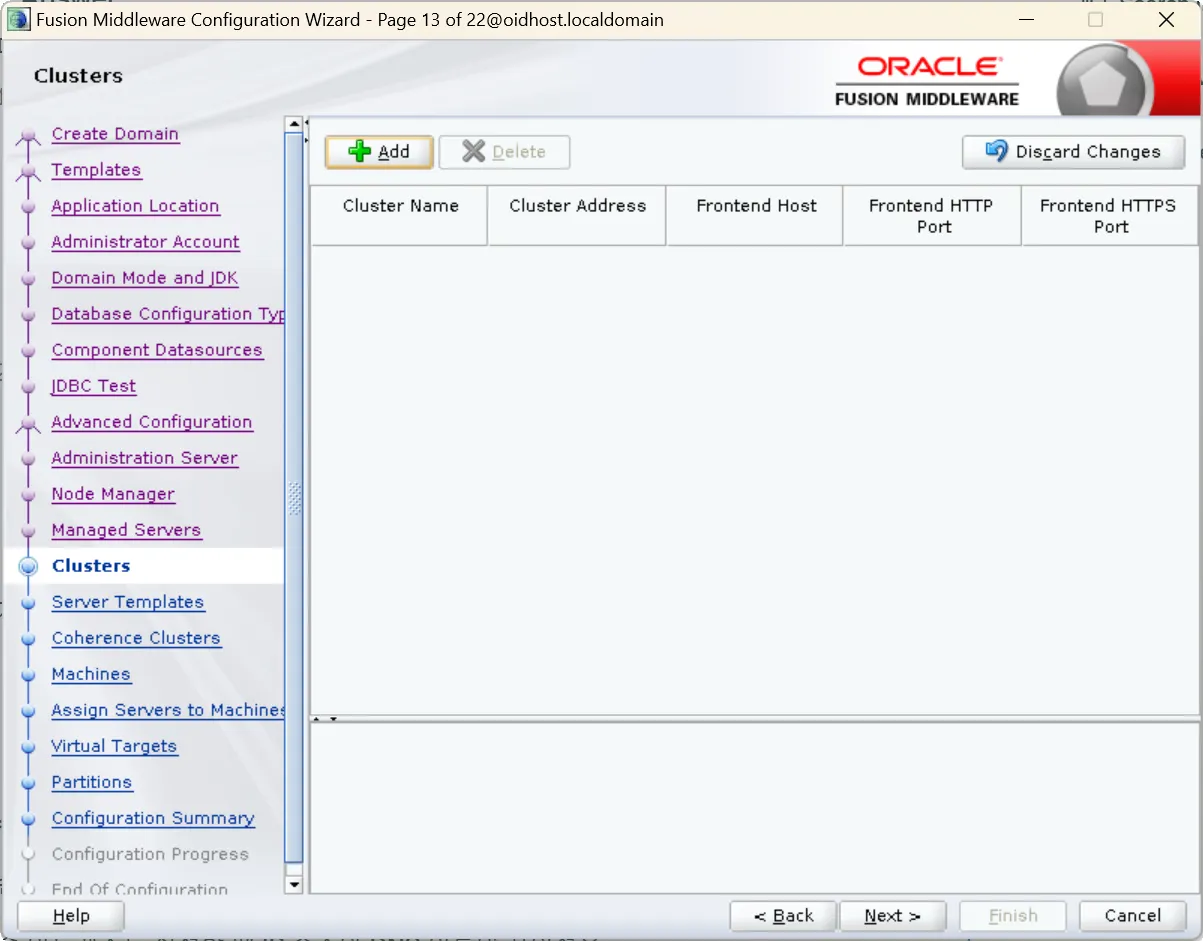
14.
Cluster Configuration:
•
Skip this step as it's not applicable for Oracle Internet Directory
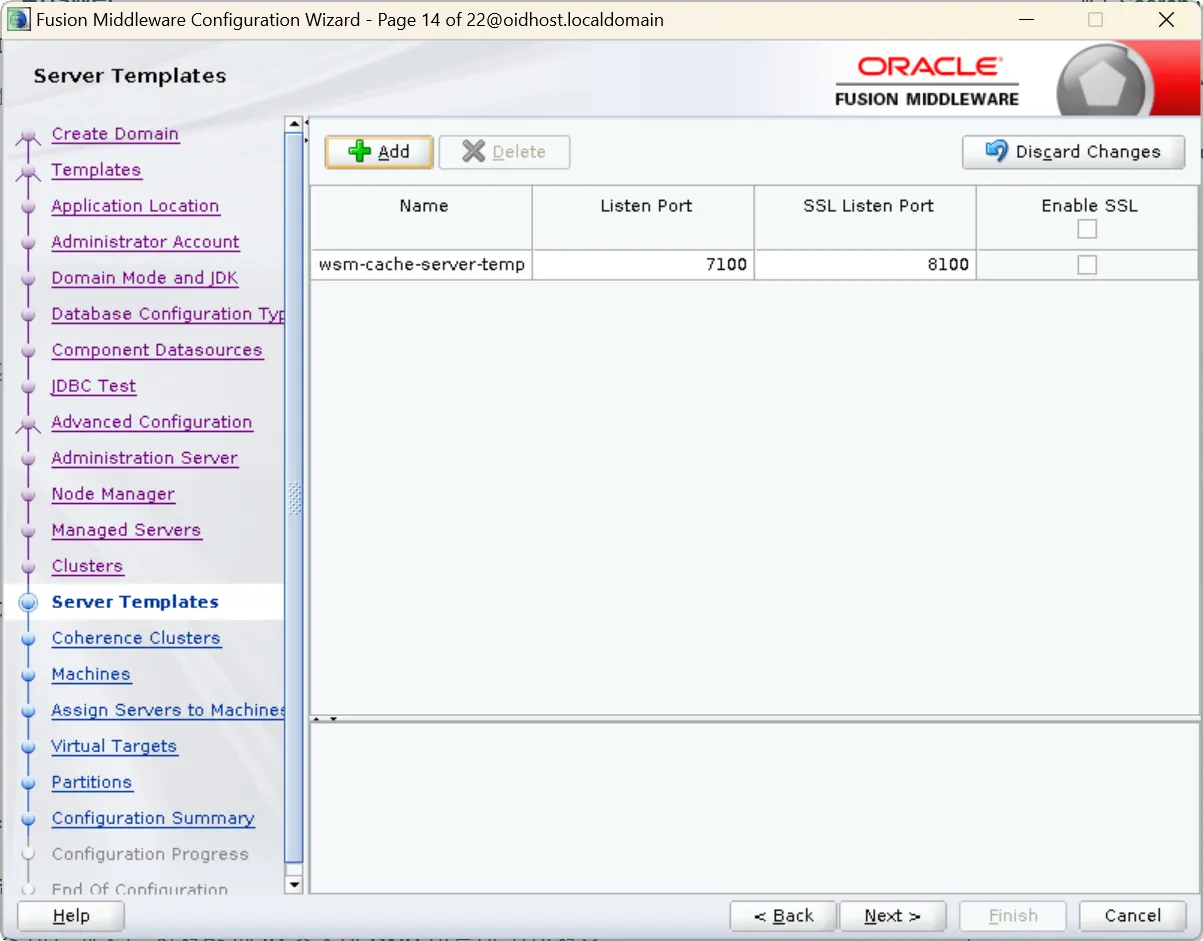
15.
Server Templates:
•
Skip this step (not applicable for OID)
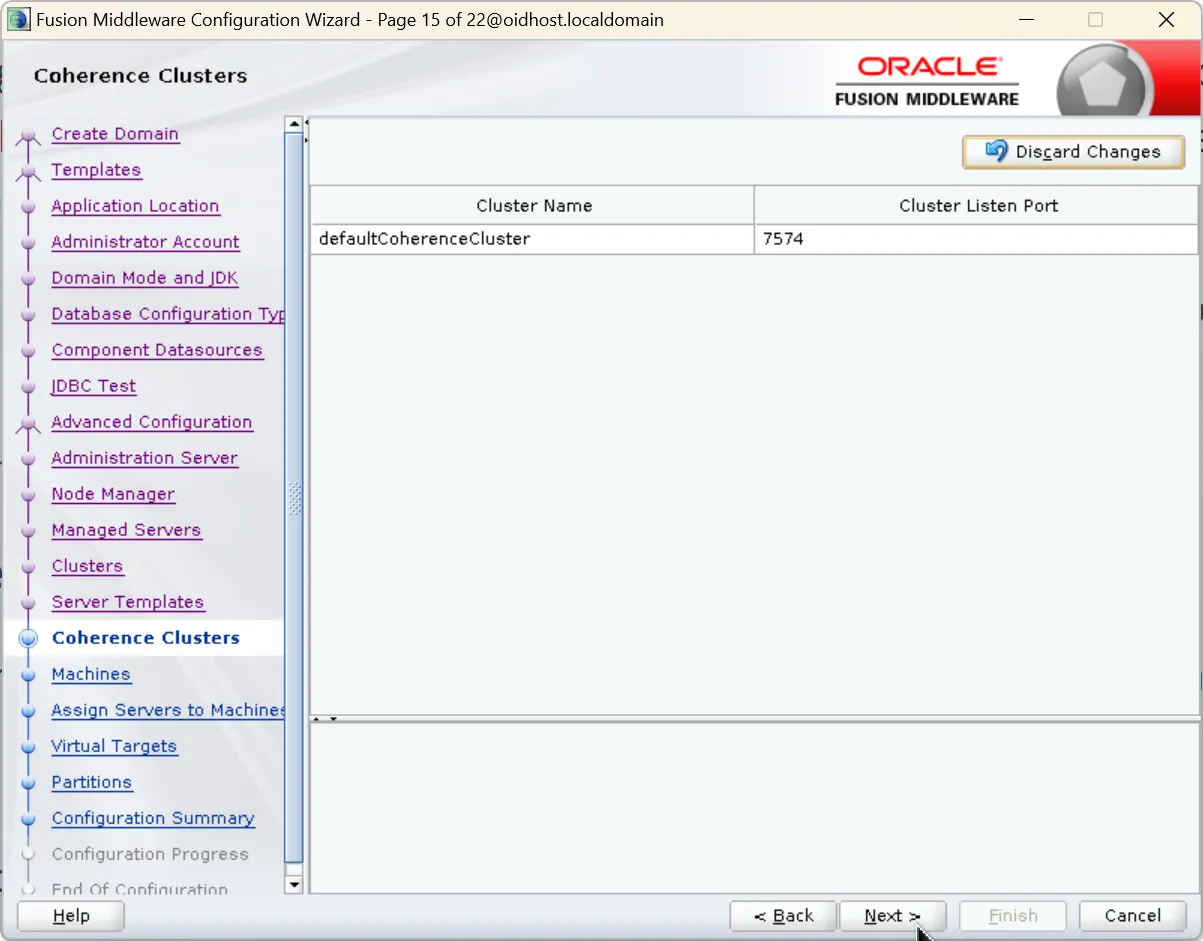
16.
Coherence Clusters:
•
Skip this step (not applicable for OID)
17.
Machine Configuration:
•
Select default machine oidhost1
•
Update Listen Port according to Node Manager port
•
Port: 5556 (should match Node Manager configuration)
Important Note:
Do not change the default machine name (oidhost1). The WLST command oid_setup() used in subsequent configuration steps relies on this name.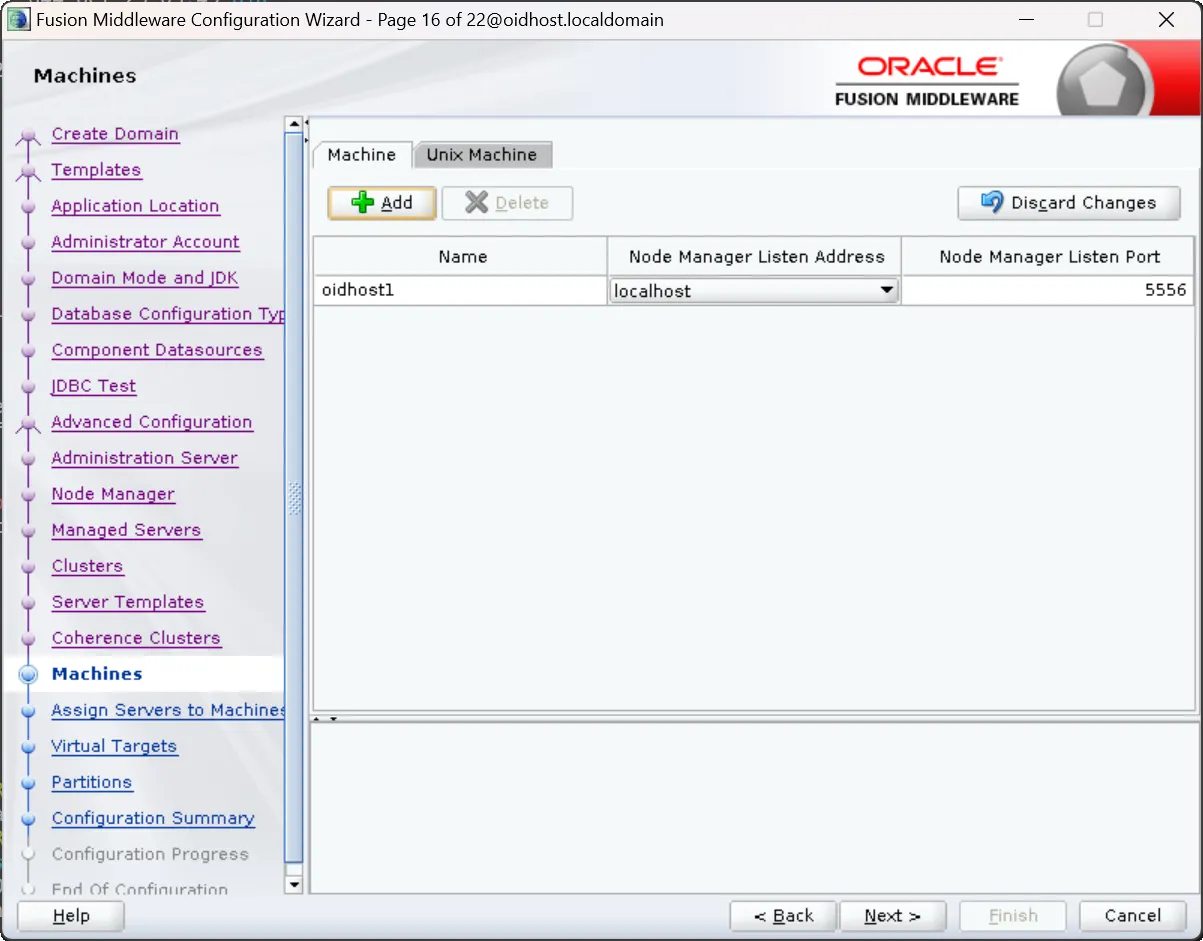
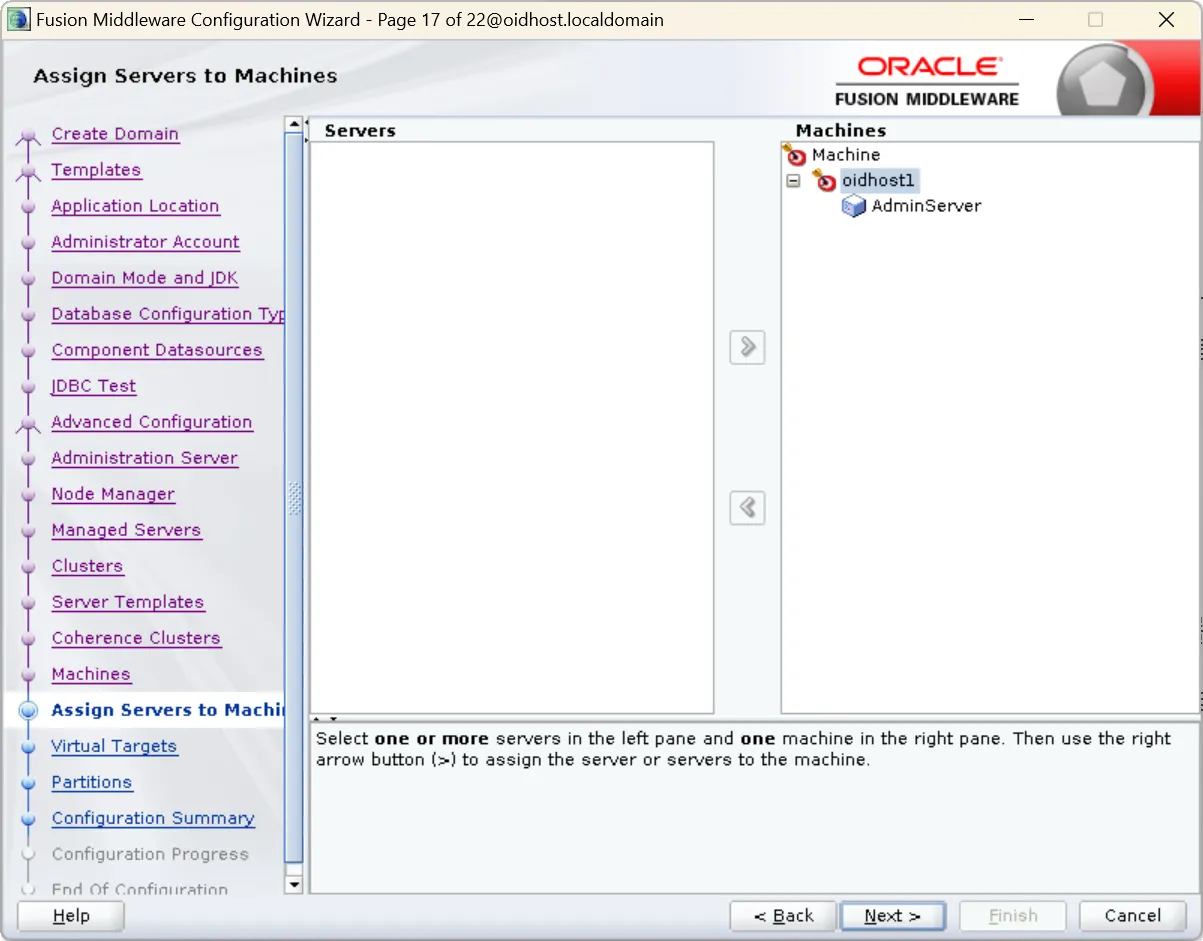
18.
Assign Servers to Machine:
•
In the Servers window, assign AdminServer to oidhost1

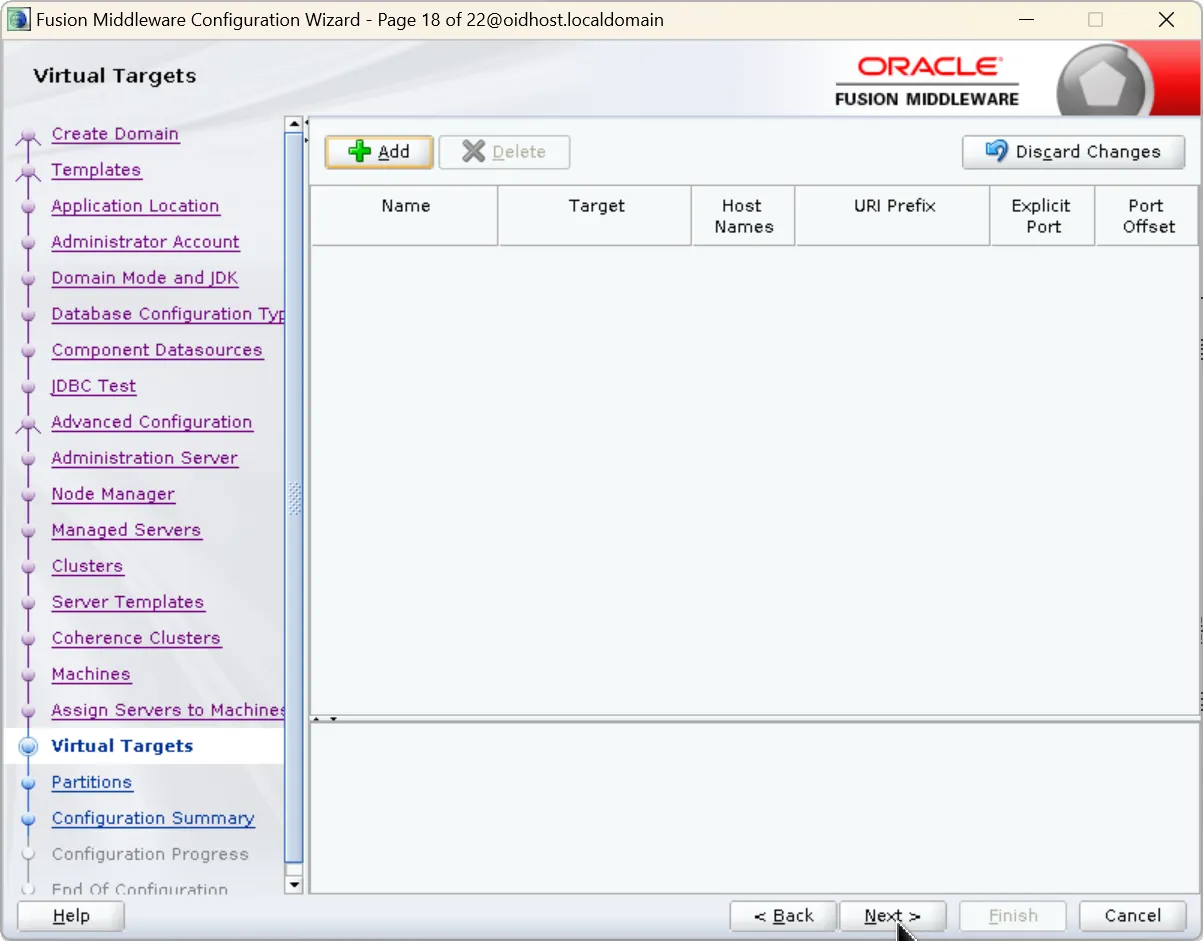
19.
Virtual Targets
•
You can skip this screen for Oracle Internet Directory configuration.
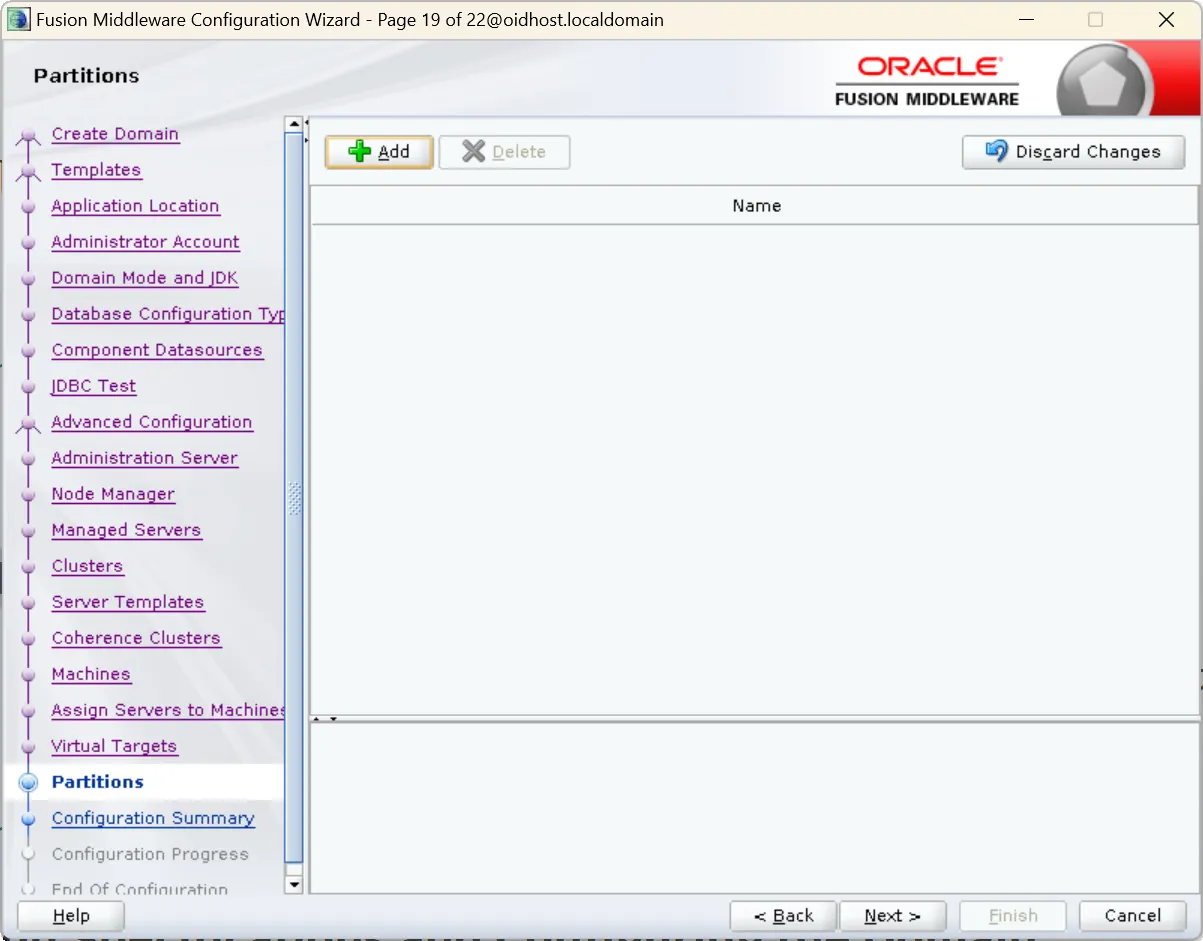
20.
Partitions
•
Click Next as this is not applicable to Oracle Internet Directory.
21.
Target Deployments to Clusters or Servers:
•
Verify OID components are assigned to oidhost1
•
Verify AdminServer is assigned to oidhost1
22.
Target Services to Clusters or Servers:
•
Verify all services are properly assigned to AdminServer and oidhost1
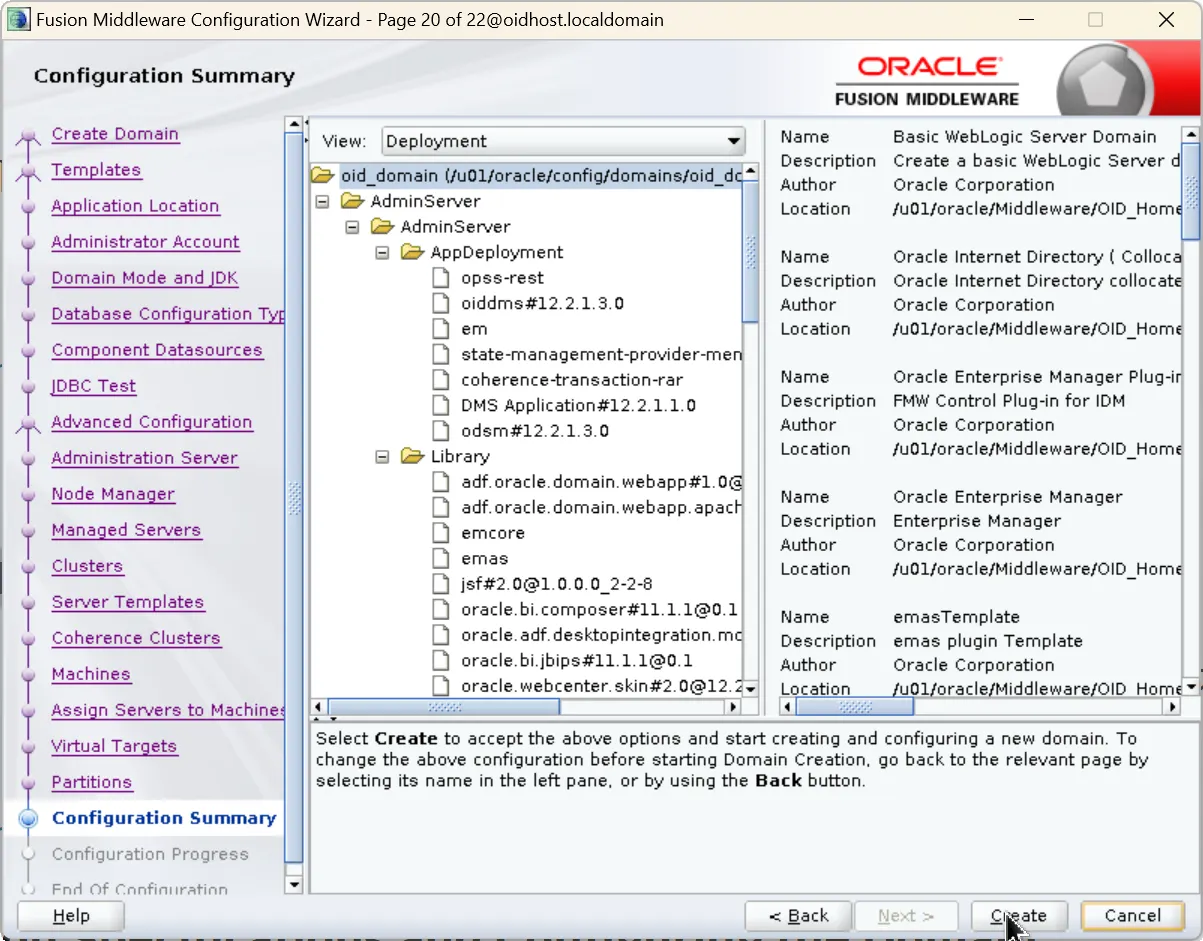
23.
Configuration Summary:
•
Review all settings
•
Return to previous sections if changes are needed
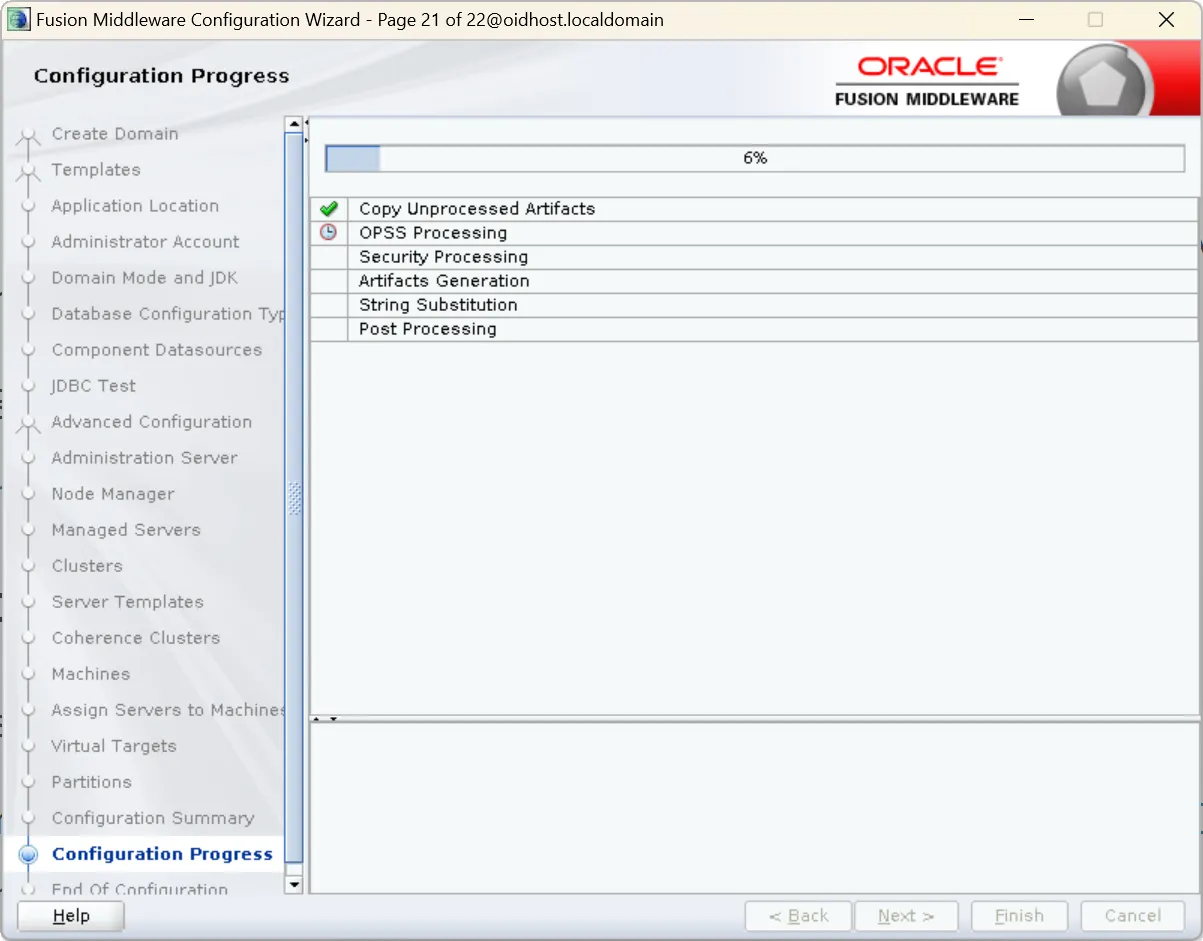
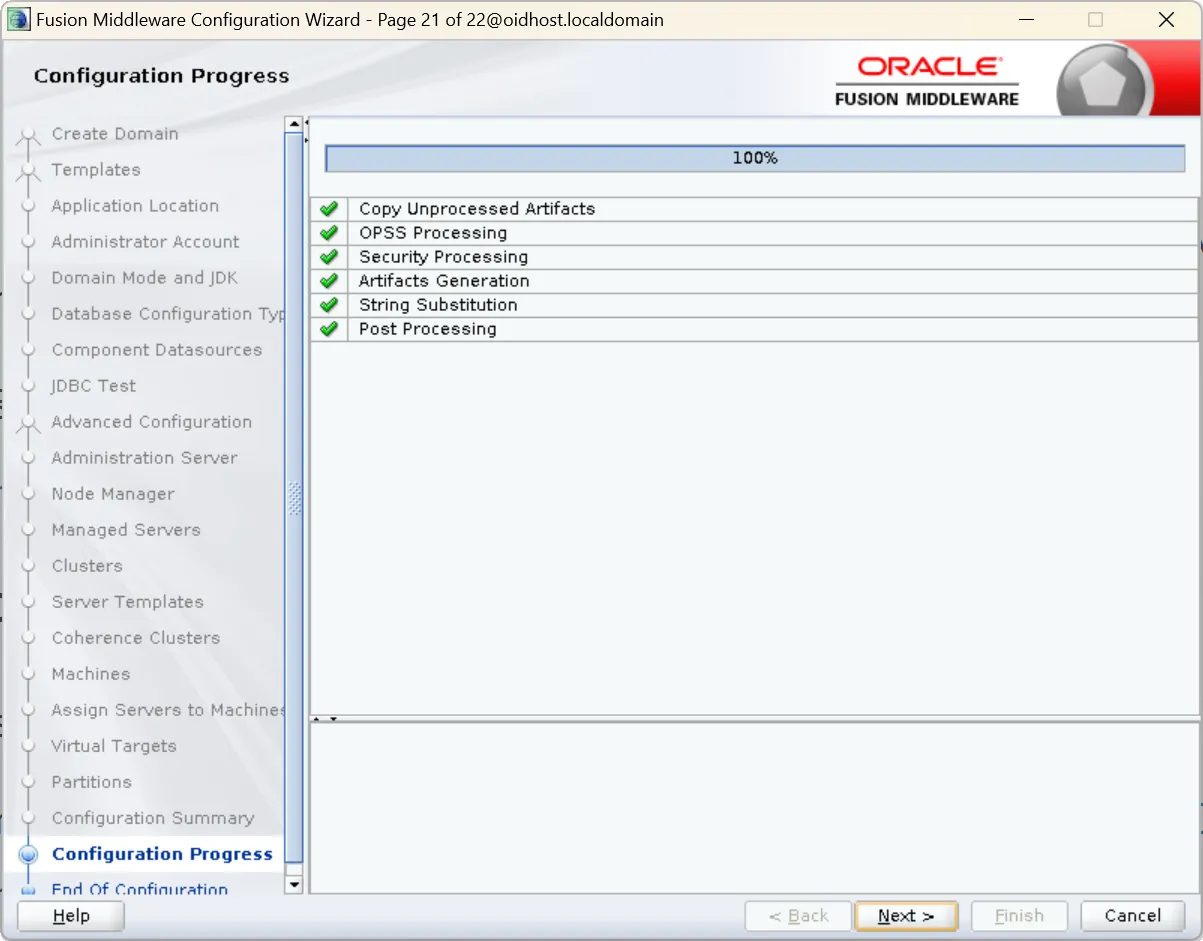
24.
Configuration Creation:
•
Click 'Create' to begin domain configuration
•
Process may take 10-20 minutes depending on system performance
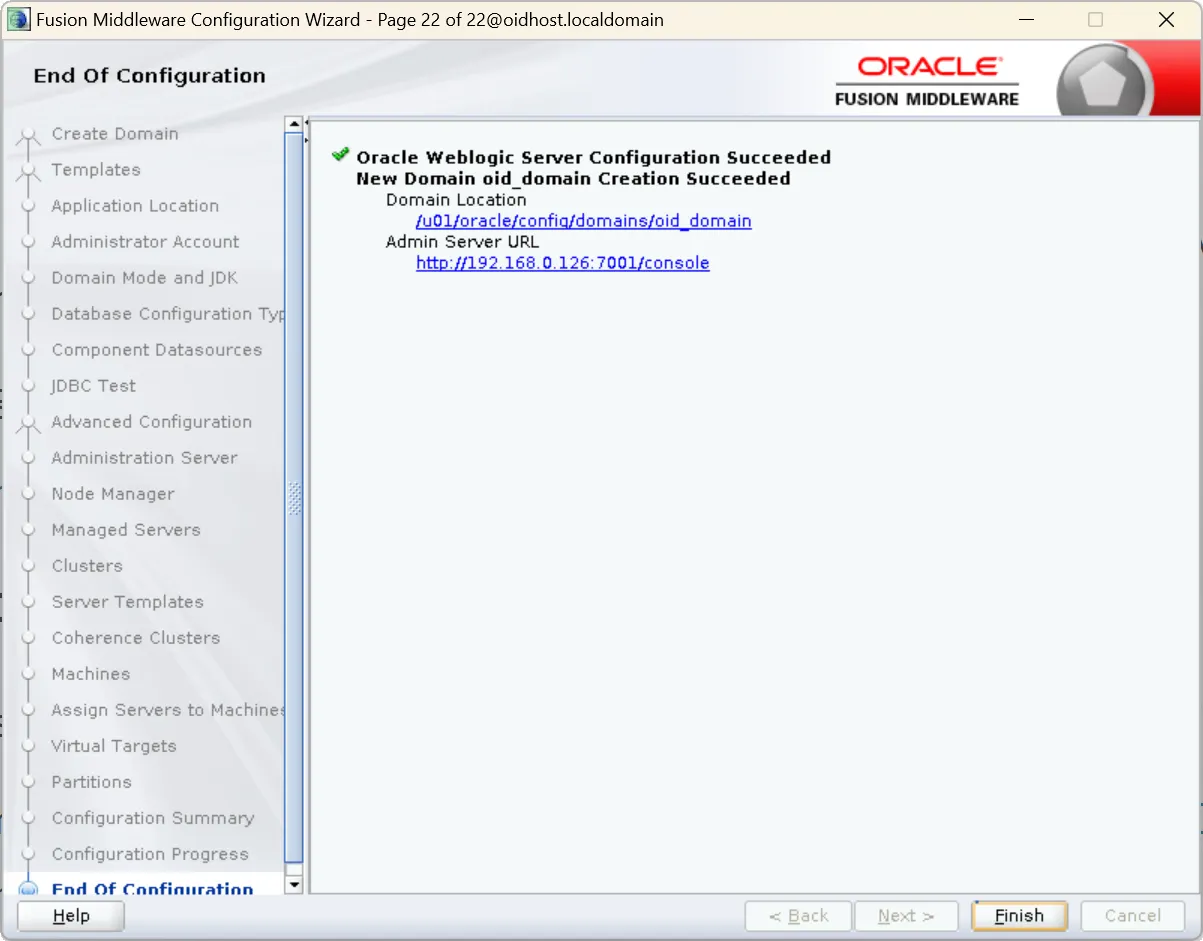
5.4 Domain Creation Completion and Verification
1.
When configuration completes, click 'Finish' to exit the Configuration Wizard
2.
Verify domain creation with these steps:
a.
Navigate to domain directory:
cd /u01/oracle/config/domains/oid_domain
Bash
복사
b.
Check main configuration files:
ls -l config
Bash
복사
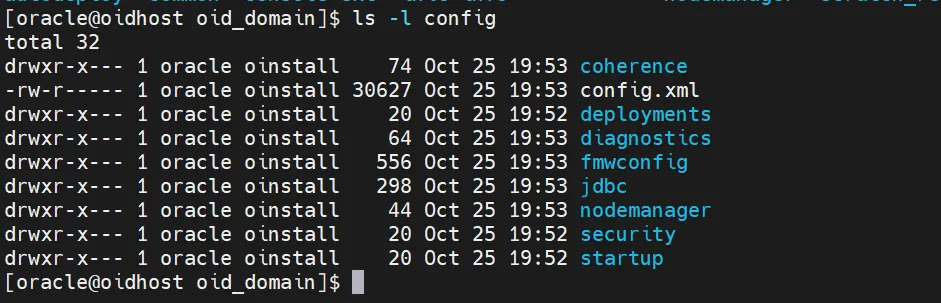
Config directory check
This should show config.xml, config.loc, and other configuration files.
c.
Verify bin directory scripts:
ls -l bin
Bash
복사
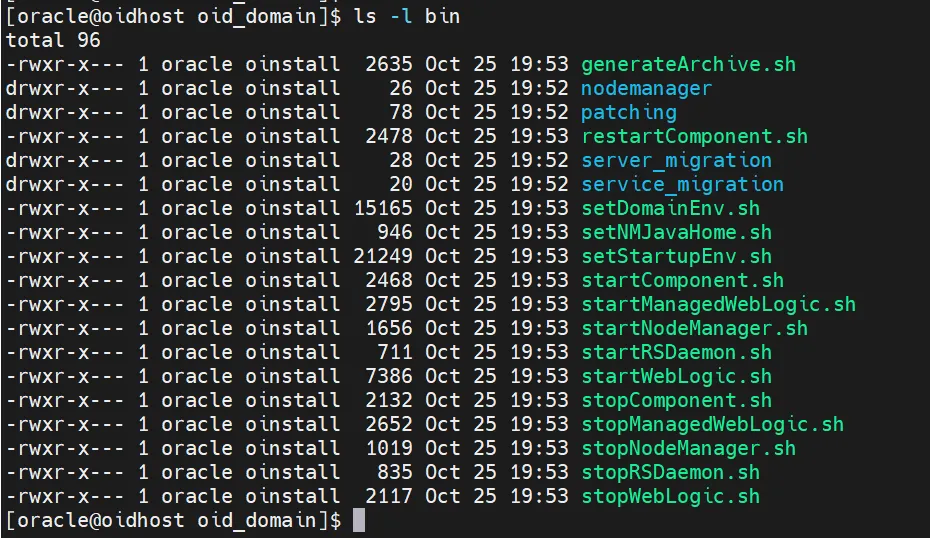
Domain directory sttructure
6. Starting Node Manager and Admin Server
After domain creation, we need to start both the Node Manager and Administration Server.
6.1 Starting Node Manager
1.
Open a new terminal window
2.
Switch to oracle user:
su - oracle
Bash
복사
3.
Set domain environment variables:
. /u01/oracle/config/domains/oid_domain/bin/setDomainEnv.sh
Bash
복사
4.
Start Node Manager:
$DOMAIN_HOME/bin/startNodeManager.sh
Bash
복사
5.
Verify Node Manager logs for successful startup:
tail -f $DOMAIN_HOME/nodemanager/nodemanager.log
Bash
복사
6.2 Starting Administration Server
1.
Open another new terminal window
2.
Switch to oracle user:
su - oracle
Bash
복사
3.
Set domain environment variables:
. /u01/oracle/config/domains/oid_domain/bin/setDomainEnv.sh
Bash
복사
4.
Start Administration Server:
$DOMAIN_HOME/bin/startWebLogic.sh
Bash
복사
5.
Enter WebLogic administrator credentials when prompted
6.
Monitor startup logs:
tail -f $DOMAIN_HOME/servers/AdminServer/logs/AdminServer.log
Bash
복사
6.3 Verifying Administration Console Access
1.
Open a web browser and navigate to:
http://[hostname]:7001/console
Bash
복사
Replace [hostname] with your server's actual hostname or IP address.
2.
Log in using WebLogic administrator credentials
3.
Verify successful login and access to the console
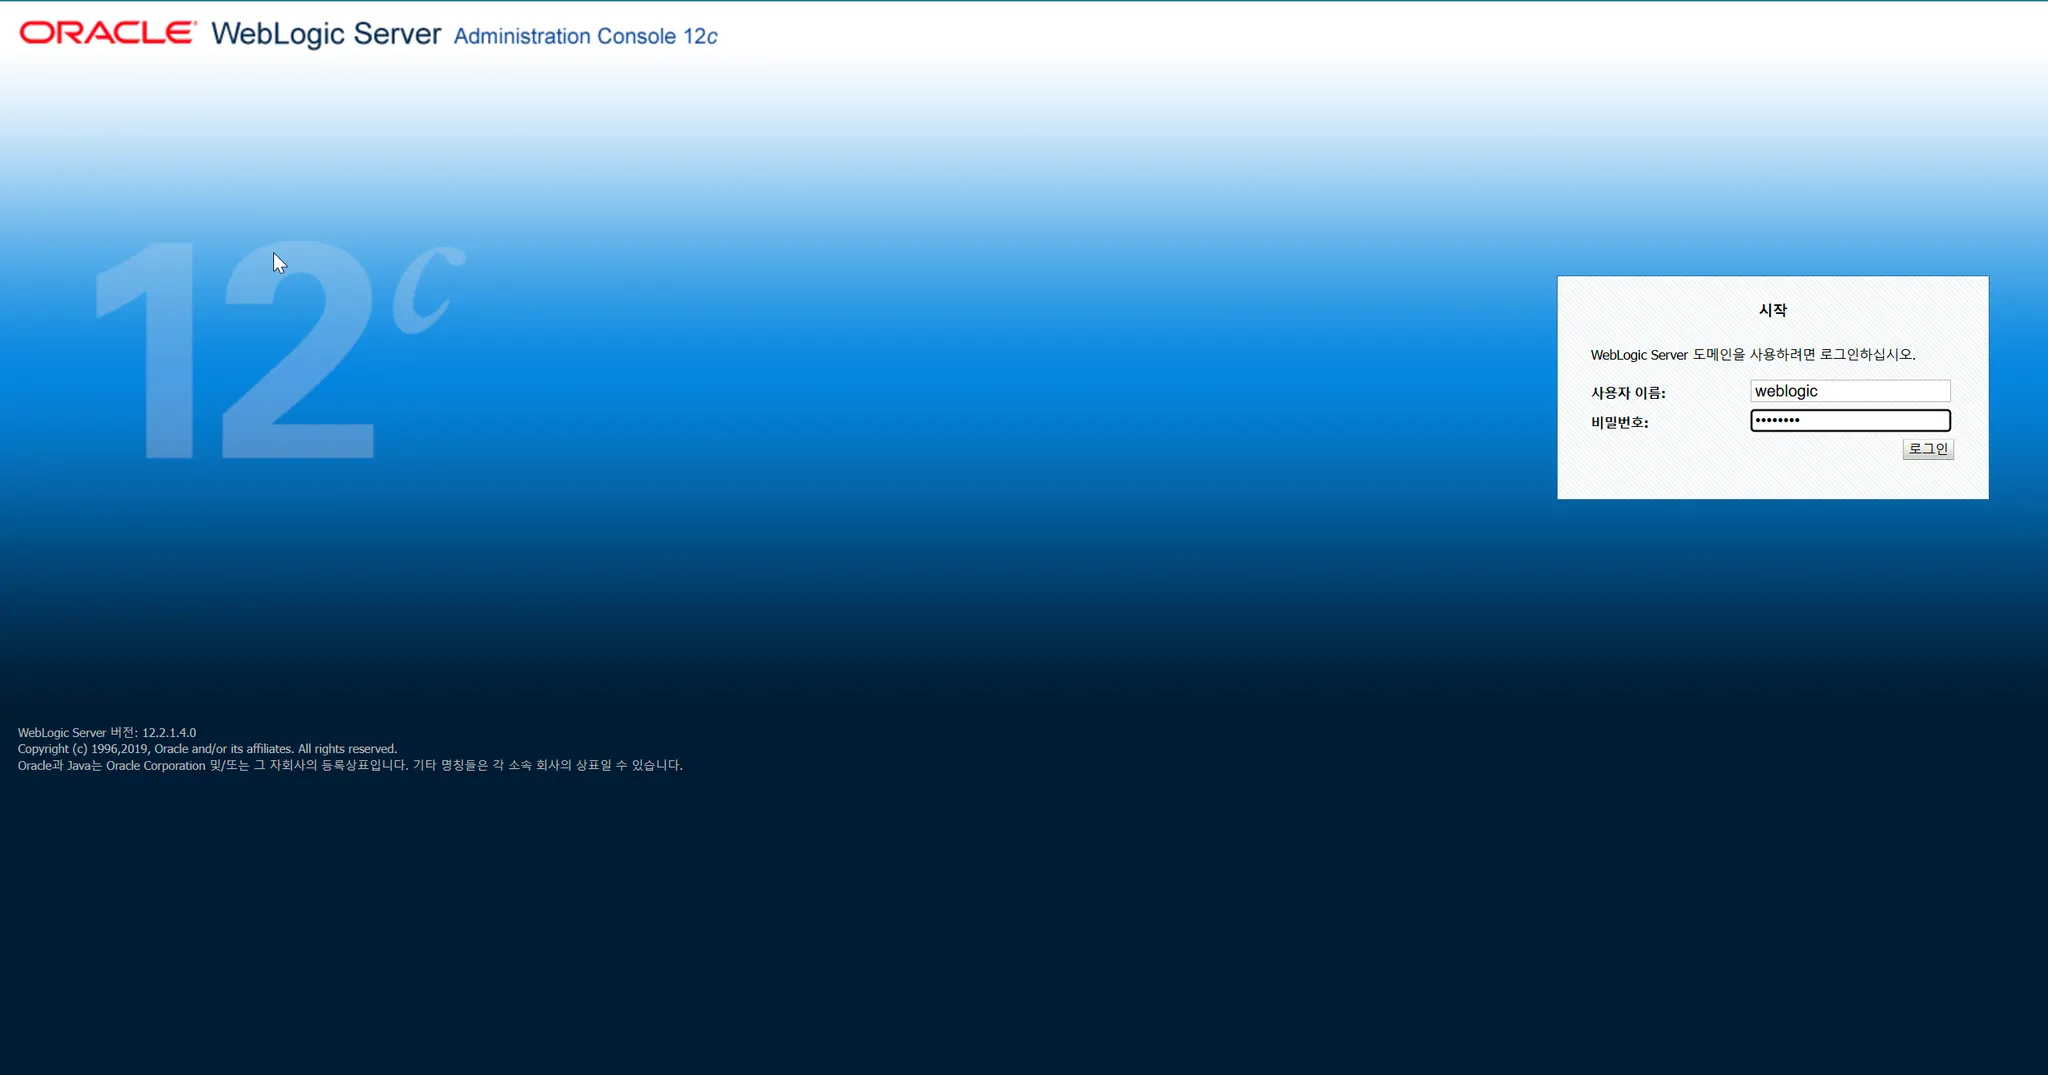
WebLogic Administration Console
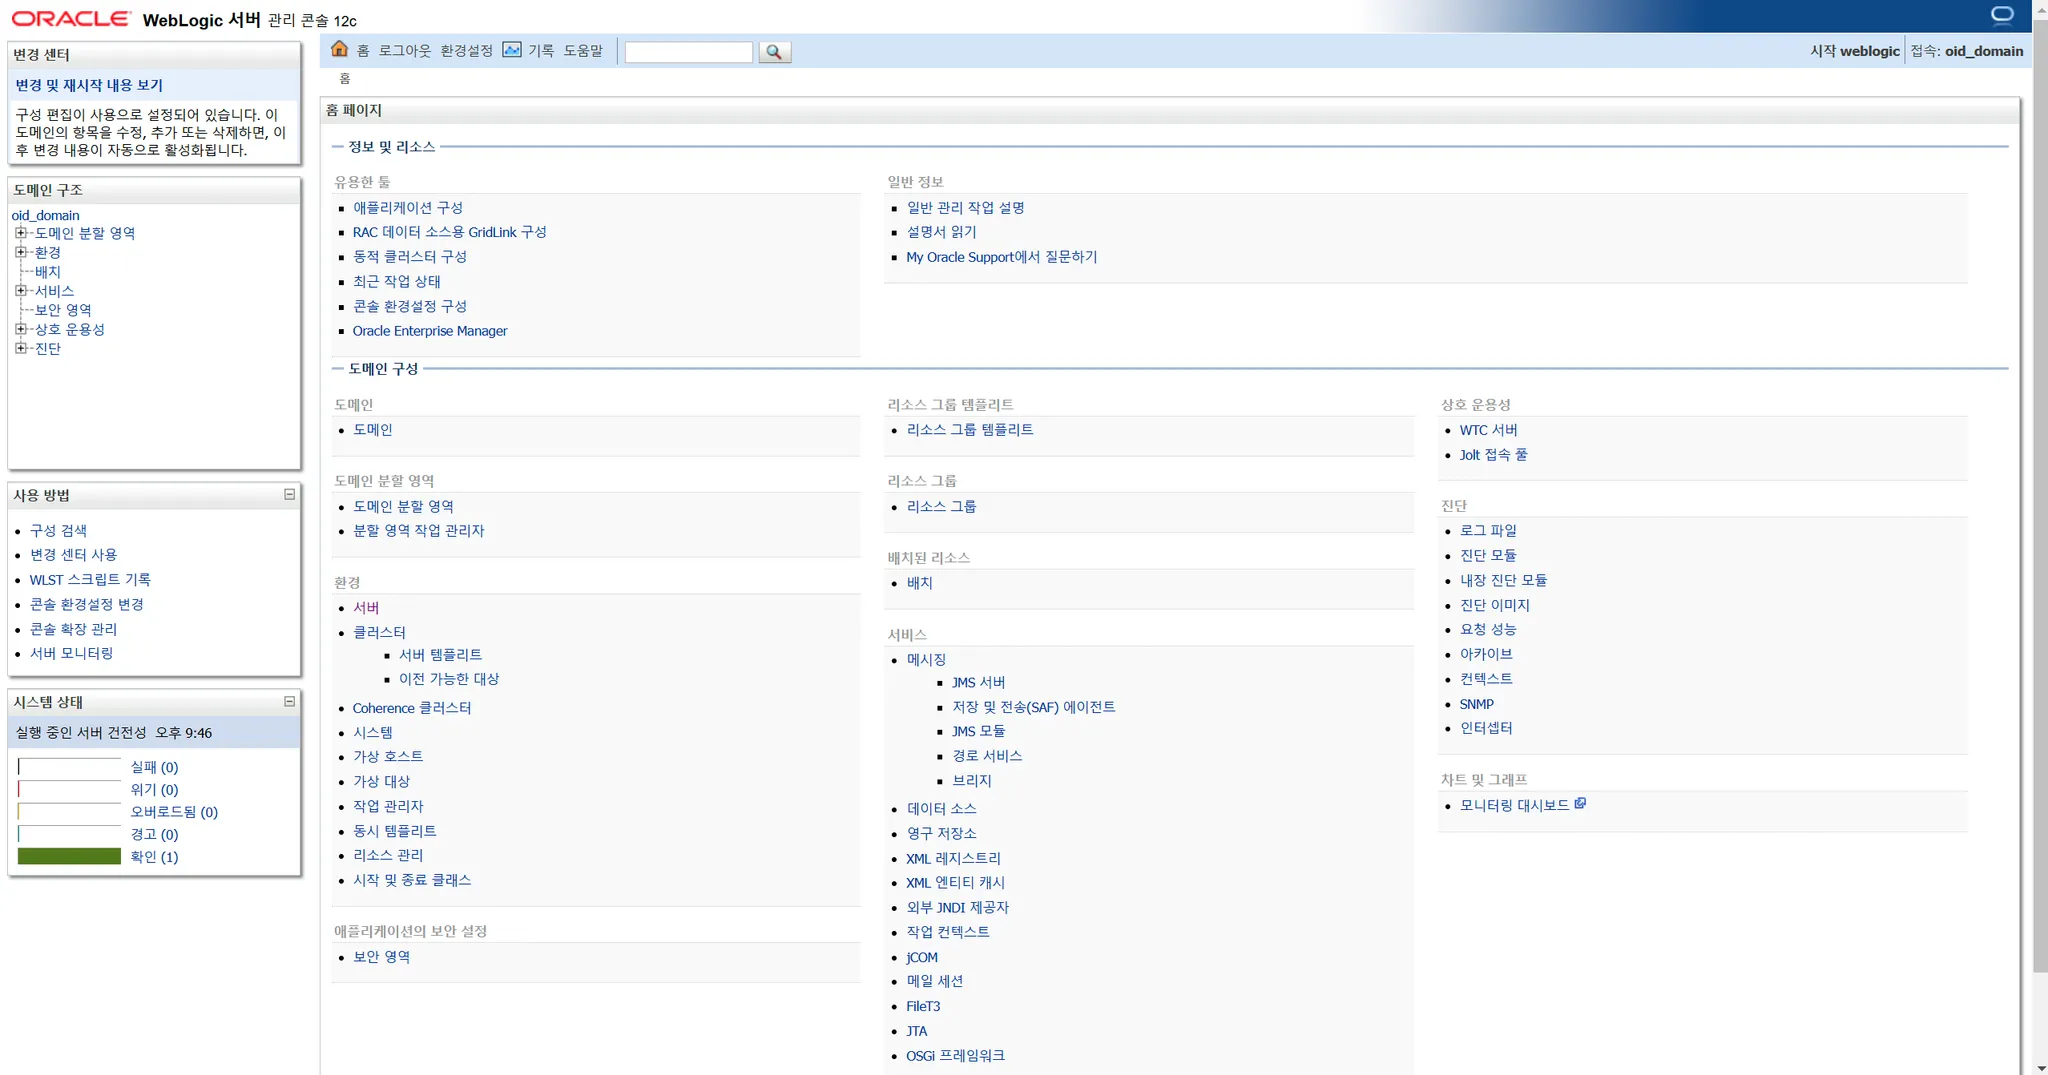
WebLogic administration console main page
6.4 Automated Startup/Shutdown Scripts
1.
Create Complete Startup Script:
The startup script handles automated initialization of the WebLogic server environment. It automates sequential startup of Node Manager and Admin Server, manages logging, and handles background process execution, significantly streamlining system administrator operations and ensuring consistent startup procedures.
cat << 'EOF' > $DOMAIN_HOME/start_all.sh
#!/bin/bash
DOMAIN_HOME=/u01/oracle/config/domains/oid_domain
LOG_DIR=$DOMAIN_HOME/logs
mkdir -p $LOG_DIR
# Start Node Manager
echo "Starting Node Manager..."
nohup $DOMAIN_HOME/bin/startNodeManager.sh > $LOG_DIR/nodemanager.out 2>&1 &
sleep 10
# Start Admin Server
echo "Starting Admin Server..."
nohup $DOMAIN_HOME/bin/startWebLogic.sh > $LOG_DIR/adminserver.out 2>&1 &
# Monitor startup
tail -f $LOG_DIR/adminserver.out
EOF
chmod 750 $DOMAIN_HOME/start_all.sh
Shell
복사
2.
Create Complete Shutdown Script:
It consistently manages service termination, data protection, and system resource cleanup, maintaining system stability through standardized shutdown processes and preventing potential data loss or system issues.
cat << 'EOF' > $DOMAIN_HOME/stop_all.sh
#!/bin/bash
DOMAIN_HOME=/u01/oracle/config/domains/oid_domain
# Stop Admin Server
echo "Stopping Admin Server..."
$DOMAIN_HOME/bin/stopWebLogic.sh
# Stop Node Manager
echo "Stopping Node Manager..."
pkill -f NodeManager
# Verify processes are stopped
sleep 5
ps -ef | grep -E 'NodeManager|WebLogic'
EOF
chmod 750 $DOMAIN_HOME/stop_all.sh
Shell
복사
7. OID Configuration and Verification
Now we'll configure OID and verify its proper operation.
7.1 Starting WLST
1.
Open a new terminal and switch to oracle user:
su - oracle
Shell
복사
2.
Set domain environment variables:
. /u01/oracle/config/domains/oid_domain/bin/setDomainEnv.sh
Shell
복사
3.
Launch WebLogic Scripting Tool (WLST):
export ORACLE_HOME=/u01/oracle/Middleware/OID_Home
$ORACLE_HOME/oracle_common/common/bin/wlst.sh
Shell
복사
7.2 Connecting to Admin Server
From the WLST prompt, execute:
connect('weblogic', 'password', 't3://localhost:7001')
Shell
복사
Notes:
•
Replace 'password' with your actual WebLogic administrator password
•
Replace 'localhost' with actual hostname if different
•
Verify connection successful before proceeding
7.3 OID Configuration
Execute this command to configure OID:
oid_setup(orcladminPassword='password', odsPassword='password', realmDN='dc=example,dc=com')
Shell
복사
Parameters explained:
•
'orcladminPassword': Password for OID admin account (cn=orcladmin)
•
'odsPassword': Password for ODS (Oracle Directory Services) schema
•
'realmDN': Root DN for your OID. Modify according to your requirements
This command:
•
Creates OID instance named 'oid1'
•
Configures required components
•
Starts the instance
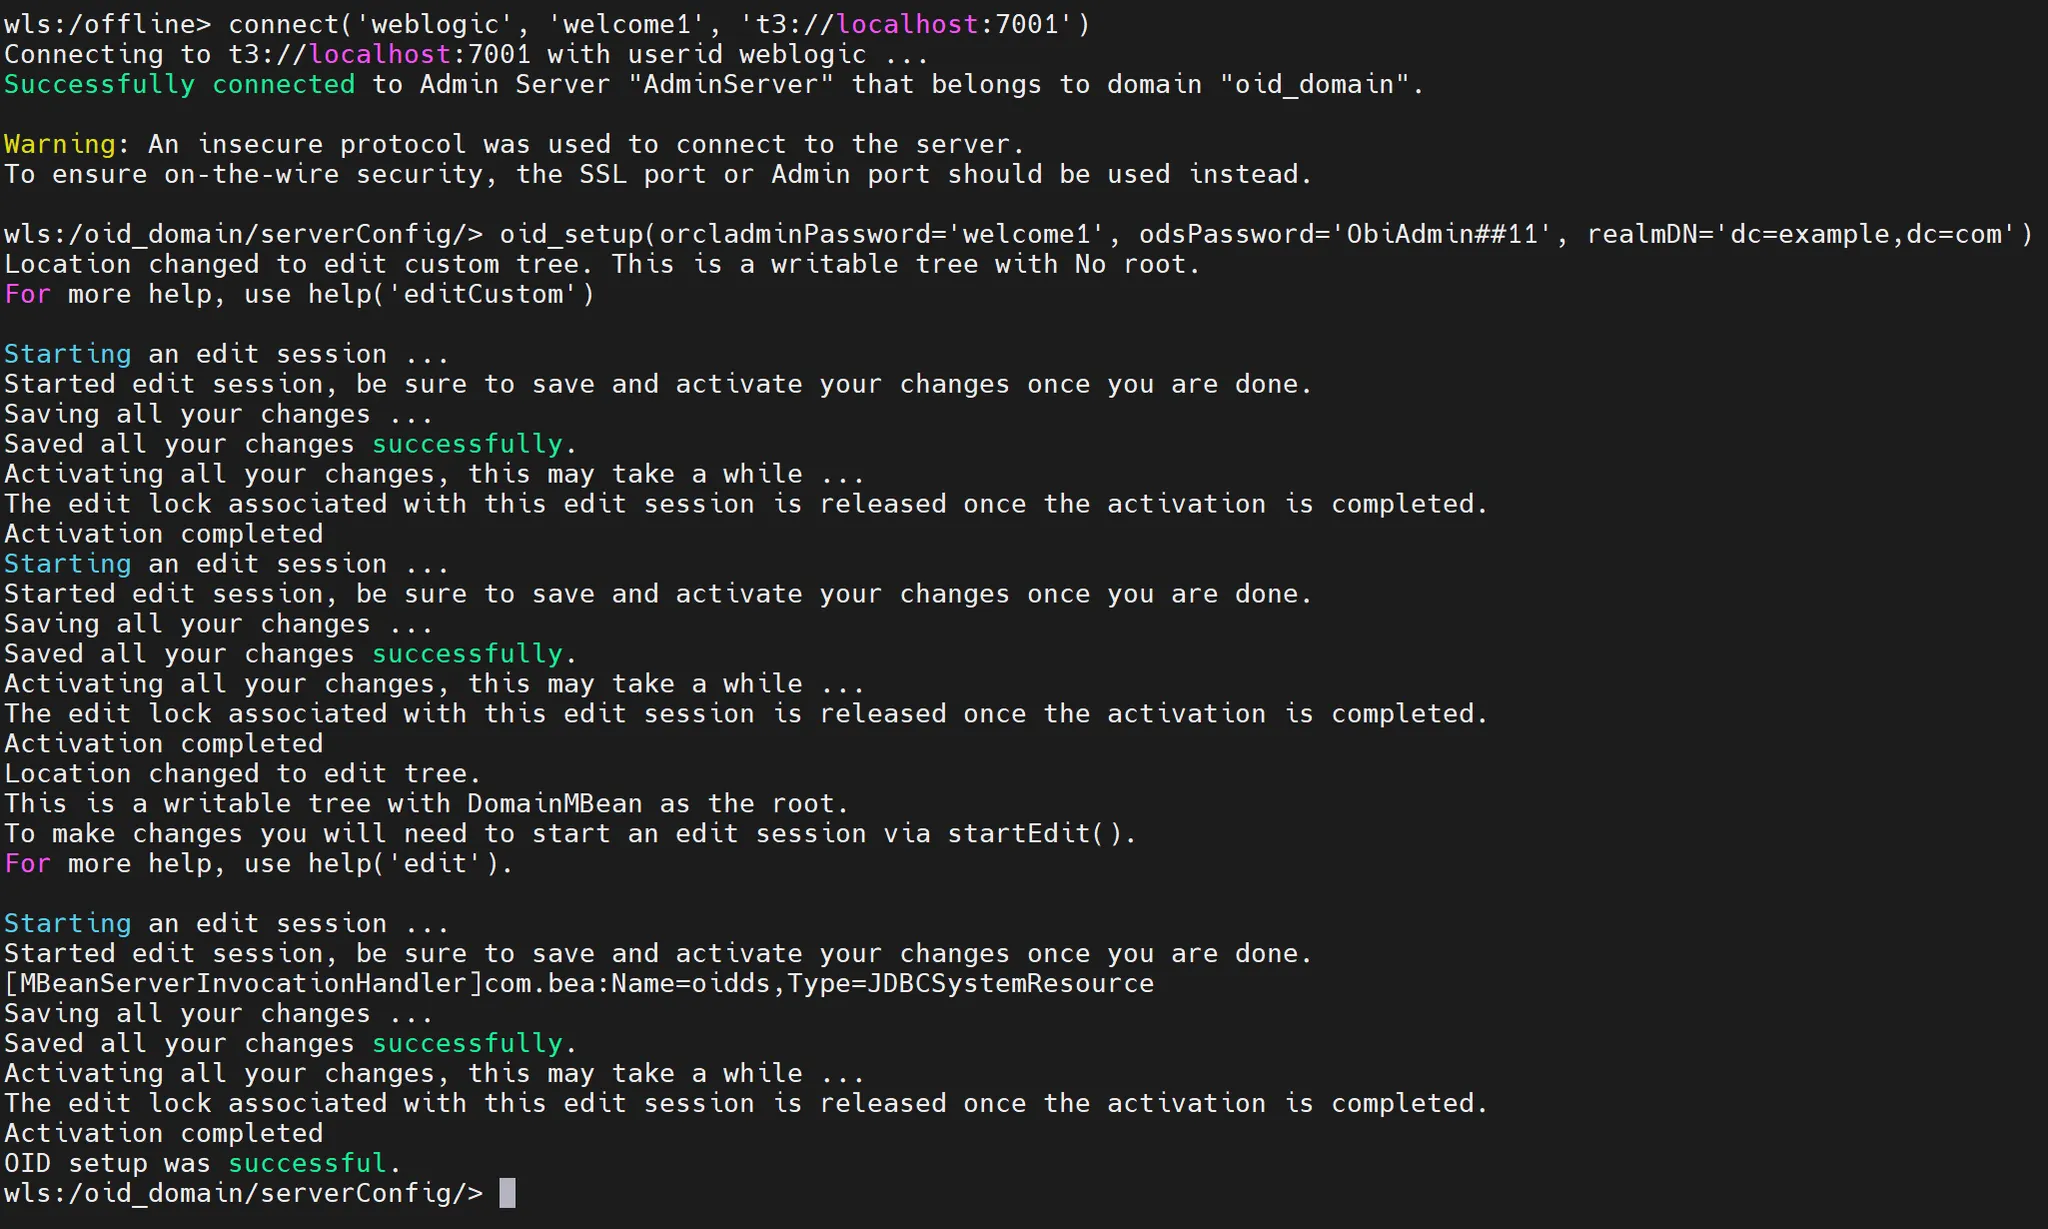
OID configuration command execution result
7.4 Installation Verification
Use these WLST commands to verify the installation:
1.
List OID Instances:
oid_listInstances()
Python
복사
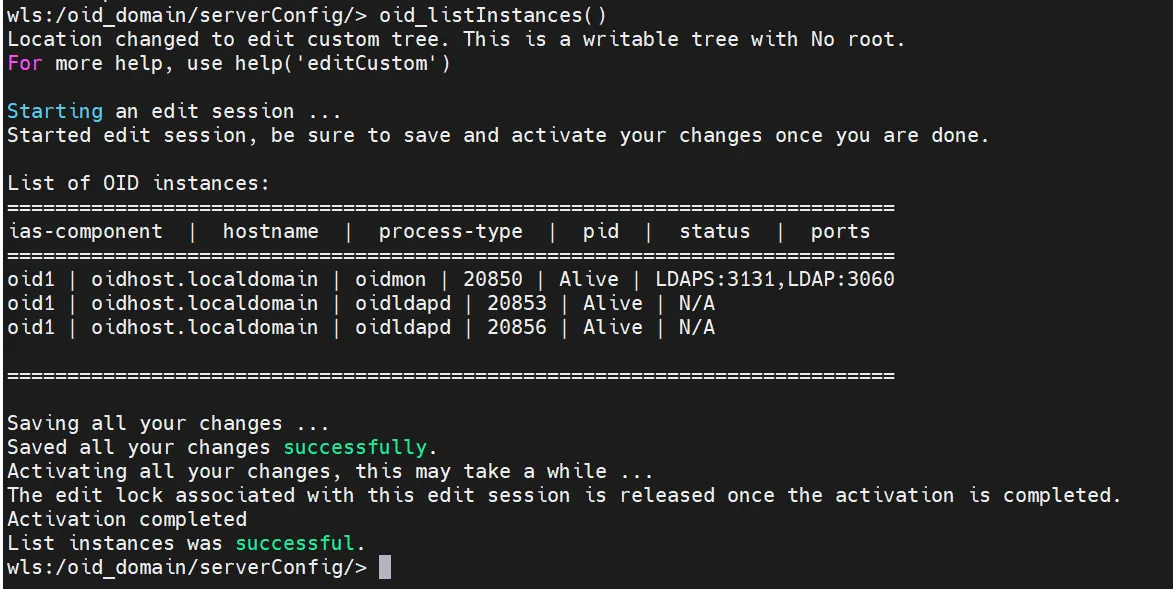
OID instance list query result
2.
Check Instance Status:
oid_instanceStatus(instanceName='oid1')
Python
복사
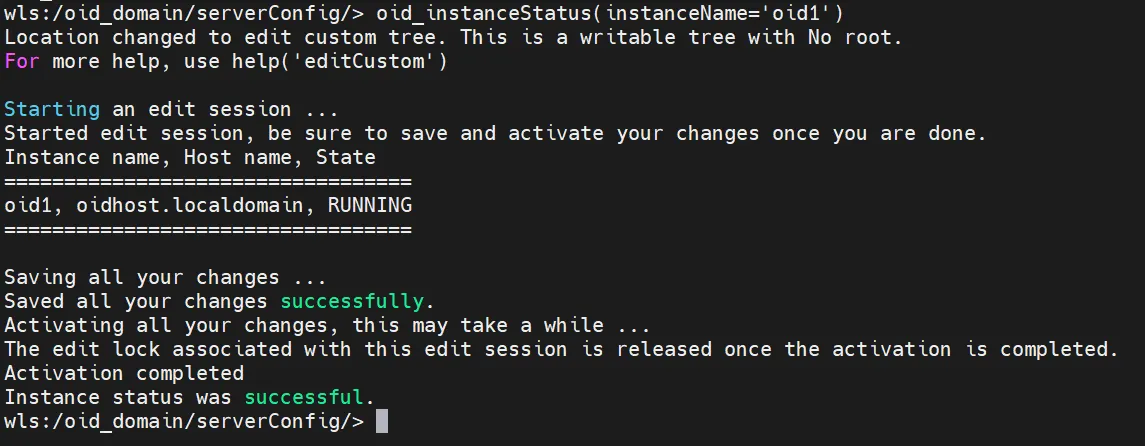
OID instance status query result
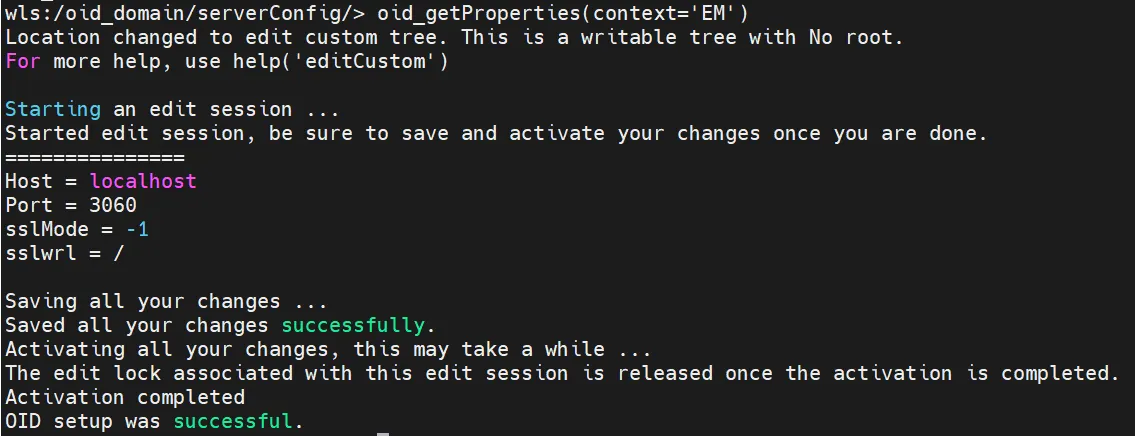
3.
Verify OID Properties:
oid_getProperties(context='EM')
Python
복사
4.
Exit WLST:
exit()
Python
복사
7.5 LDAP Connection Testing
After exiting WLST, test LDAP connections:
1.
Test Non-SSL Port:
$ORACLE_HOME/bin/ldapbind -h localhost -p 3060 -D cn=orcladmin -q
Shell
복사

OID connection test - ldapbind execution result - Non-SSL port
2.
Test SSL Port:
$ORACLE_HOME/bin/ldapbind -h localhost -p 3131 -D cn=orcladmin -q -U 1
Shell
복사

LDAP connection test result - SSL port
Enter the orcladmin password when prompted.
7.6 Using OID Control and Monitoring Utility (OIDCTL)
Manage and monitor OID processes:
1.
Set Environment Variables:
export ORACLE_INSTANCE=/u01/oracle/Middleware/OID_Home/ldap
export INSTANCE_NAME=inst1
export COMPONENT_NAME=oid1
export NLS_LANG=AMERICAN_AMERICA.AL32UTF8
export TNS_ADMIN=$ORACLE_HOME/network/admin
export PATH=$PATH:$ORACLE_HOME/bin
export ORACLE_SID=PDBORCL
Bash
복사
2.
$ORACLE_HOME/network/admin
PDBORCL =
(DESCRIPTION =
(ADDRESS = (PROTOCOL = TCP)(HOST = obitrn2)(PORT = 1521))
(CONNECT_DATA =
(SERVER = DEDICATED)
(SERVICE_NAME = pdborcl)
)
)
Plain Text
복사
3.
Start OIDMON Process
$ORACLE_HOME/bin/oidmon start
Plain Text
복사
4.
Start OID Process (if stopped):
$ORACLE_HOME/bin/oidctl connect=PDBORCL instance=1 name=oid1 server=oidldapd start
Shell
복사

oidmon start / oid process start result
5.
Check OID Process Status:
$ORACLE_HOME/bin/oidctl connect=PDBORCL instance=1 name=oid1 server=oidldapd status
Shell
복사
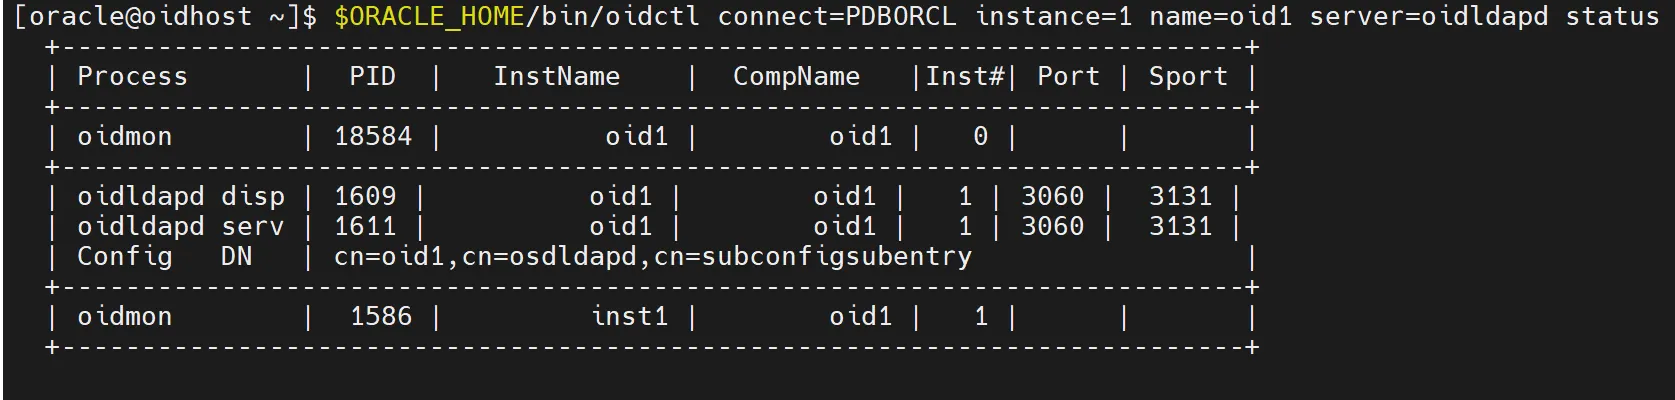
oidctl status result
6.
Stop OID Process (if needed):
$ORACLE_HOME/bin/oidctl connect=PDBORCL instance=1 name=oid1 server=oidldapd stop
Shell
복사
7.7 Initial OID Configuration Verification
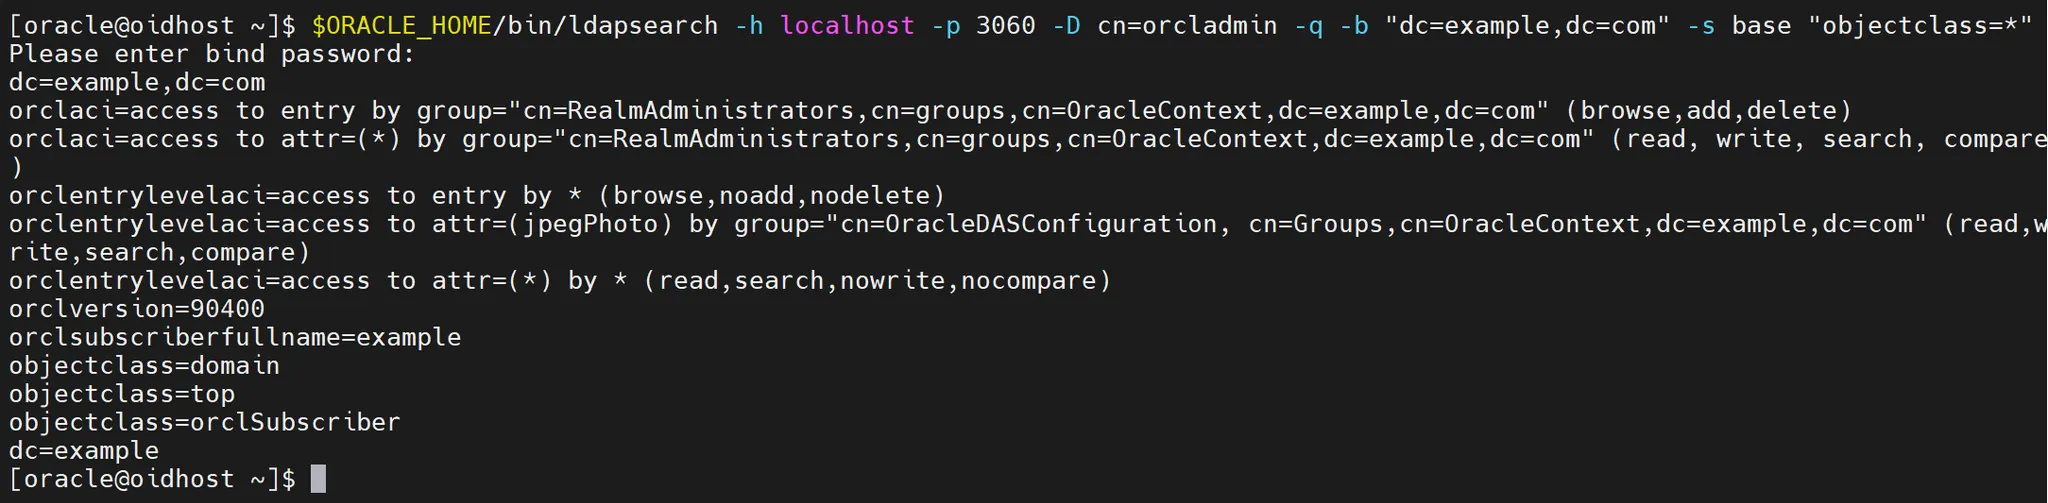
1.
Verify Base DN Creation:
$ORACLE_HOME/bin/ldapsearch -h localhost -p 3060 -D cn=orcladmin -q -b "dc=example,dc=com" -s base "objectclass=*"
Shell
복사
2.
Verify SSL Configuration:
$ORACLE_HOME/bin/ldapsearch -h localhost -p 3131 -D cn=orcladmin -q -U 1 -b "" -s base "objectclass=*"
Shell
복사
Result:
[oracle@oidhost ~]$ $ORACLE_HOME/bin/ldapsearch -h localhost -p 3131 -D cn=orcladmin -q -U 1 -b "" -s base "objectclass=*"
Please enter bind password:
orclreplicaid=oidhost_orcl
orcldirectoryversion=OID 12.2.1.4.0
orclcompatibleversion=OID 11.1.1.7.0
orclcompatibleversion=OID 11.1.1.6.0
orclcompatibleversion=OID 11.1.1.9.0
orclcompatibleversion=OID 12.2.1.4.0
orclcompatibleversion=OID 12.2.1.3.0
supportedcontrol=2.16.840.1.113730.3.4.2
supportedcontrol=2.16.840.1.113894.1.8.1
supportedcontrol=2.16.840.1.113894.1.8.2
supportedcontrol=2.16.840.1.113894.1.8.3
supportedcontrol=2.16.840.1.113894.1.8.4
supportedcontrol=2.16.840.1.113894.1.8.5
supportedcontrol=2.16.840.1.113894.1.8.6
supportedcontrol=1.2.840.113556.1.4.473
supportedcontrol=1.2.840.113556.1.4.319
supportedcontrol=2.16.840.1.113894.1.8.14
supportedcontrol=2.16.840.1.113894.1.8.16
supportedcontrol=2.16.840.1.113894.1.8.23
supportedcontrol=2.16.840.1.113894.1.8.29
supportedcontrol=2.16.840.1.113894.1.8.36
supportedcontrol=2.16.840.1.113730.3.4.9
supportedcontrol=2.16.840.1.113730.3.4.10
supportedcontrol=2.16.840.1.113730.3.4.18
supportedcontrol=1.3.6.1.1.21.2
supportedcontrol=2.16.840.1.113894.1.8.37
supportedcontrol=1.3.6.1.4.1.42.2.27.8.5.1
supportedcontrol=2.16.840.1.113730.3.4.3
supportedcontrol=2.16.840.1.113730.3.4.7
supportedcontrol=1.2.840.113556.1.4.805
supportedextension=2.16.840.1.113894.1.9.1
supportedextension=1.3.6.1.4.1.1466.20037
supportedextension=1.3.6.1.1.21.1
supportedextension=1.3.6.1.1.21.3
authpassword={SASL/MD5}CywPwOkQCwfMiP4DM9YHSg==
authpassword={SASL/MD5-DN}hUmSSVeTc/nGPyTVl54xOg==
authpassword={SASL/MD5-U}mr8lk9zc8DYgh8+wbbIMgg==
orclcryptoscheme=SSHA
objectclass=top
pwdpolicysubentry=cn=default,cn=pwdPolicies,cn=Common,cn=Products,cn=OracleContext
orclsimplemodchglogattributes=uniquemember
orclsimplemodchglogattributes=member
orcldiprepository=FALSE
orclentrylevelaci=access to entry by * (browse, noadd, nodelete)
orclentrylevelaci=access to attr=(orclaci,orclcryptoscheme,orclsuname,orclsupassword) by * (none)
orclentrylevelaci=access to attr=(*) by * (search, read, nowrite, nocompare)
orclentrylevelaci=access to attr=(*) AppendToAll by group="cn=directoryadmingroup,cn=oracle internet directory" (search,read,write,comp are)
orclentrylevelaci=access to entry AppendToAll by group="cn=directoryadmingroup,cn=oracle internet directory" (browse,add,delete)
orclentrylevelaci=access to attr=(orclstatsflag, orclstatsperiodicity,orcleventlevel) by dn="cn=emd admin,cn=oracle internet directory" (search,read,write,compare) by * (search,read)
orclaci=access to entry by * (browse,noadd,nodelete)
orclaci=access to attr=(userpkcs12,orclpkcs12hint,userpassword,pwdhistory,orclrevpwd) by group="cn=OracleUserSecurityAdmins,cn=Groups,c n=OracleContext" (search,read,write,compare) by self (search,read,write,compare) by * (none)
orclaci=access to attr=(orclpassword) by self (search,read,write,compare) by group="cn=OracleUserSecurityAdmins,cn=Groups,cn=OracleCont ext" (search,read,write,compare) by * (none)
orclaci=access to attr=(authpassword,orclpasswordverifier) by self (search,read,write,compare) by * (none)
orclaci=access to attr=(*) by * (search,read,compare)
orclaci=access to attr=(*) AppendToAll by group="cn=directoryadmingroup,cn=oracle internet directory" (search,read,write,compare)
orclaci=access to entry AppendToAll by group="cn=directoryadmingroup,cn=oracle internet directory" (browse,add,delete,proxy)
orclupgradeinprogress=FALSE
orclcatalogentrydn=cn=catalogs
matchingrules=distinguishedNameMatch
matchingrules=caseIgnoreMatch
matchingrules=caseExactMatch
matchingrules=numericStringMatch
matchingrules=telephoneNumberMatch
orclreplagreements=cn=replication configuration
orclsupassword={SSHA}4g+FCo8SNA7Tdry2TzDplTqiVxhyBCOnTVyJYw==
orclsuname=cn=orcladmin
changestatus=cn=changestatus
changelog=cn=changelog
subregistrysubentry=cn=subregistrysubentry
subconfigsubentry=cn=subconfigsubentry
orclnormdn=
subschemasubentry=cn=subschemasubentry
supportedsaslmechanisms=DIGEST-MD5
supportedldapversion=2
supportedldapversion=3
7.8 Troubleshooting Tools
1.
Debug Level Adjustment:
$ORACLE_HOME/bin/ldapmodify -h localhost -p 3060 -D cn=orcladmin -q << EOF
dn: cn=componentname,cn=osdldapd,cn=subconfigsubentry
changetype: modify
replace: orcldebuglevel
orcldebuglevel: 256
EOF
Shell
복사
2.
Log Analysis Script:
cat << 'EOF' > $DOMAIN_HOME/analyze_logs.sh
#!/bin/bash
ORACLE_HOME=/u01/oracle/Middleware/OID_Home
DOMAIN_HOME=/u01/oracle/config/domains/oid_domain
LOG_DIR=$DOMAIN_HOME/servers/OID/logs/oid1
echo "Analyzing OID logs..."
echo "1. Error Pattern Analysis:"
grep -i "error" $LOG_DIR/oid*.log | sort | uniq -c
echo "2. Warning Pattern Analysis:"
grep -i "warning" $LOG_DIR/oid*.log | sort | uniq -c
echo "3. Connection Failures:"
grep -i "connection" $LOG_DIR/oid*.log | grep -i "fail" | sort | uniq -c
EOF
chmod 750 $DOMAIN_HOME/analyze_logs.sh
Shell
복사
8. Conclusion and Additional Resources
We have now explored the comprehensive process of installing, configuring, and operating Oracle Internet Directory (OID) 12c. While OID is a powerful and scalable directory service solution, it requires proper planning and continuous management.
As you build and operate OID based on the content covered in this guide, remember to adjust according to your specific environment and requirements. By balancing various aspects such as security, performance, and availability, you can provide a stable and efficient directory service.
For more detailed information and the latest updates, refer to the following resources:
If you encounter difficulties during OID implementation or need additional support, please refer to Oracle's official documentation or contact Oracle Technical Support. Additionally, community forums can be a great source of experience and advice from other administrators.We hope this guide helps you build a secure and efficient directory service with OID. Best wishes for successful OID operations![Screenshot: Successfully configured OID Administration Console main screen]
Appendix: Frequently Asked Questions (FAQ)
1.
Q: What are the main differences between OID and Active Directory?A: OID is an Oracle-based LDAP server, well-integrated with Oracle products and suitable for large-scale environments. Active Directory is optimized for Microsoft environments and provides Windows domain management features.
2.
Q: Can OID be deployed in a cloud environment?A: Yes, OID can be deployed on Oracle Cloud Infrastructure or other cloud platforms. However, careful attention must be paid to network configuration and security settings.
3.
Q: What is the licensing model for OID?A: OID typically has a licensing model based on the number of users or processors. For accurate licensing information, please contact your Oracle sales representative.
4.
Q: What are the scalability limits of OID?A: OID can support millions of entries and thousands of concurrent connections. The exact limits depend on hardware configuration and tuning.
5.
Q: Is synchronization possible between OID and other LDAP servers?A: Yes, you can implement synchronization between OID and other LDAP servers using Oracle Directory Integration Platform (DIP).
6.
Q: What is the process for upgrading OID?A: OID upgrades typically involve step-by-step progression from the current version to the next major version. Refer to Oracle documentation for detailed upgrade procedures.
7.
Q: Can custom attributes be added to OID?A: Yes, you can extend the OID schema to add custom attributes and object classes. However, this should be done with careful planning and testing.
8.
Q: What disaster recovery options are available for OID?A: Various disaster recovery options include database backups, LDIF exports, and standby configurations using Oracle Data Guard.
9.
Q: Can encrypted attributes be used in OID?A: Yes, OID supports encryption of specific attributes, allowing for more secure storage of sensitive information.
10.
Q: What's the best way to resolve performance issues in OID?A: Optimizing indexing, tuning caches, increasing hardware resources, and using efficient search filters can help improve performance. The appropriate method should be chosen based on the specific situation.
We hope this FAQ section helps to provide additional understanding of OID and addresses common questions. For more in-depth knowledge about OID management, please refer to Oracle's official documentation and training materials.Best wishes for building a secure and efficient Identity Management environment with OID.