
In today's security-conscious world, proper auditing is crucial for maintaining the integrity and security of your WebLogic Server environment. This guide will walk you through the process of configuring WebLogic Auditing, providing you with the knowledge to enhance your server's security posture.
Why Configure WebLogic Auditing?
Before we dive into the configuration process, it's important to understand why auditing is essential:
1.
Security Monitoring: Auditing helps track security-related events, providing visibility into potential threats or unauthorized access attempts.
2.
Compliance: Many regulatory standards require comprehensive auditing of system activities.
3.
Troubleshooting: Audit logs can be invaluable when diagnosing issues or understanding system behavior.
Step-by-Step Configuration Process
1. Accessing the WebLogic Administration Console
First, log in to your WebLogic Administration Console. Navigate to "Security Realms" > "myrealm" > "Providers" > "Auditing".

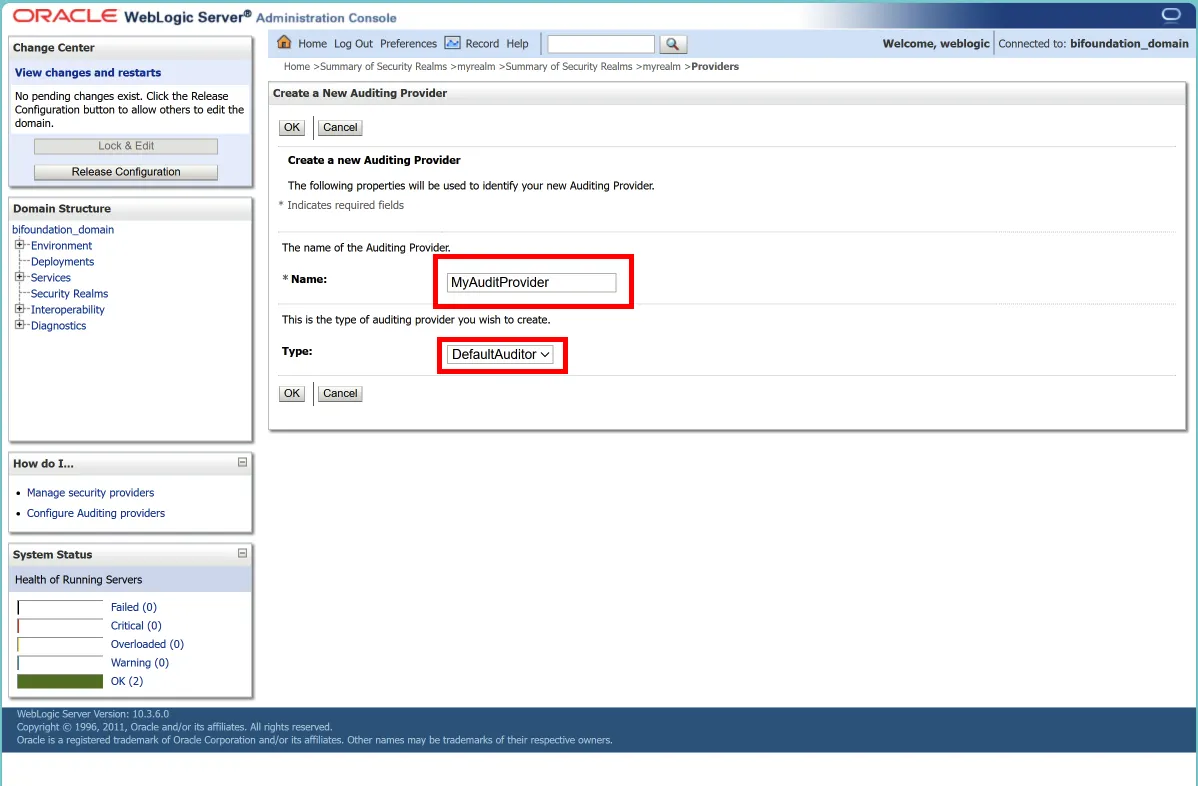
2. Creating a New Auditing Provider
1.
Click "Lock & Edit" in the Change Center to enable configuration changes.
2.
Click "New" to create a new Auditing provider.
3.
Select "DefaultAuditor" from the list and provide a name for your new Auditing provider.
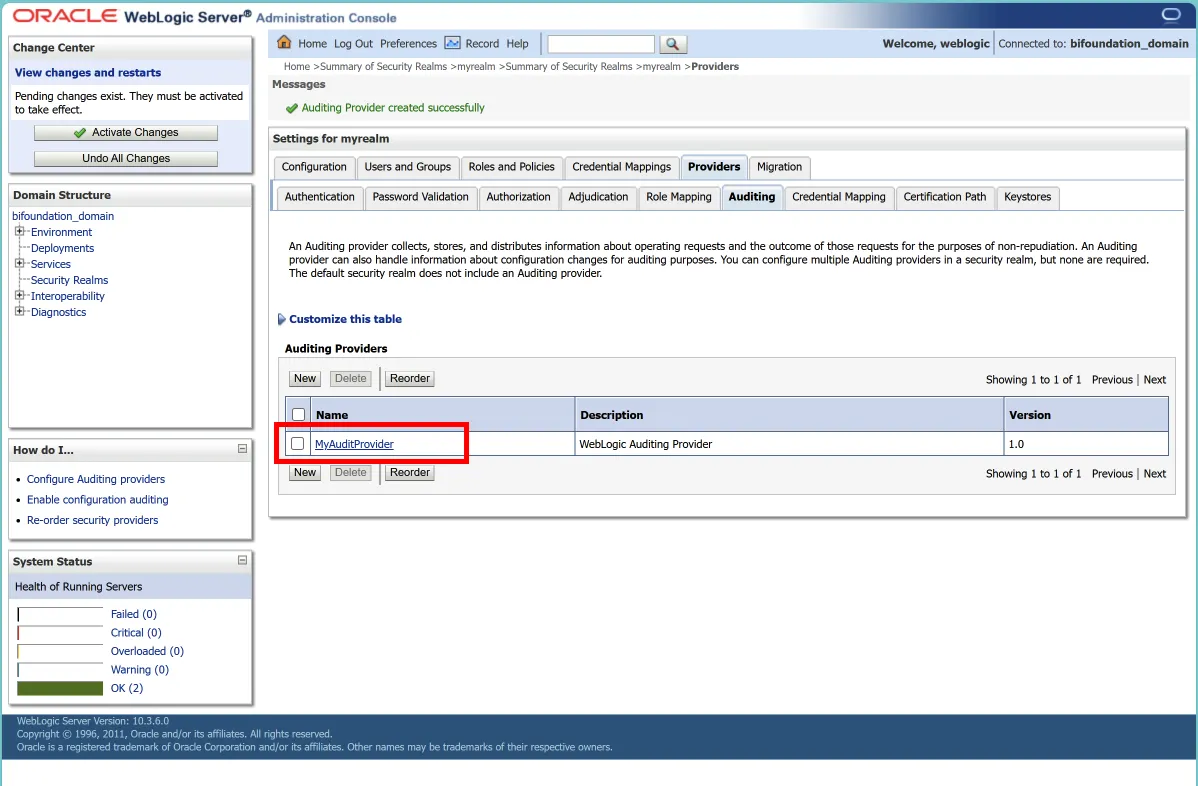
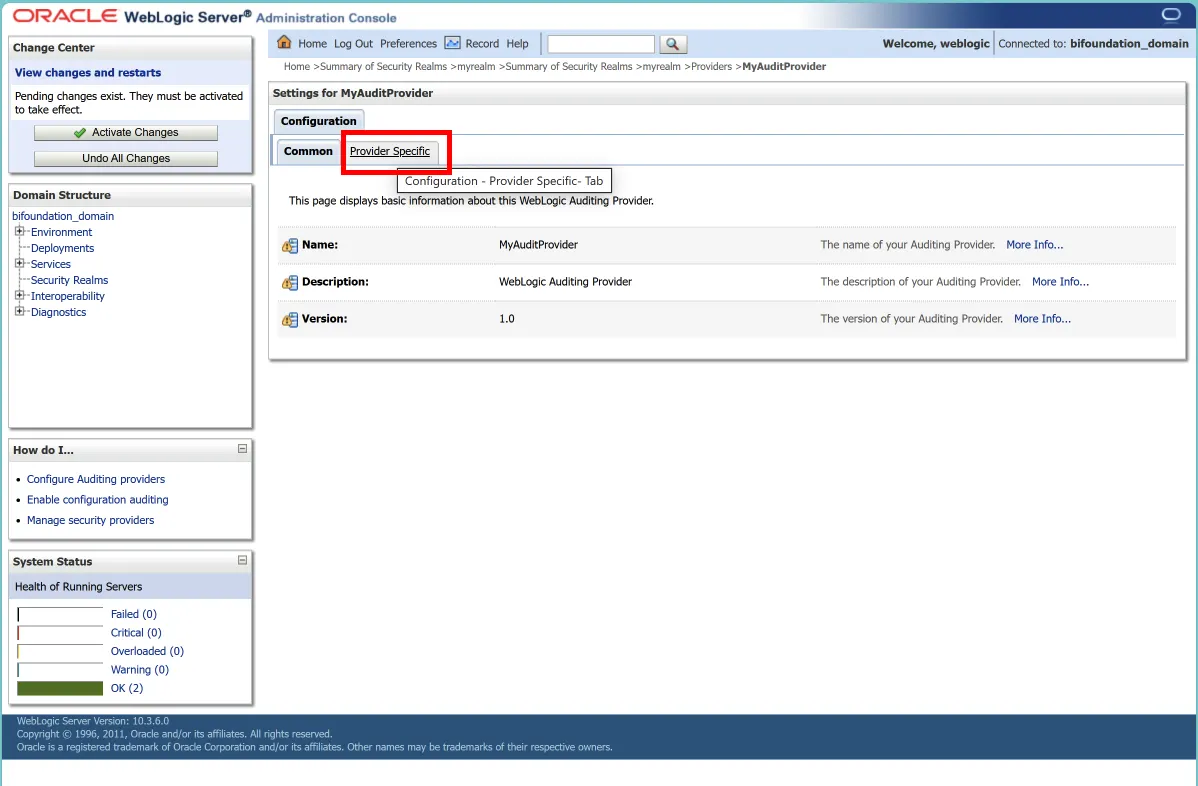
3. Configuring the Auditing Provider
After creating the new Auditing provider, select it to access its configuration page. Navigate to the "Configuration" tab, then to the "Provider Specific" page. Here, you'll find several important settings:
a. Severity Level
Set the severity level appropriate for your deployment. Options include:
•
INFORMATION
•
WARNING
•
ERROR
•
SUCCESS
•
FAILURE
•
CUSTOM
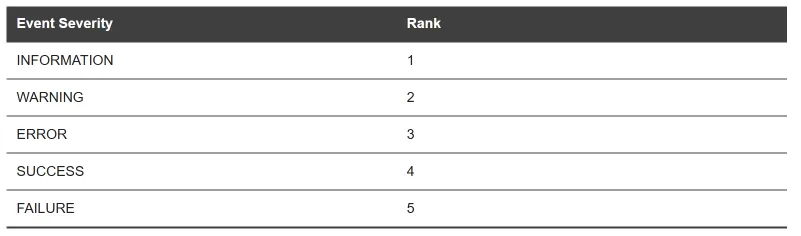
If you choose CUSTOM, you can enable specific severity levels you want to audit.
b. Active ContextHandler Elements
An Audit Event includes a ContextHandler that can hold various information or objects. Specify which ContextElement entries in the ContextHandler should be recorded.
c. Rotation Minutes
This setting determines how often a new DefaultAuditRecorder.log file is created. For example, setting this to 1440 would create a new log file daily.
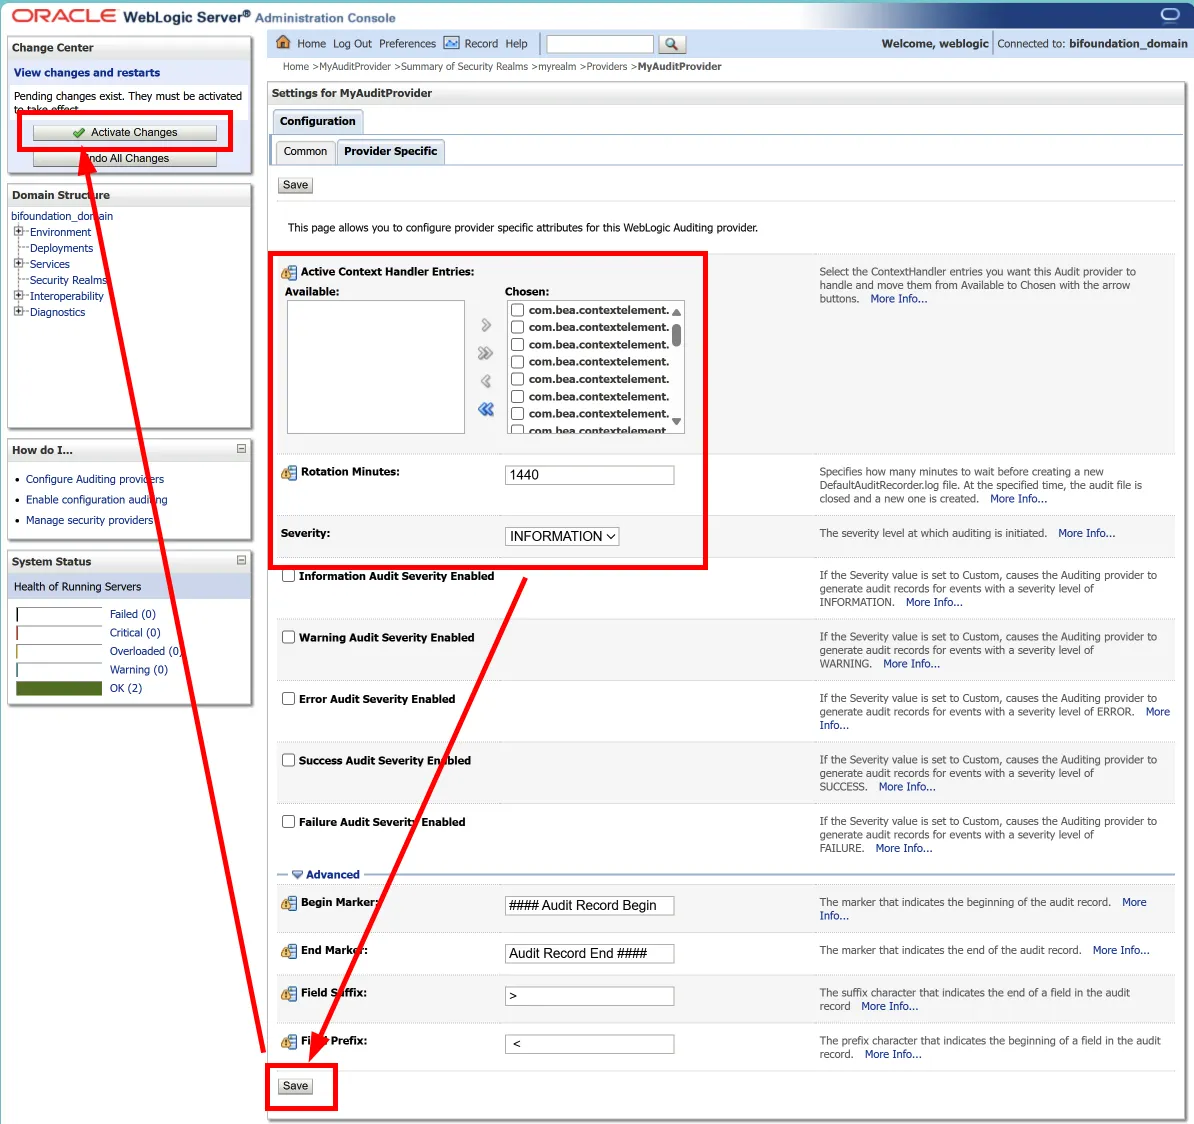
4. Saving and Activating Changes
After configuring your settings:
1.
Click "Save" to save your changes.
2.
In the Change Center, click "Activate Changes".

3.
Restart your WebLogic Server to apply the new configuration.
Additional Configuration Options
For more granular control, you can also:
1.
Set the "Auditing Active ContextHandler Elements" to specify which context elements are recorded.
2.
Configure the "Rotation Minutes" to manage log file rotation.
Best Practices
1.
Start with a higher severity level and adjust based on your needs and system performance.
2.
Regularly review and analyze your audit logs.
3.
Implement a log rotation and archival strategy to manage disk space.
4.
Periodically review and update your auditing configuration to ensure it meets your current security needs.
Conclusion
Properly configured auditing is a critical component of a secure WebLogic Server environment. By following this guide, you've taken an important step in enhancing your server's security posture. Remember, auditing is not a "set it and forget it" task - regular review and adjustment of your auditing configuration is key to maintaining robust security.
Happy auditing, and here's to a more secure WebLogic environment!